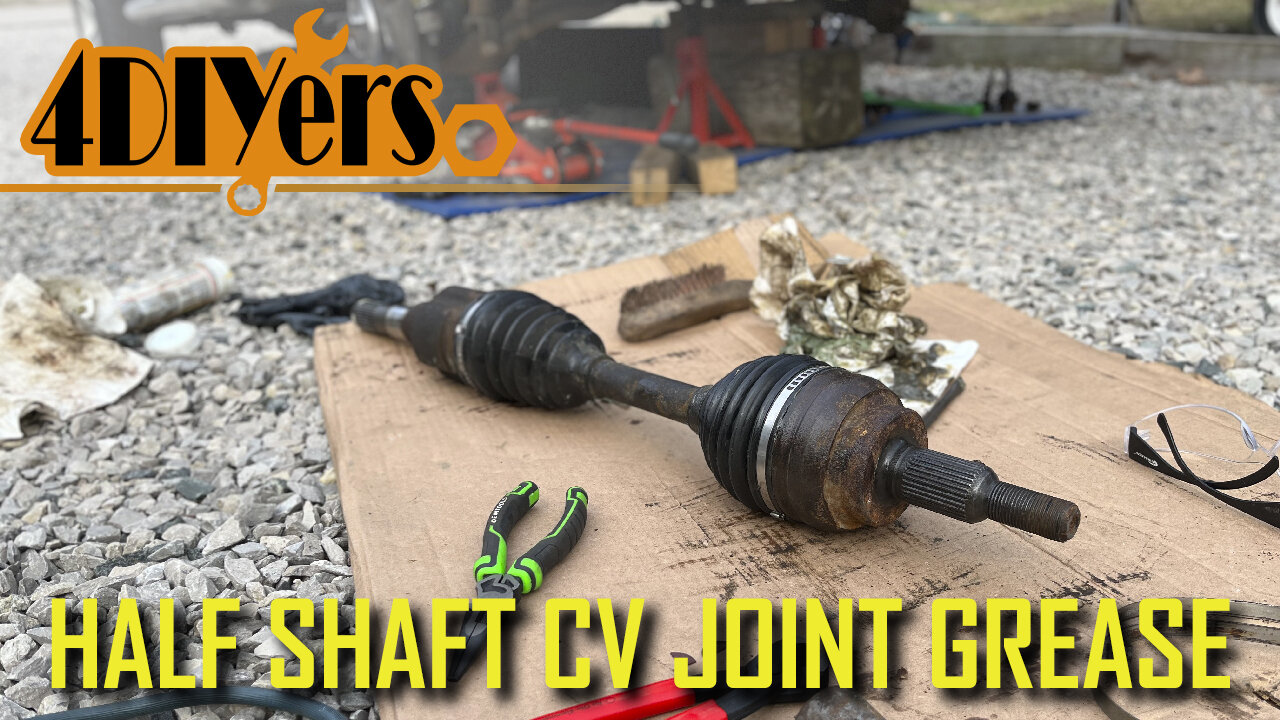
How to Remove the Front Axle Dodge Ram 1500 and Grease the CV Joint
How to remove and grease the front axle cv joints in a third generation Dodge Ram 4wd. This particular truck I am working with here today is a 2006 1500 model. A CV joint needing grease may have resistance when rotating, cause a vibration, or a growling noise. However you don’t have long to grease a CV joint, it’s always moving when the truck is in motion therefore it can cause damage quickly eventually requiring a replacement. #oemtools #dodgeram #dodgeram1500
OEMTOOLS 24481 1/2" Drive Impact Wrench: https://www.mobiledistributorsupply.com/24481-heavy-duty-1-2-in-drive-jacob-s-chuck-impact-wrench-oem
Website: http://4diyers.com
Patreon: https://www.patreon.com/4diyers
Facebook: https://www.facebook.com/4diyers
Twitter: https://twitter.com/4DIYers
Instagram: https://www.instagram.com/4diyers/
Tumblr: http://4diyers.tumblr.com
Pintrest: https://www.pinterest.com/4diyers/
Tools/Supplies Needed:
-8mm, 22mm, 35mm sockets with ratchet
-brass hammer
-wire brush
-torque wrench
-jack with axle stand
-large interlocking pliers
-pliers
-medium grade threadlocker
-pry bar
-hammer
-grease
-band clamps
-band clamp crimper
-rotary tool with cutting disk
-safety glasses
-paper towel
Procedure:
Elevate the front of the truck. Remove the 22 mm lug nuts. Remove the wheel, pop out the center cap, and then reinstall the wheel. Lower the vehicle back onto the ground. Use a 35 mm socket to loosen that axle nut. Finally remove the wheel.
Crack the master cylinder reservoir cap. Compressed the pistons in the caliper using large interlocking pliers. Use a 22 mm socket with a half inch drive ratchet to loosen and remove those caliper carrier bolts. Remove the caliper, pad, and carrier assembly. Tied it up to the frame and then remove the rotor.
If the ball joints and tie rod is equipped with castle nuts, you will need to remove the cotter pins.
Remove the tie rod. Using an 8mm, remove the bolts holding on the fender liner. Push the fender liner in towards the frame, then unclip it from around the fender’s edge, and pull out that fender liner.
Disconnect the electrical connector for the ABS sensor, there will be a red clip that needs to be pulled out. A standard screwdriver is best for this.
Remove the nut for the upper ball joint and then disconnect the joint. Remove the nut on the lower ball joint and then disconnect the joint.
Remove that half shaft axle nut. Once disconnected, remove the steering knuckle and disconnect the spline for the half shaft.
Remove the axle, this can be done using a pry bar. It’s best to force the axle straight out, it’ll disconnect the easiest. If the pry bar is slightly pushing the axle on an angle, it’ll make the clip disconnection much harder. Another option is using a smaller hammer to gently hit out the axle to help with the clip disconnection. One out, place it on a piece of cardboard which will help contain the mess. A brass wire brush is used to clean up any stuck debris so the cv joint doesn’t become contaminated when the boot is removed.
I’m not completely disassembling these as the boots are still good. I will only be cutting off the larger band clamps to roll the boot back. I’m using a rotary tool with a cutting disc. Take your time, it doesn’t need to be fully cut as you can use something under the clip to break away the remaining material. The is a spot welded clamp.
With paper towel, use your finger to scrape out the old grease. Additional paper towel is used to wipe away any remaining exposed grease. I didn’t use a solvent to wash away any grease because that would require a full disassembly to grease those other areas.
Once cleaned, pack new grease inside the boot around the joint. As for the type of grease used in CV joints, it is a specific grease required for this application and it’ll be stated on the side of the tube. You’ll want to make sure the component inside is sufficiently covered. Too much grease will cause a build up of heat, which can expand and be forced out or cause premature wear on the joint.
Wipe any grease residue from the outside and then push the boot back on. Install the new clamp. You’ll need to know the diameter of the clamp’s location to pick the correct sized clamp. Wrap the clamp around the boot, then lock it into place. A hammer can be used to help lock in those tabs as they may not be angled right. Using an ear clamp crimping tool, crimp the clamp.
The other components are installed in reverse of removal.
Thank you to all those who watch my videos and support my content. Don't forget to subscribe to my channel for future tutorial videos and like my video if you found it helpful. New videos are always being uploaded every week!
© 4DIYers 2013
All Rights Reserved
No part of this video or any of its contents may be reproduced, copied, modified or adapted, without the prior written consent of the author.
-
 10:53
10:53
Nikko Ortiz
2 days agoWORST Clips On The Internet
81.4K27 -
 3:42:38
FreshandFit
12 hours agoREAL R*pe Victim Exposes Shannon Sharpe Accuser As Liar!
64.4K69 -
 2:18:29
Badlands Media
14 hours agoDevolution Power Hour Ep. 376: Optics, Explosions & the War for the Narrative
138K43 -
 37:46
37:46
Stephen Gardner
12 hours ago🔥Trump NEVER expected THIS WIN as Schumer has EPIC MELTDOWN!
39.2K37 -
 2:02:41
Inverted World Live
8 hours agoNASA Engineer Says Trillions of Shape-Shifting, Cloaked Devices are Hidden on Earth| Ep. 83
33.4K11 -
 3:12:37
TimcastIRL
8 hours agoGOP Councilman DOUSED IN GAS, Set ON FIRE In Virginia, Suspect In Custody | Timcast IRL
244K90 -
 2:32:23
The Quartering
8 hours agoOn To The Big Bosses! Act 2 Of Expedition 33
60.5K6 -
 7:36:34
SpartakusLIVE
10 hours agoTiger Blood RESTOCKED and 30% off w/ code SPARTAKUS30
85.5K -
 24:58
24:58
Law&Crime
10 hours ago $3.24 earnedSecond Note Leaves Disturbing Clues in New York City Killings
40.5K12 -
 1:36:57
Badlands Media
1 day agoAltered State S3 Ep. 39: Earthquakes, Energy Games & the Fall of the Narrative
76.1K16