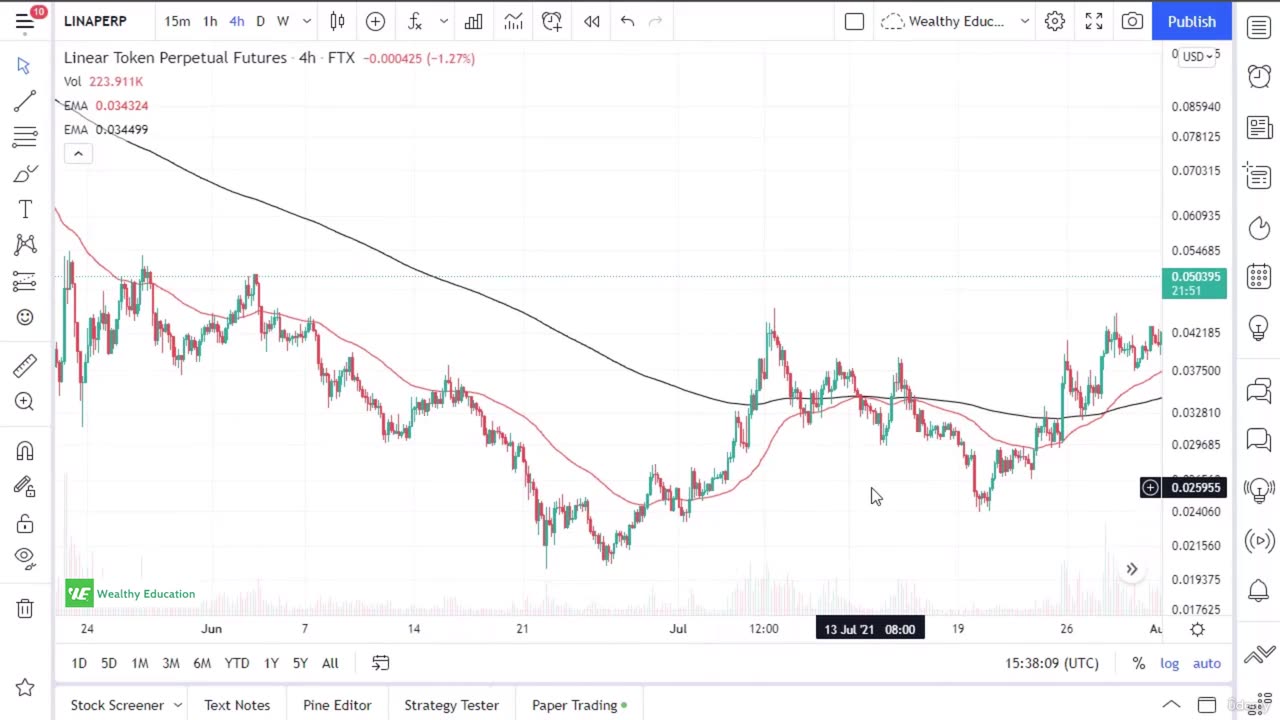
3. How to Use EMA as Dynamic Support and Resistance Levels
Loading comments...
-
 LIVE
LIVE
Mally_Mouse
9 hours agoLet's Hang!!
115 watching -
 1:04:10
BonginoReport
4 hours agoCornhusker Clink & A Sizzling Border Wall Deter Illegals - Nightly Scroll w/ Hayley Caronia (Ep.116)
91.4K54 -
 LIVE
LIVE
blackfox87
1 hour agoFoxyFam takes on Warzone! | PREMIUM CREATOR | #DisabledVeteran
87 watching -
 LIVE
LIVE
Spartan
4 hours agoScrims then Ranked / Octopath Traveler 2
33 watching -
 LIVE
LIVE
The Jimmy Dore Show
3 hours agoTrump Administration Sends Accused Pedo BACK TO ISRAEL! Ukrainians Now OVERWHELMINGLY Oppose War!
8,416 watching -
 6:44:51
Dr Disrespect
9 hours ago🔴LIVE - DR DISRESPECT - IMPOSSIBLE 5 CHICKEN DINNER CHALLENGE - FEAT. VISS
103K15 -
 LIVE
LIVE
GloryJean
1 hour agoDominating The Sniper Role 🖱️ 6.7 K/D | Duos w/ Spartakus
18 watching -
 LIVE
LIVE
BigTallRedneck
1 hour agoBRRRAP PACK VS ANYBODY!!
30 watching -
 1:09:21
TheCrucible
4 hours agoThe Extravaganza! Ep. 24 (8/20/25)
65.8K10 -
 1:18:42
Kim Iversen
4 hours agoUFO Base Area 51 Catches Fire… Is It a Massive Cover-Up?!
39.7K59