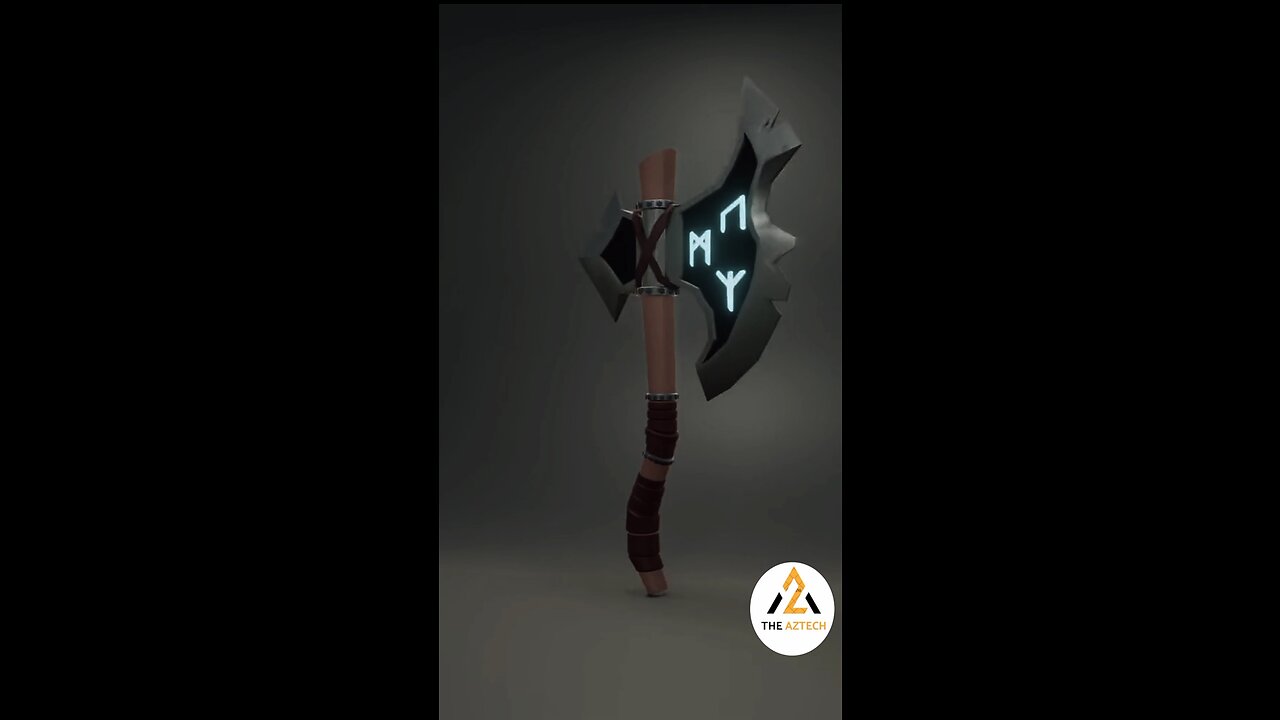
Make an AXE in blender | 3D | AZ Tech
Creating a 3D axe model in Blender involves several steps. First, open Blender and remove the default objects. Next, add a cylinder mesh for the axe head and manipulate its shape in Edit Mode using extrusion, scaling, and rotation. You can refine the axe head's appearance by using the Subdivision Surface modifier. For the handle, add another mesh separately and position it accordingly.
Combining the axe head and handle into one object is achieved by selecting both and using Ctrl + J. To make your axe look realistic, add materials and textures in the Materials tab. UV unwrapping can be used to map textures onto your model. Setting up lighting and cameras for your scene and rendering your axe with the desired settings are crucial for a polished result.
Finally, export your 3D model in a suitable format like .fbx or .obj for use in other applications or game engines. For more advanced techniques, consider exploring Blender's vast toolset and referring to online tutorials and resources
#blendertutorial #blendertutorialforbeginners #blendertutorialcharactermodeling #blendertutorialanimation #blendertutorialmodeling #blendertutorialroblox #blendertutorial3dprinting #blendertutorialsculpting
#makeanaxeinblender #makeanaxethrowingtarget #makeanaxesheath #makeanaxetotk #makeanaxehead #makeanaxeinblender #makeanaxeinminecraft #makeanaxezelda #makeanaxeinyork #makeanaxehandle #makeanaxeanimalcrossing #makeanaxeintearsofthekingdom #makeanaxezeldatearsofthekingdom #makeanaxeterraria #makeanaxezeldatotk
#makeanaxeinblender
#makeanaxeinblender #makeanaxeinblenderand
-
 1:59:29
The Charlie Kirk Show
2 hours agoShut It Down + End the ADL + The Baddest Bunny | Tim Pool | 10.1.2025
113K69 -
 57:39
57:39
Dear America
1 hour agoThe Government Is Closed And Netflix Wants Your Kids! + Revival Happens If We Keep Moving Forward
15.4K23 -

The White House
3 hours agoPress Secretary Karoline Leavitt Briefs Members of the Media, Oct. 1, 2025
17.5K9 -
 53:14
53:14
The Kevin Trudeau Show Limitless
4 hours agoKevin Trudeau Reveals the Crypto Secrets Only the Ultra-Rich Know
2645 -
 3:36
3:36
Michael Heaver
4 hours agoItaly Witnesses POWERFUL Election Victory
5.14K1 -
 12:51
12:51
Silver Dragons
16 hours agoIs Silver a Good Buy at an ALL TIME HIGH?
563 -
 23:38
23:38
Professor Nez
1 hour agoCandace Owens Just BROKE the Internet with Charlie Kirk BOMBSHELL!
6.8K5 -
 DVR
DVR
Side Scrollers Podcast
4 hours agoMASSIVE Netflix Boycott + The TRUTH About Jimmy Kimmel’s Return + BIG Side Scrollers NEWS
9.71K -

Sean Unpaved
2 hours agoWild Card Highlights, Eagles' Lucky Streak, Gabriel Takes QB1, & CFB Hot Seat Watch
4.69K -
 1:36:16
MattMorseTV
2 hours ago $1.63 earned🔴Trump's Press Conference on the SHUTDOWN.🔴
2.44K19