3D Photo make in mobile screen on Photoshop
Creating a 3D photo effect on a mobile screen using Photoshop is a bit challenging, especially on a small screen. However, I can guide you through a simplified process to achieve a basic 3D effect on a photo using Photoshop's mobile app. Please note that this won't be a true 3D image but rather a simulated depth effect.
Here's a step-by-step guide:
Install Adobe Photoshop Express: If you don't have it already, download and install Adobe Photoshop Express from your device's app store.
Open Your Photo: Launch Photoshop Express and open the photo you want to apply the 3D effect to.
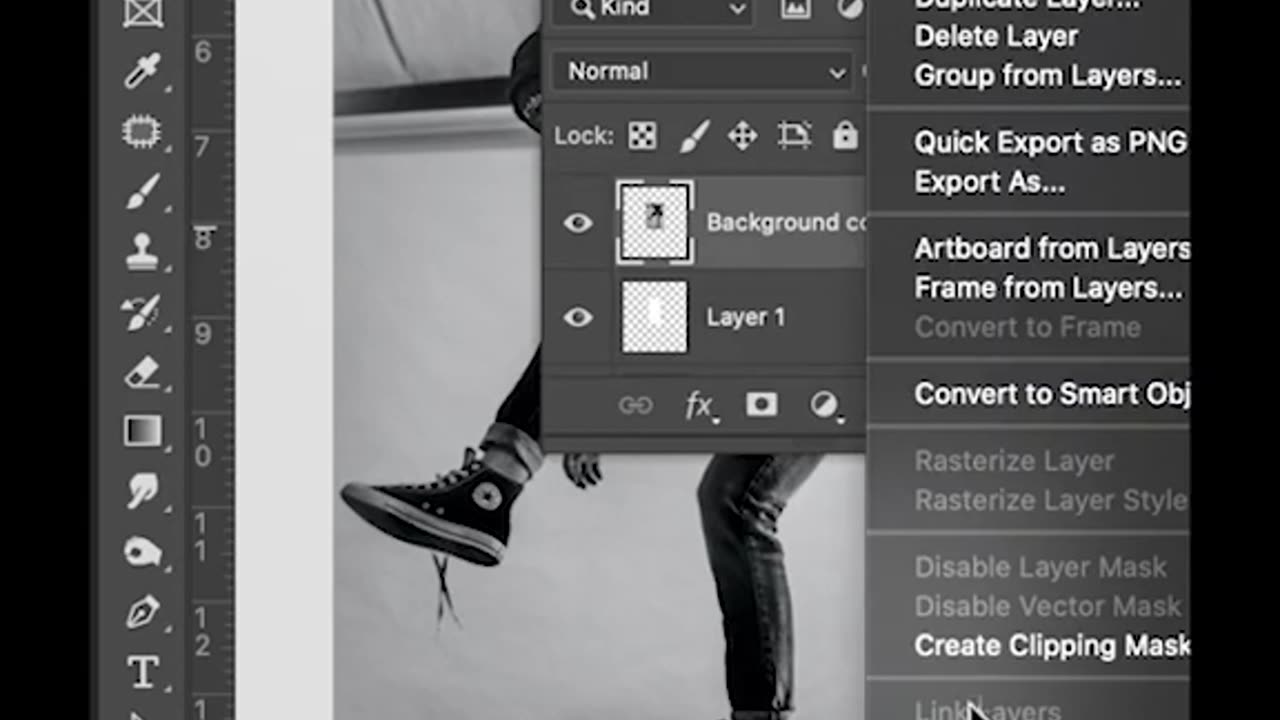
Duplicate the Photo: To create a depth map, duplicate the photo. You'll use this duplicate to add depth information.
Apply Depth (Simulated) Effect:
Tap on the duplicate photo layer.
Look for the "Looks" or "Effects" option in the app, and select it.
Choose an effect that adds a simulated depth effect, such as "Focal," "Depth," or "3D."
Adjust Depth Settings: After applying the effect, you'll likely have some control over its intensity. Adjust the settings to achieve the desired level of depth.
Blur Background (Optional): To enhance the 3D effect, you can manually blur the background in the duplicate layer to create more separation between the subject and the background. Use the app's blur tool or filter for this purpose.
Save Your Image: Once you're satisfied with the 3D effect, save your image to your device.
View on Your Mobile Screen: You can now view your edited photo on your mobile screen to see the simulated 3D effect. Tilt your phone slightly to observe the effect.
Please note that this method will create a basic simulated 3D effect by adding depth and blurring the background, but it won't produce a true 3D image. For true 3D images, you would need specialized software and possibly multiple photos taken from different angles
-
 LIVE
LIVE
BEK TV
1 hour agoTrent Loos in the Morning 6/18/2025
538 watching -
 1:25:27
Nick Freitas
15 hours agoThe Utter Hypocrisy of “No Kings”
62.6K22 -
 36:48
36:48
Kitco NEWS
13 hours agoEnd of Fiat Has Begun as Bitcoin and Gold Take Center Stage Says Billionaire Ricardo Salinas
27.6K12 -
 9:10:27
MyronGainesX
1 day ago $15.98 earnedIran Strikes Mossad, Zionist Debate On X, Diddy Trial, Antonio Brown Wanted For Attempted Murder!
62.4K75 -
 LIVE
LIVE
PudgeTV
2 hours ago🟠 Gaming on Rumble | Star Wars Battlefront 2 | Story Campaign or Online Play?
211 watching -
 31:45
31:45
Uncommon Sense In Current Times
15 hours ago $0.40 earnedThe Fatherless Crisis in America | Healing Homes & Breaking Cycles Through Faith | Sean Teis
16.8K1 -
 LIVE
LIVE
Midnight In The Mountains
2 hours agoMorning Coffee w/ Midnight | Weed doubles risk of sudden heart disease death |
194 watching -
 14:19
14:19
ARFCOM Reviews
17 hours ago $0.51 earnedA New Reflex Suppressor | The Troy Industries Kryptos 5.56
22.3K -
 31:15
31:15
Esports Awards
21 hours agoDecade Awards Finalist Reveal
26.5K -
 19:28
19:28
DeVory Darkins
1 day ago $4.75 earnedTrump announces two MAJOR UPDATES warns Iran to EVACUATE immediately
22.7K51