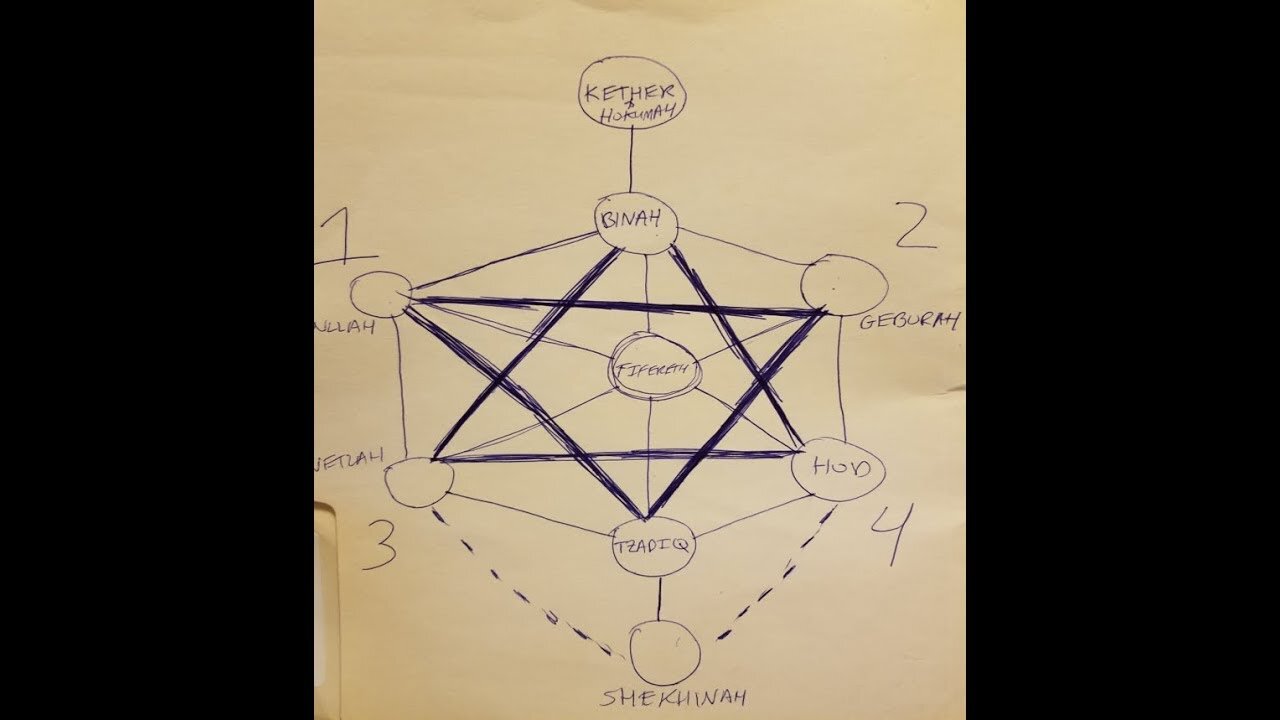
Introduction to HaSfiroth: Part 3 - The Correct Diagram of HaSephiroth
Loading comments...
-
 2:18:29
Badlands Media
14 hours agoDevolution Power Hour Ep. 376: Optics, Explosions & the War for the Narrative
144K43 -
 37:46
37:46
Stephen Gardner
12 hours ago🔥Trump NEVER expected THIS WIN as Schumer has EPIC MELTDOWN!
44K37 -
 2:02:41
Inverted World Live
8 hours agoNASA Engineer Says Trillions of Shape-Shifting, Cloaked Devices are Hidden on Earth| Ep. 83
39K11 -
 3:12:37
TimcastIRL
8 hours agoGOP Councilman DOUSED IN GAS, Set ON FIRE In Virginia, Suspect In Custody | Timcast IRL
250K90 -
 2:32:23
The Quartering
8 hours agoOn To The Big Bosses! Act 2 Of Expedition 33
60.5K6 -
 7:36:34
SpartakusLIVE
10 hours agoTiger Blood RESTOCKED and 30% off w/ code SPARTAKUS30
87.4K -
 24:58
24:58
Law&Crime
11 hours ago $3.24 earnedSecond Note Leaves Disturbing Clues in New York City Killings
40.5K12 -
 1:36:57
Badlands Media
1 day agoAltered State S3 Ep. 39: Earthquakes, Energy Games & the Fall of the Narrative
78.3K16 -
 2:04:07
Due Dissidence
16 hours agoCharlie Kirk's GAZA LIES, Caitlin Clark Stalker, Palantir Goes Hollywood - w/ Kyle Matovcik | TMWS
41.3K10 -
 2:54:43
I_Came_With_Fire_Podcast
17 hours agoAmerica First, Trump Threatens China, Your Friendly Neighborhood Illegal, EPA Gets a "W"
39.6K16