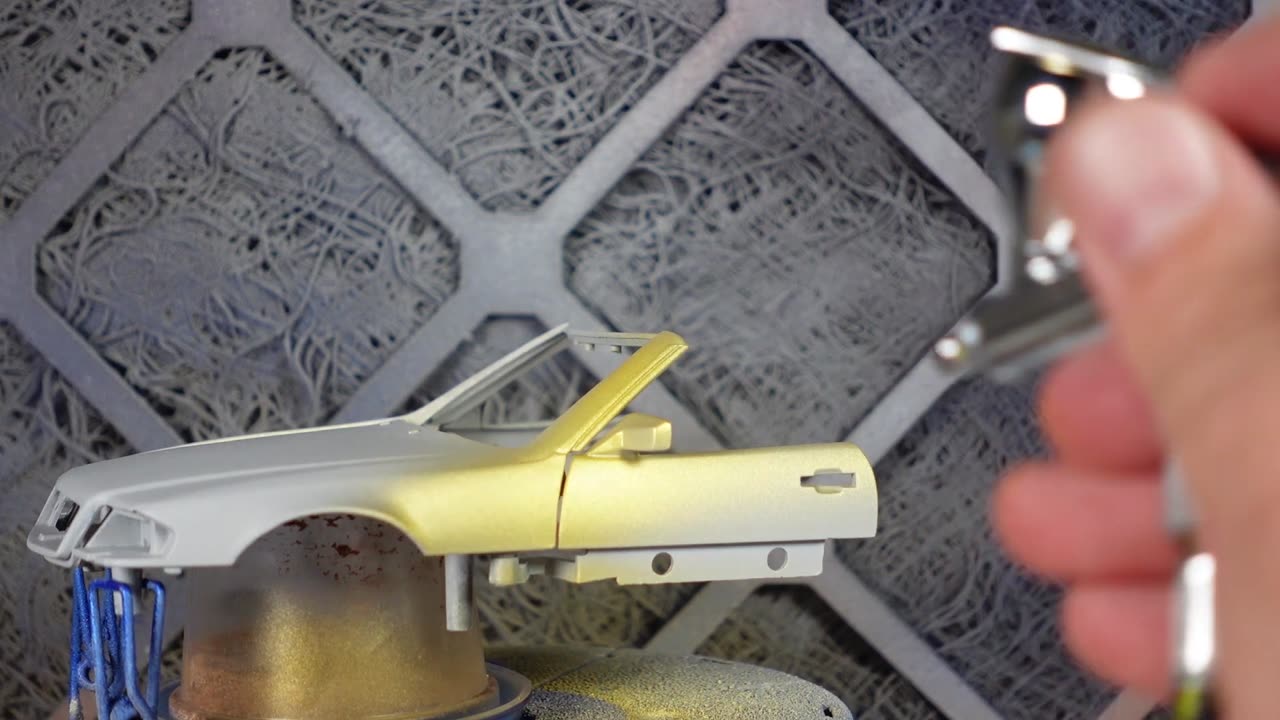
Restoration Repair Damaged Diecast Mercedes-Benz SL500 Resurrection
title: "🔧 Restoration Magic: Reviving a Damaged Diecast Mercedes-Benz SL500! 🚗✨ #DiecastRestoration #MercedesBenzLove #Resurrection"
Introduction:
In the world of diecast model cars, there's a unique sense of satisfaction in taking a damaged, neglected Mercedes-Benz SL500 and bringing it back to life. This step-by-step description outlines the art of restoration and repair for a damaged diecast Mercedes-Benz SL500, a journey that transforms a forgotten treasure into a gleaming masterpiece. 🌟🔩
Materials and Tools:
Damaged Diecast Model: The starting point, your injured Mercedes-Benz SL500 diecast. 🏁
Safety Gear: Protect yourself with safety goggles, gloves, and a dust mask. 👷♂️👓
Workspace: Set up a well-lit, ventilated area for your restoration project. 🌞🏠
Cleaning Supplies: Gentle detergent, warm water, soft brushes, and microfiber cloths for cleaning. 🧼🚿
Disassembly Tools: Small screwdrivers, pliers, or a hobby knife for delicate disassembly. 🔧🔨
Replacement Parts: Locate or fabricate any missing or irreparable parts. 🛠️🔍
Adhesives: High-quality plastic or metal bonding glue for structural repairs. 🧪🚗
Primer and Paint: Automotive-grade primer and paint in the correct colors. 🎨🖌️
Painting Supplies: Brushes or an airbrush for paint application, and masking tape for precise lines. 🖌️🎨
Clear Coat: A clear protective layer for a glossy finish and paint protection. 💎✨
Step-by-Step Restoration Process:
1. Assessment: Start by thoroughly inspecting your damaged diecast model to identify all areas requiring attention. Make a checklist of missing or damaged parts. 📋🕵️♂️
2. Disassembly: Gently disassemble the model, documenting each step with photographs for reference during reassembly. 📸🔍
3. Cleaning: Soak components in warm, soapy water to dissolve grime and old paint. Use soft brushes to clean crevices and corners. Rinse and dry thoroughly. 🚿🧼
4. Repair Broken Parts: Utilize plastic or metal bonding glue to mend broken or missing components. Allow ample drying time per adhesive instructions. 🩹🕒
5. Sanding and Filling: For any surface imperfections, use fine-grit sandpaper to create a smooth finish. Fill gaps or dents with putty, sanding once more for uniformity. 🧽✨
6. Priming: Apply automotive-grade primer to all components. This provides an ideal base for paint adherence. Let the primer dry thoroughly. 🎨🖌️
7. Painting: Using the appropriate paint colors, recreate the Mercedes-Benz SL500's distinctive appearance. Employ a fine brush or airbrush for precision. Apply thin, even coats, allowing each layer to dry before the next. Use masking tape for clean lines in multi-color paint schemes. 🎨✏️
8. Detailing: Add intricate details such as logos, emblems, and other fine points with a delicate brush. 🚗🎨
9. Clear Coat: After the paint has completely dried, apply a clear protective coat for a lustrous finish and long-lasting paint preservation. 💎🌟
10. Reassembly: Carefully reassemble all components, referencing your disassembly photographs to ensure correct placement. 🔩🔙
11. Final Inspection: Conduct a meticulous inspection to guarantee that all elements are in order. Perform any last-minute touch-ups if necessary. 👀🔍
12. Display or Preserve: With your beautifully restored diecast Mercedes-Benz SL500, consider displaying it proudly in a showcase or protective display case to preserve its pristine condition. 🏆👏
Embarking on the journey of restoring a damaged diecast model is a labor of love that demands patience and precision. Yet, the gratification of breathing new life into a once-forgotten treasure is an experience like no other. Enjoy the process, and relish the pride that comes with the resurrection of your Mercedes-Benz SL500 diecast model. 🤩🛠️ #RestorationMagic #DiecastRevival #MercedesResurrection
-
 LIVE
LIVE
Rallied
4 hours ago $0.12 earnedWARZONE SOLO CHALLENGES ALL DAY
441 watching -
 2:00:33
Joker Effect
3 hours agoSoo @MrBeast charity, is it legit? XenaTheWitch got attested? Lets talk about it! HOW TO GO VIRAL.
18.8K1 -
 27:01
27:01
TheRoyaltyAutoService
10 hours ago $0.06 earnedAnother Shop Replaced The Timing Belt & Fuel Injectors On This Honda Pilot… Now It Has No Power!
31.9K3 -
 10:14:25
GritsGG
12 hours agoRanked Crim 2! Most Wins 3390+ 🧠
62.7K -
 3:12:37
IsaiahLCarter
1 day ago $1.69 earnedJonah O. Wheeler: In Defense of Reality || APOSTATE RADIO #026
31.4K1 -
 LIVE
LIVE
Cewpins
6 hours agoSmoke Sesh🔥Gaming???💨420🍃!MJ !giveaway
162 watching -
 LIVE
LIVE
Phyxicx
5 hours agoShin Megami Tensei - Part 5 - 8/13/2025 | Chaos Route | Expert Difficulty
102 watching -
 1:59:32
vivafrei
15 hours agoEp. 277: Russia Peace Talks! Trump D.C. Takeover Leads to Lawsuit! Heat Wave Lawsuit? AND MORE!
84.5K114 -
 2:17:57
Nerdrotic
7 hours ago $0.22 earnedTransient Lunar Phenomenon: Deeper into the Mysteries of the Moon | Forbidden Frontier #112
27.1K3 -
 2:58:44
Barry Cunningham
1 day agoBREAKING NEWS: PRESIDENT TRUMP ABSOLUTELY TROLLS THE MEDIA! BIG WEEK AHEAD!
75.4K108