Premium Only Content

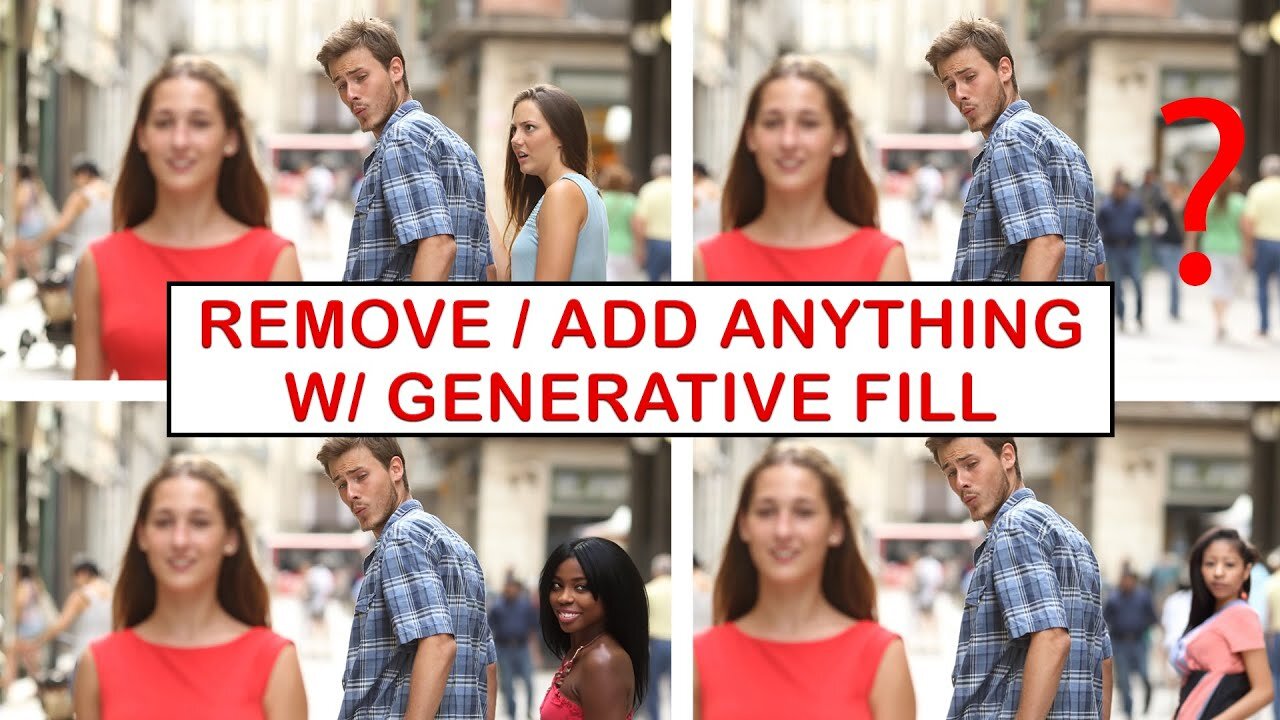
Photoshop Tutorial: How to Add and Remove Objects using Generative Fill
Welcome to another Adobe Photoshop tutorial! In this video, we dive into the world of Photoshop's beta version, exploring the power of the generative fill tool.
🕒 Timestamps:
00:00 - Introduction
00:20 - Starting from scratch
00:38 - Using the rectangular marquee tool
00:55 - Adjusting the selection with the quick selection tool
01:01 - Deleting unwanted parts of the selection
01:11 - Finalizing the selection
01:28 - Introducing the generative fill tool
01:46 - Removing the selected object with generative fill
02:05 - Adding a new object with generative fill
02:43 - Understanding the role of Adobe's servers in generative fill
02:59 - Experimenting with different generative fill results
03:18 - Finalizing the new image
In this tutorial, we take a deep dive into how to remove objects and people from images realistically using the generative fill tool. We start from scratch, showing you step by step how to select the object you want to remove, adjust your selection, and finally remove the object using the generative fill tool.
But we don't stop there! We also show you how to add a new object into the image using the same tool. We explore different results, showing you how to experiment with the tool to get the result you want.
Remember, this tool uses Adobe's servers, not your computer's processing power, so don't worry about it slowing down your machine.
Whether you're a Photoshop pro or a beginner, this tutorial has something for you. So why wait? Dive in and start exploring the power of Photoshop's generative fill tool today!
Don't forget to like, comment, and subscribe for more tutorials like this one. Thanks for watching!
-
 LIVE
LIVE
StoneMountain64
4 hours agoBattlefield REDSEC leveling guns for attachments
215 watching -
 LIVE
LIVE
Wayne Allyn Root | WAR Zone
7 hours agoWatch LIVE: The War Zone Podcast with Wayne Allyn Root
125 watching -
 33:39
33:39
LibertyRoundTable
3 hours agoWarhawk Down: Dick Cheney’s Legacy & the Rise of Citizen Journalism | LRT Radio 11/4/25”
12 -
 2:05:29
The Quartering
4 hours agoEscape From New York, Harvard Bombers Caught, Trump DEFIES Court On SNAP, Bomb Threat On Plane!
153K88 -
 16:30
16:30
Clintonjaws
19 hours ago $11.55 earned'The View's' Producer Stops Show & Forces Whoopie To Correct Lie
32.5K19 -
 10:51
10:51
Scammer Payback
3 hours agoScammer's Meltdown after He's Been Hacked
3.72K3 -
 LIVE
LIVE
LFA TV
20 hours agoLIVE & BREAKING NEWS! | TUESDAY 11/4/25
1,233 watching -
 LIVE
LIVE
freecastle
6 hours agoTAKE UP YOUR CROSS- INTEGRITY of the upright GUIDES them, CROOKEDNESS of the treacherous DESTROYS!
118 watching -
 2:04:16
Pop Culture Crisis
3 hours agoCoca-Cola's WAR ON CHRISTMAS, Movie Press Tour CRINGE, Gen Z HATES Gen Z | Ep, 949
28.5K4 -
 1:10:24
Steve-O's Wild Ride! Podcast
5 days ago $1.53 earnedMatt McCusker Makes Steve-O Nervous | Wild Ride #272
24.9K2