OPPO Reno10 5G(CPH2531 )Disassembly and Assembly
#oppo #opporeno10xzoom #opporeno10pro
#oppowatch
Please note that disassembling any electronic device, including smartphones, can be complex and may void your warranty. It also carries the risk of damaging the device if not done correctly. It's always recommended to consult professional technicians or refer to official repair guides provided by the manufacturer. With that said, here are some general steps you can follow:
Prepare the necessary tools: You'll typically need a set of precision screwdrivers, plastic pry tools, and tweezers.
Power off the device: Make sure the phone is turned off before you start disassembling it.
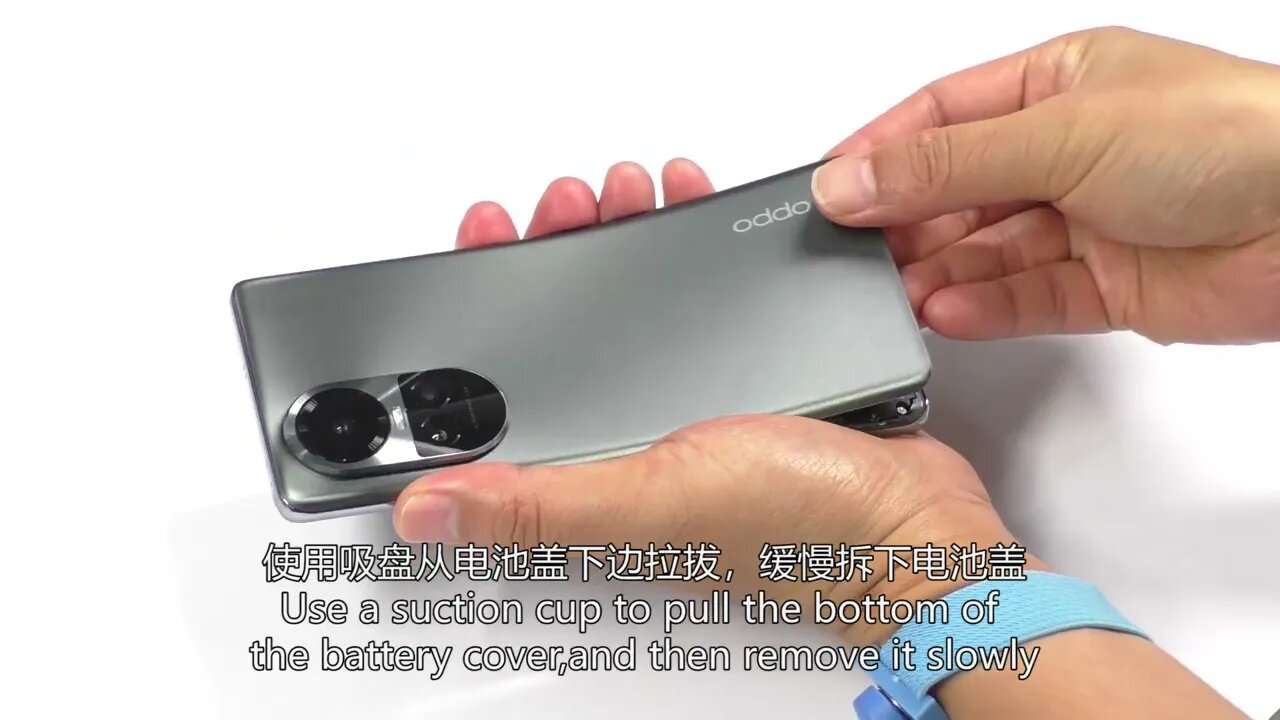
Remove the back cover: Most smartphones have a removable back cover. Look for any screws or clips holding the back cover in place. Use a plastic pry tool or your fingernail to carefully pry open the back cover.
Disconnect the battery: Locate the battery connector and gently unplug it from the motherboard to disconnect the power supply.
Remove the screws: Look for screws that secure the internal components, such as the motherboard and other modules. Use the appropriate screwdriver to remove these screws.
Disconnect internal connectors: As you remove the screws, you'll come across various connectors that attach the different components to the motherboard. Carefully unplug these connectors using a plastic pry tool or tweezers. Take note of their positions and how they are connected.
Lift the motherboard: Once all the connectors are disconnected, you can carefully lift the motherboard from the device. Be cautious not to apply too much force or damage any delicate components.
Access other components: With the motherboard removed, you can access other components such as the camera module, display assembly, and other modules if needed. Follow similar steps to disconnect and remove these components.
Please keep in mind that these steps are general guidelines, and the specific disassembly process may vary for different smartphone models. It's always recommended to refer to official repair guides or seek professional assistance if you're unsure or inexperienced in disassembling electronic devices.
Regenerate response
-
 2:39:02
The Pascal Show
13 hours ago'HE'S THE DEVIL!' Former Mother In Law Breaks Silence On Jake Haro & Emmanuel Haro Case
1.03K1 -
 4:47:50
The Why Files
2 days agoCOMPILATION: UFOs and Aliens Vol.2 | They are NOT our friends
37.9K36 -
 5:30:10
SpartakusLIVE
8 hours ago#1 Verdansk Sniper gets HACCUSATIONS because of INSANE Headshots
45.6K4 -
 46:18
46:18
SB Mowing
2 days agoShe was LOSING HOPE but this SURPRISE CHANGED EVERYTHING
28.7K40 -
 LIVE
LIVE
ItsLancOfficial
8 hours agoWE LIVE 🔴WE LIVE 🔴 SUNDAY SUNDAYS!!!!!!! TARKOV
478 watching -
 4:09:32
EricJohnPizzaArtist
6 days agoAwesome Sauce PIZZA ART LIVE Ep. #59: Are You Ready for some FOOTBALL with GameOn!
25.9K7 -
 1:21:43
Jake Shields' Fight Back Podcast
13 hours agoJake Shields and Paul Miller!
61.1K102 -
 1:20:41
TRAGIKxGHOST
5 hours agoTrying to get SCARED tonight! | Are You SCARED!? | Screams Beyond Midnight | Grab a Snack
20.5K2 -
 5:21:24
StuffCentral
6 hours agoI'm baaack (no you can't play with me.. unless you a healer)
22.4K4 -
 2:25:11
TheSaltyCracker
8 hours agoTrump Is Not Dead ReEEeStream 8-31-25
96.7K124