Social Media banner, flyer, broucher MZ Graphic
Sure I can help you with creating a social media banner using CorelDRAW. Here's a step-by-step guide to get you started:
1. Launch CorelDRAW and create a new document by going to File > New.
2. Set the dimensions for your banner. The recommended size for a social media banner varies depending on the platform. Here are a few popular sizes:
- Facebook cover: 820 pixels wide x 312 pixels tall
- Twitter header: 1500 pixels wide x 500 pixels tall
- YouTube channel art: 2560 pixels wide x 1440 pixels tall
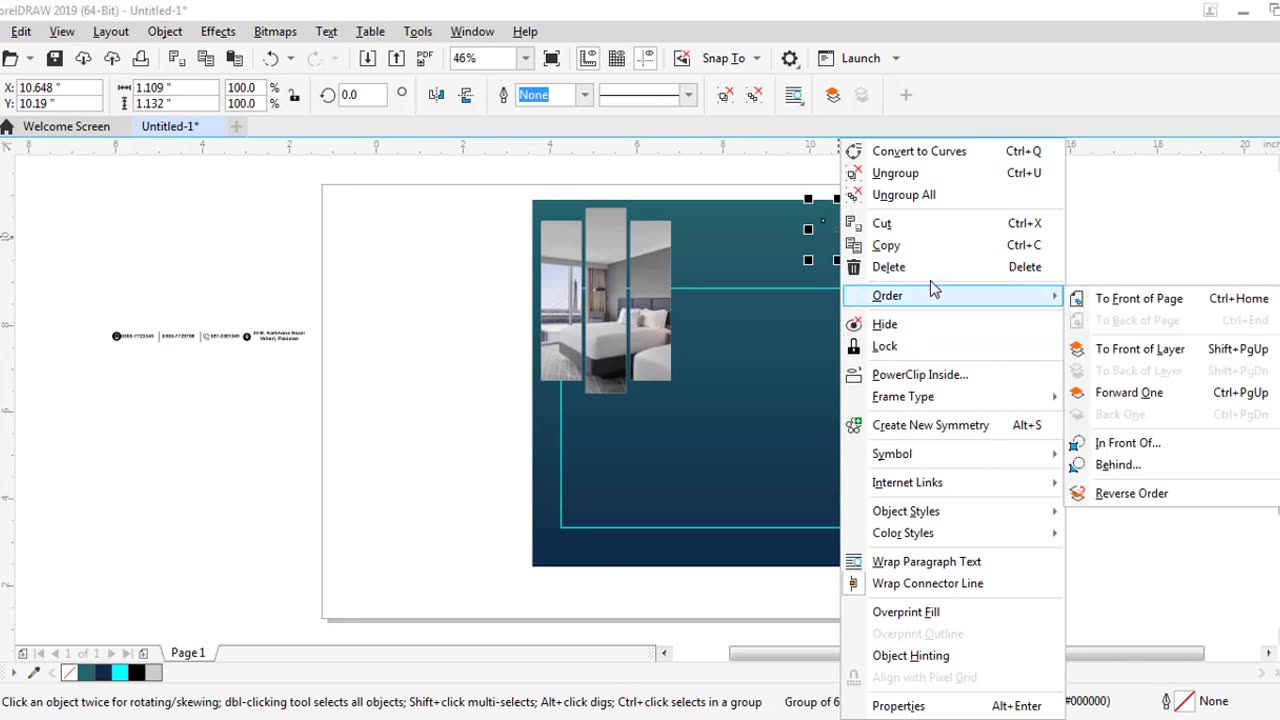
3. Once the document is created you can start designing the banner.
4. Choose a background color or image for your banner. You can use the rectangle tool (Shortcut: F6) to draw a shape that covers the entire canvas. Fill the shape with your desired color or import an image using File > Import.
5. Add text to your banner by selecting the text tool (Shortcut: T) and clicking on the canvas. Type in your desired text and adjust the font size and color using the options in the properties bar at the top.
6. To enhance the banner you can add images logos icons or illustrations. You can either create your own graphics or import pre-made ones from external sources. Use the rectangle or ellipse tools to create shapes and arrange them as per your design.
7. Experiment with different effects such as gradients shadows or transparency to make your design visually appealing. These effects can be accessed through the "Effects" menu or the Object properties panel.
8. Once the design is complete save your banner in a suitable format such as JPEG or PNG to maintain its quality. Go to File > Export or File > Save As to save your file.
Remember to consider the guidelines and specifications of the social media platform you intend to use the banner on as they may have specific requirements for file size and content placement.
Have fun designing your social media banner using CorelDRAW!
-
 DVR
DVR
Raginglumberjackv1
2 hours agoTake Back America Live steam
27 -
 LIVE
LIVE
PandaCoder
2 hours agoStreaming with Buds
72 watching -
 DVR
DVR
Bannons War Room
4 months agoWarRoom Live
24.2M6.23K -
 58:44
58:44
The White House
9 hours agoPresident Trump Delivers Address to the Nation, June 21, 2025
223K406 -
 LIVE
LIVE
KLW World News
10 hours agoBREAKING NEWS! US BOMBS 3 NUKE SITES IN IRAN!
1,332 watching -
 1:45:46
BlackDiamondGunsandGear
8 hours agoAFTER HOURS ARMORY / USA Dropping Bombs / Mike w - Krate Tactical / DLD After Dark
44.5K2 -
 1:45:46
DLDAfterDark
8 hours ago $16.56 earnedThe United States Strikes Iran With Multiple Bunker Buster Missles - Is This The Start of WWIII?
78.4K33 -
 1:03:29
Hard Lens Media
10 hours ago $10.05 earnedTRUMP Addressing The Nation As He Announced US Bombed Three Iranian Nuclear Sites
111K51 -
 16:46
16:46
Exploring With Nug
20 hours ago $13.30 earnedWe Recovered a Stolen Chevy Malibu From the River! Underwater Vehicle Search!
202K10 -
 4:58:30
Spartan
11 hours agoPro Halo Player | Sens Crisis Grind
140K2