Adding Overhead Lighting to the Soft Top, Part 3
After years of not using the factory deck light switch, I found it no longer worked reliably when I connected in the new overhead light. Some contact cleaner sprayed into the switch and operating the switch many times was able to restore normal operation.
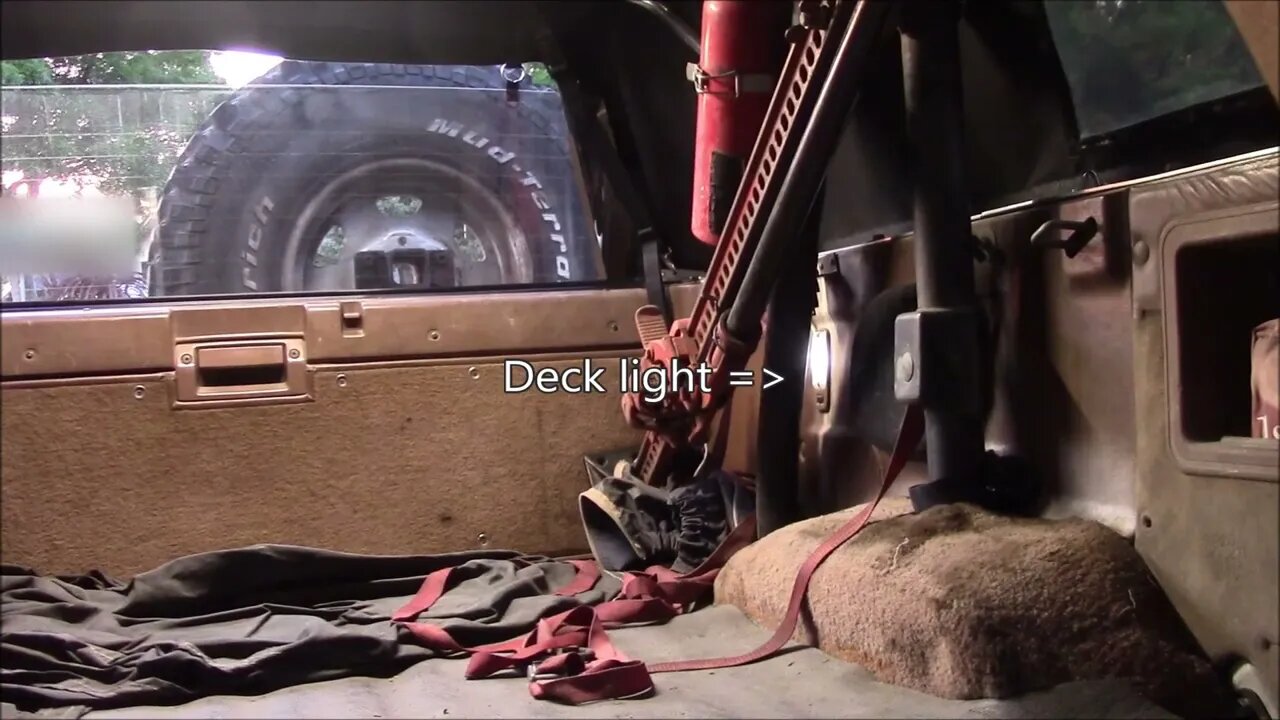
This new overhead light is tied into the factory deck (or room) light and can be operated from the dash or from the back of the bed. Having the overhead light on the rear hoop of the soft top gets it up above the factory roll bar, so it's no longer in the way like the old trouble light was.
Many years ago I had modified the factory deck light to improve it's usefulness. Originally, it had an 3W incandescent festoon bulb and required the vehicle running lights to be on. You could then turn that lamp on with it's built-in switch or from the dash switch, wired up as a 3-way light circuit. I initially re-powered that switch to work off constant 12V power:
https://www.4crawler.com/4x4/CheapTricks/index.shtml#DeckLightMod
I had also installed a 6-LED festoon bulb that put out much more light and used 1/5 the current of the original 3W incandescent bulb.
Later I changed that light to work off of accessory power but I think I'll return to constant power. I also tapped into the bulb wiring and ran that to a 12V power socket that I could plug the 12V LED trouble light into. Over time, that early design trouble light started to break down so I didn't use it a lot. When I pulled to Kayline top off, I removed that old light and looked for a new solution.
I found this linear "rail lights":
18.5" Pivoting LED Rail Light - Integrated Rocker Switch
https://www.superbrightleds.com/
I wanted something that could be attached to the support tubes of the soft top without drilling, be adjustable in angle and have a built-in switch. One will be placed across the back of the bed and connected to the old deck light wiring. The other two will be up front on either side of the bed. My 12V fridge will be placed on the driver's side so one light will be over that. The other one will be over the area behind the passenger seat where I have gear stored below.
I found some 3/4" conduit clamps were the right size and shape to clamp to the support tubes. I added some heat shrink tubing to the center of the clamps to grip the tubes tighter and to help protect the canvas top where it made contact with the clamps.
In the next video, we'll take a look at why the old trouble light failed...
Killer Toy Tops:
https://killertoytops.com/
More to come...
Subscribe for more content like this
Comment, like, share & click the bell icon
And as always, thanks for watching
#4Runner #softtop
-
 LIVE
LIVE
NewsTreason
40 minutes agoDECLAS w/ Rambo & Dave: Nuremberg 2.0 | MTG Exits Stage Left | Mamdani Psyop Confirmed, 8pm EST
6,377 watching -
 LIVE
LIVE
Mally_Mouse
21 hours ago🌶️ 🥵Spicy BITE Saturday!! 🥵🌶️- Let's Play: Human Fall Flat
1,743 watching -
 LIVE
LIVE
SpartakusLIVE
2 hours agoTeam BUNGULATORS || From HUGE WZ DUBS to TOXIC ARC BETRAYALS
956 watching -
 37:06
37:06
Camhigby
2 hours ago $3.13 earnedI Was Stalked By DRONE At Dearborn MOSQUE
15.1K17 -

SavageJayGatsby
4 hours ago🔥 Spicy Saturday – Let's Play: Human Fall Flat🔥
16.4K2 -
 12:38
12:38
Timcast
23 hours agoJasmine Crocket HUMILIATED By CNN To HER FACE Over Epstein LIE | Tim Pool
94.4K66 -
 19:32
19:32
MetatronHistory
20 hours agoWas Nazism Left Wing or Right Wing? An Answer From History
15.7K35 -
 LIVE
LIVE
a12cat34dog
4 hours agoI'M FINALLY BACK :: Resident Evil 4 (2023) :: FINISHING MAIN GAME & DLC {18+}
245 watching -
 31:23
31:23
Stephen Gardner
4 hours agoFINALLY! Charlie Kirk MISSING DETAILS released!
26.2K137 -
 5:26:11
cosmicvandenim
9 hours agoCOSMIC VAN DENIM | SEX APPEAL & HORROR
20.6K10