Pour concrete into a cookie lid - this is BRILLIANT!
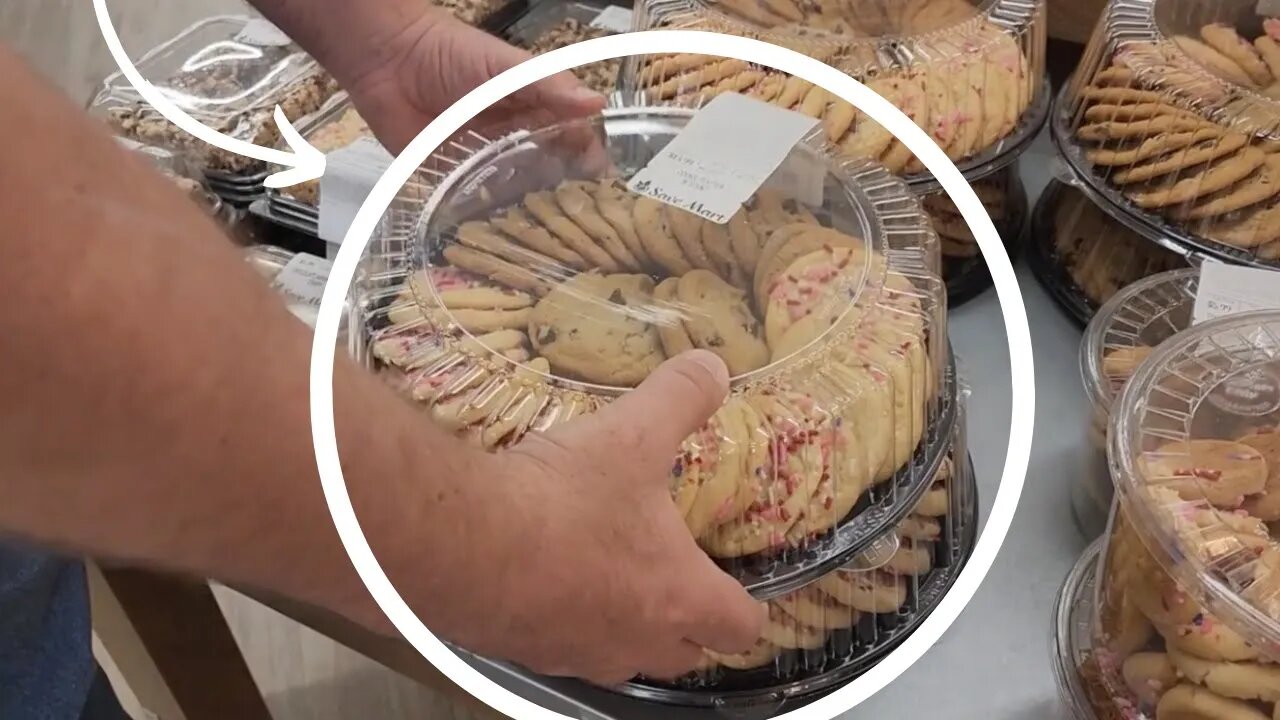
Time to run down to your local baker and grab a big old container of cookies…
Even though those cookies are yummy, we want that decorative lid. It is perfect for this project.
Let’s get started:
We're going to measure it straight across and get about 10 inches. Lay out some cardboard and we're going to pick a bowl that's round for us to mark and this one is a perfect size. Just go ahead and lay it on the cardboard and take a marking pin to get you that perfect circle.
Now it's time to mix up our cement. The best way to do it is to pour a little bit of water into your mixing bucket first and then go ahead and add your concrete.
A word of advice: do this in a well-ventilated area, you can tell that it gets pretty dusty.
If you need a little bit more water, just add it.
Now I use my drill and a mixing spoodle to put it together. If you need to hand mix it, go ahead, just do a little bit at a time so it's not too hard.
Once we get it mixed, carefully lay it inside the bucket. You can see the consistency here is like some really good pudding, just put it in.
Now once you get the right amount in, you're going to go ahead and just shake it all up. This allows that concrete to spread and fill all the little gaps. If you need to add a little bit more, remember, just shake it back and forth.
Cut some strips of wood, this one is going to be a full 10 inches across and the other ones are going to be four each. So, you're going to put the large one first and then glue up the ends of the other two pieces. Don't be hesitant to use your finger to spread them out; this is non-toxic glue. Lay it out and fold it in. We want to make sure that all the pieces of wood fit inside the circle.
Now take some popsicle sticks and some hot glue, you're going to lay this across the top, this is going to be our clamp that is going to hold the pieces together while that wood glue dries. Once you get one side done, flip it over. We're gonna do the other side also exactly the same way as we did the first side.
Once you get these pieces on, it's so strong you couldn't even pull them apart if you tried, and that's what we want.
It's time to go ahead and drill them because we want to put these caster legs on there one for each side of the boards. So, take a drill that allows those caster wheels to go right inside and drill it all the way through. See that it fits great and all we need to do is take some hot glue, put it in and all four wheels go right in there.
Now it's time to take those wood and the wheels and we're gonna just shake it back and forth let it sink right into the concrete this is what's going to hold it together, just keep shaking it, and once you get it in there it's going to hold just great.
Let it dry for about 24 hours go ahead and turn it back over after that 24 hours is up we're going to use a knife and we're going to start cutting away the plastic, just do this because once you cut it, and be careful we don't want to cut up the side of the concrete, we need to get some air in there that's what's going to release our mold from from the concrete. Just keep working it all the way around the side and once you get it up, look at that! Look at that smooth beautiful concrete it looks like it even has a mirror finish to it. I couldn't have been more happy.
Now it's time to go ahead and take it outside and test it make sure that it spins on those wheels and we've got the perfect base for a rolling planter. It works perfect, you can roll it around clean underneath and it looks great!
I hope this inspired you to build your own concrete rolling DIY planter thanks for watching home talk and we'll see you next time!
Hometalk | Ideas you can do.
Get our daily email for endless DIY ideas: https://ht.hmtlk.com/l/4VfU
FACEBOOK → https://www.facebook.com/Hometalk
INSTAGRAM → https://www.instagram.com/hometalk
PINTEREST → https://www.pinterest.com/hometalk
TIKTOK → https://vm.tiktok.com/ne4T87
#Hometalk #DIY #homehacks #lifehacks #gardening #gardeningtips #concrete #spring #springdecor #springdecorideas
-
 1:07:29
Hometalk
1 year ago $32.12 earnedTrending NEW pumpkin DIY ideas everyone's copying in fall 2024!
104K8 -
 2:23:21
PandaSub2000
5 days agoMadison VR (Part 4) | PSVR 2000 (Original Live Version)
14.4K2 -
 2:34:32
Badlands Media
5 days agoCODEX 9/11
284K239 -
 1:53:43
Nerdrotic
7 hours ago $0.29 earnedMysteries of 3I/ATLAS | Forbidden Frontier #113
47K5 -
 2:04:21
vivafrei
1 day agoEp. 278: D.C. Peace Wave! Big Tish & Nipple Judge SPANKED! "Maryland Man" Trafficker FREE & MORE?
101K124 -
 3:02:42
Damysus Gaming
3 hours agoBorderlands 3 - Part 8 - FL4K Time | Children of the Vault be Warned!
17.5K -
 1:30:28
Patriots With Grit
7 hours agoWhat You Should Know About Harmful Vaccine Ingredients And What To Say To Your Doctor, Pediatrician, Health Department or School When They Pressure You, Your Kids Or Your Family Members | Dr. Bryan Ardis, D.C.
15.5K6 -
 2:21:12
This is the Ray Gaming
3 hours ago $0.02 earnedSunday Night Live with the Boys | Rumble Premium Creator
8.64K -
 2:02:16
ItsMossy
4 hours ago🍃NEW MIC WHO THIS🍃DRIVING SIM GO BRRR🍃420 SESH🍃
5.43K1 -
 3:00:58
THOUGHTCAST With Jeff D.
3 hours agoSunday night Fortnite With ScottishVikingGaming & crew
3.91K1