9 genius NEW home hacks (from the guy who painted 1,000 homes)
Spring is right around the corner, making it a perfect time to get ready for home improvements.
The first thing we need to focus on is painting, which is a great way to spruce up our house. However, there's nothing worse than spilling paint all around the edges. Luckily, I have an important solution for that. Grab a clear plastic bottle and cut it off just at the top. Then, slip it over the paint can for a snug fit. To seal it in place, use a hairdryer or heat gun to warm the bottle, allowing it to form a tight seal with the edge of the paint can. Once it cools down, you'll see that it pours perfectly. Plus, with a lid, you can keep the paint fresh and clean for future use.
To achieve a crisp line with no bleed under when painting a room, especially at corners or where two walls meet, try this handy technique. Start by applying painter's tape exactly where you want it. Then, here's the trick: use some caulk from a caulking gun and apply it on top of the paint, right at the edge of the tape. Make sure to fill in any gaps, even on heavily textured walls. Once the caulk is applied, use a damp cloth to wipe off any excess, leaving the caulk underneath to fill in the gaps. When you paint, be sure to paint from the tape to the wall in a continuous motion. After removing the tape, you'll be left with a nice, straight, crisp edge with no bleed under.
For big paint projects that require a lot of brushing, here's a clever hack. Take a brush and drill a hole at an angle near the top, large enough to fit a cap inside. Attach a suitable cap using hot glue. Now, fill a bottle with paint, screw it onto the brush, and turn it over. This setup allows the paint to drip slowly, eliminating the need to constantly dip the brush. You can keep painting until you run out of paint, making your project much faster. When you're done, simply remove the brush, cap the paint bottle to keep it fresh, and clean the brush by running water through the cap edge.
To avoid forgetting the color, brand, or type of paint on a wall, try this practical solution. When removing outlet or switch covers, write the necessary details on the inside. Additionally, apply a small amount of sample paint with your finger. This way, when you put the cover back on, you'll always have a handy reference for touch-up painting.
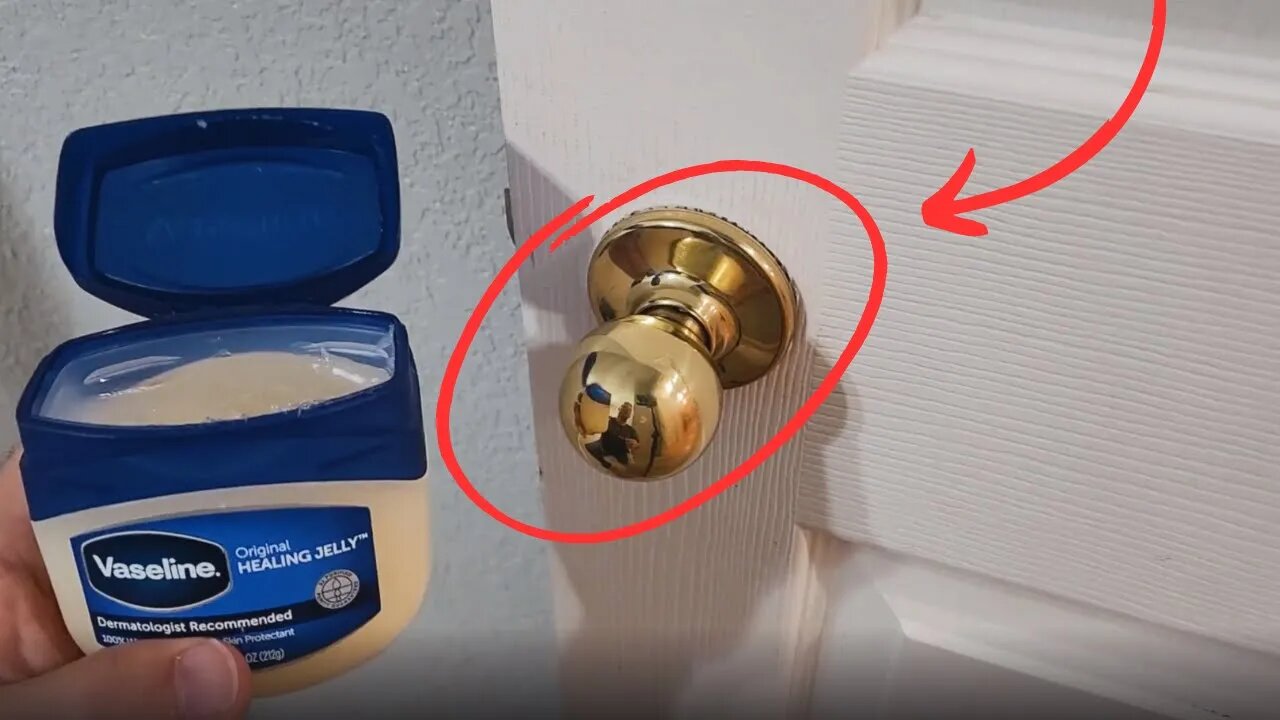
Drip marks on doorknobs or hinges can be frustrating while painting. But here's a simple hack using Vaseline. Just apply a small amount of Vaseline on those areas, and it will prevent the paint from sticking. If any paint accidentally gets on the Vaseline, it can be easily wiped off, saving you the hassle of taping.
Now, let's talk about caulking, especially in areas like tubs. Apply a thin line of caulk between the tub and the tile. Then, take a Popsicle stick and run it at an angle along the caulk, creating a perfect curve and a flawless caulk line every time.
Here's a water-saving tip for a leaky toilet. Remove the top lid and add some food dye to the back of the tank. Open the lid and check if the water in the bowl changes color. If it does, it indicates a leak, most likely from the flapper inside. Replace the flapper to save water and reduce your water bill.
Lastly, if your dryer isn't working as efficiently as it should, there might be lint buildup that's hard to reach. Grab the cardboard from a paper towel roll and squeeze it along its edges, creating a tool to get into those tight spots. Attach the cardboard to the end of your vacuum, turn it on, and use it to remove the trapped lint, which may have accumulated over the years.
I hope these home hacks inspire you to come up with your own painting and home improvement tricks. Thank you for watching Hometalk, and we'll see you next time!
Hometalk | Ideas you can do.
Get our daily email for endless DIY ideas: https://ht.hmtlk.com/l/4VfU
FACEBOOK → https://www.facebook.com/Hometalk
INSTAGRAM → https://www.instagram.com/hometalk
PINTEREST → https://www.pinterest.com/hometalk
TIKTOK → https://vm.tiktok.com/ne4T87
#Hometalk #DIY #homehacks #lifehacks
-
 1:01:58
Hometalk
10 months ago $9.67 earnedWhy homeowners are currently OBSESSED with old shutters (this is brilliant!)
43K6 -
 14:13
14:13
Clickbait Wasteland
14 hours ago $4.28 earnedAsking New Yorkers Who they Support for Mayor: Harlem
29.9K26 -
 19:55
19:55
The Rad Factory
15 hours ago $1.33 earnedCan I Fix My Fire Damaged F1 Car?
12.8K1 -
 1:26:22
Dialogue works
2 days ago $0.36 earnedScott Ritter: Russia Just DEFIED the U.S.: We'll End the War on OUR Terms!
3.35K8 -
 LIVE
LIVE
BEK TV
23 hours agoTrent Loos in the Morning - 8/01/2025
273 watching -
 13:08
13:08
Dad Saves America
13 hours ago $1.53 earnedTeachers Unions Play Politics While Students Lag Behind - Poisoning of the American Mind: Pt 4
18K11 -
 20:05
20:05
Preston Stewart
13 hours ago $2.27 earnedCrimea Raid to Chasiv Yar Fight
20K9 -
 8:11
8:11
Millionaire Mentor
15 hours agoTulsi Gabbard and Leavitt DOUBLE-TEAM Kaitlan Collins in FIERY Exchange
16.1K6 -
 46:02
46:02
Coin Stories with Natalie Brunell
1 day agoWhat They’re Hiding About the Economy | Natalie Brunell with Danielle DiMartino Booth
49.4K13 -
 12:12
12:12
GritsGG
15 hours ago23 Warzone Wins in a Row! (Cypher AR)
90.1K3