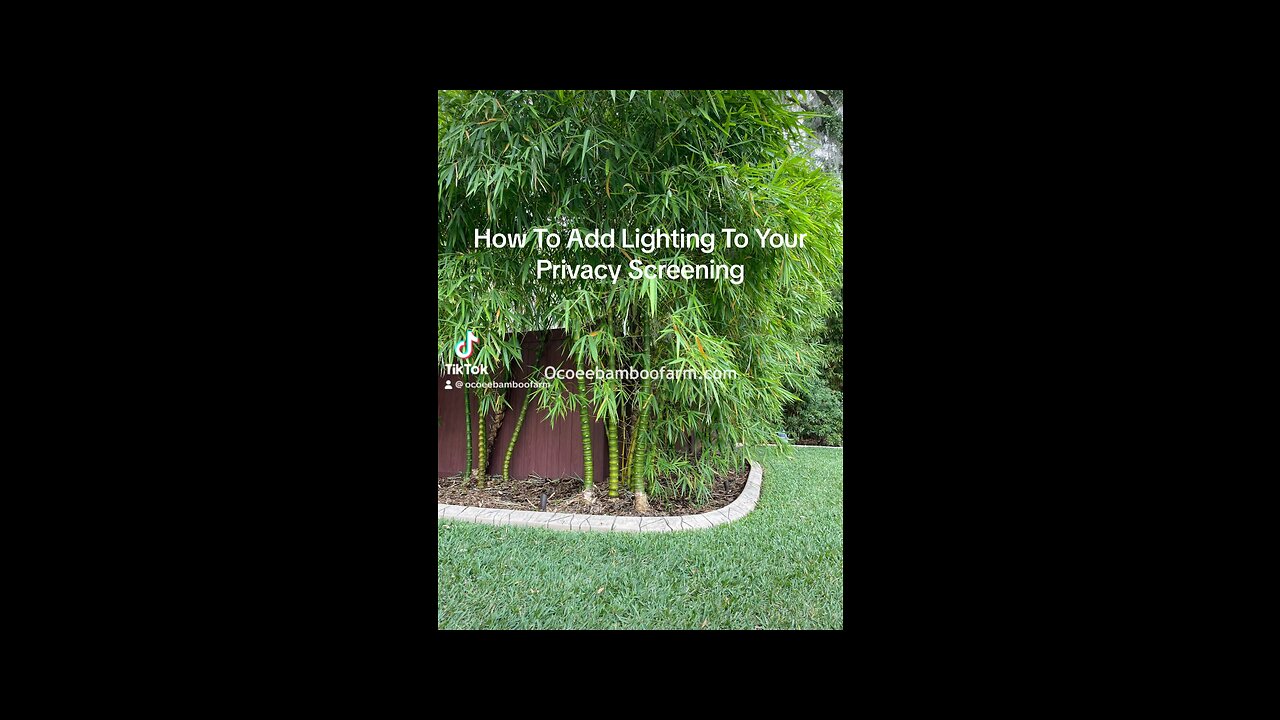
Look At What A Few Cheap Solar Spot Lights Can Do To Your Privacy Screen Project
🌿
If you've been working on a privacy plant screening project and want to take it to the next level, adding solar spotlights can be a fantastic idea. Not only will they illuminate your greenery at night, creating a captivating atmosphere, but they'll also provide an extra layer of security to your property. Let's walk you through the steps to seamlessly integrate solar spotlights into your project:
Step 1: Assess Your Screening Area
Before diving into the installation process, examine your privacy plant screening setup. Identify key areas where solar spotlights would have the most significant impact. Focus on spots where you have taller plants or architectural elements that you'd like to highlight.
Step 2: Choose the Right Solar Spotlights
There are numerous solar spotlight options available in the market, ranging from different brightness levels and beam angles. Opt for spotlights with LED bulbs for energy efficiency and ensure they come with solar panels that receive sufficient sunlight during the day to power the lights at night. Additionally, select weather-resistant spotlights that can endure various environmental conditions.
Step 3: Plan the Solar Panel Placement
Solar spotlights depend on sunlight to recharge their batteries. Hence, it's crucial to position the solar panels in areas that receive ample direct sunlight throughout the day. Make sure there are no obstructions like tall trees or buildings blocking the sunlight from reaching the solar panels.
Step 4: Install the Solar Spotlights
Follow these general steps to install your solar spotlights:
a. Read the manufacturer's instructions thoroughly before beginning the installation process.
b. For ground-mounted solar spotlights: Position the lights in the desired locations and gently push the stakes into the ground. Make sure they are stable and secure.
c. For wall-mounted solar spotlights: Use screws and anchors appropriate for your wall type to attach the lights securely.
d. Connect the solar panels to the spotlights following the provided instructions.
Step 5: Test the Lights
Once you've installed the solar spotlights, test them at night to ensure they are working correctly. If they don't seem to be functioning optimally, double-check that the solar panels are receiving sufficient sunlight during the day and that they are clean and free from dust or debris.
Step 6: Adjust the Spotlight Angles
Experiment with the spotlight angles to get the best lighting effect. You might need to make minor adjustments to highlight specific plants or features effectively.
Step 7: Maintain Your Solar Spotlights
Regularly clean the solar panels to maximize their efficiency. Wipe away any dirt or debris that might accumulate on the surface. Also, consider storing the spotlights indoors during harsh weather conditions like heavy storms or extreme winters to extend their lifespan.
By adding solar spotlights to your privacy plant screening project, you'll not only create a mesmerizing ambiance but also enhance your outdoor space's overall security and beauty. Enjoy the enchanting views of your screening project, day and night! 🌟🏡🌿
-
 8:19
8:19
MattMorseTV
6 hours ago $0.90 earnedTrump is ACTUALLY DOING IT.
1.82K17 -
 LIVE
LIVE
ZWOGs
8 hours ago🔴LIVE IN 1440p! - Tarkov w/ Casey & crgoodw1n, Kingdom Come Deliverance, & More - Come Hang Out!
45 watching -
 1:45:02
Glenn Greenwald
3 hours agoIsrael Slaughters More Journalists, Hiding War Crimes; Trump's Unconstitutional Flag Burning Ban; Glenn Takes Your Questions | SYSTEM UPDATE #504
68K51 -
 LIVE
LIVE
Killerperk
31 minutes agoRoad to BF6. Come hang out #regiment #bf6
65 watching -
 LIVE
LIVE
Jokeuhl Gaming and Chat
1 hour agoDARKTIDE - Warhammer 40k w/ Nubes Bloobs and AoA
30 watching -
 LIVE
LIVE
Cripiechuccles
2 hours ago😁💚💙MOTA MONDAY WITH CRIPIE💚💙 👌SMOKING, GAMING & WATCHING FLICKS!:😁
61 watching -
 DVR
DVR
Stephen Gardner
1 hour ago🔥'Burn ALL TRUMP FLAGS’ says Tim Walz + Democrat CAUGHT rigging own election!
2192 -
 10:10
10:10
robbijan
1 day agoHollywood’s Hidden Messages: Predictive Programming & What’s Next
1.13K8 -
 40:13
40:13
MattMorseTV
2 hours ago $3.62 earned🔴It's EVEN WORSE than we thought...🔴
12K51 -
 LIVE
LIVE
MissesMaam
4 hours agoDying Light w/ Da Bois💚✨
98 watching