Best Way for Tangle Free Extension Cords!?
We’ll show you one of 5 ways to wind up extension cords. Used widely in the trades and AV/Video industry, learn how to wind up cordage using the over-and-under method!
#extensioncord #powercable #cablestorage
Buy your DFJ T-Shirt, Cap, or Coffee Mug at https://www.dirtfarmerjay.com/shop
This is one in a series of episodes showing different methods of winding up and/or using extension cords. In this series, we will show the chain, over-and-under, figure 8, cord reel, and cord bucket approaches.
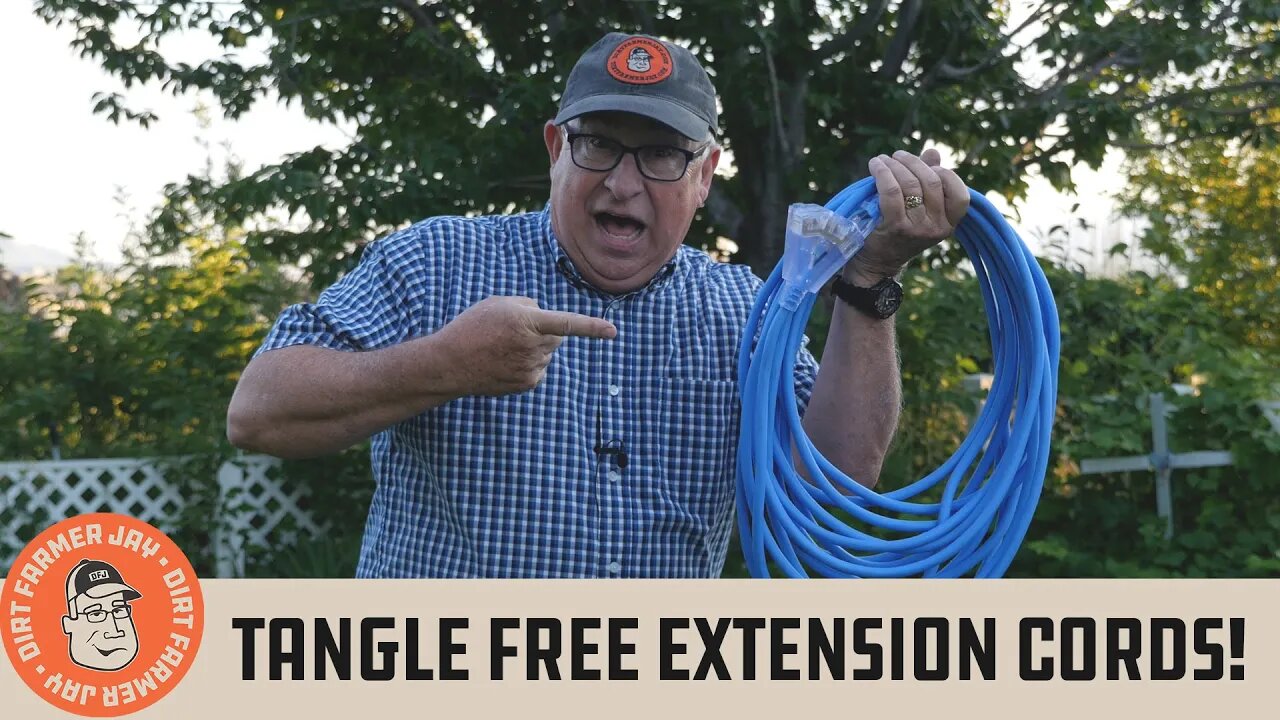
This episode features the “over-and-under” method. Is it the best way to get a tangle-free cable? Many think so - it’s that good! You make up your own mind!
No mind what method you use to wind up your cord, always get the best extension cord you can afford. The cheaper the cord, the stiffer it will be, especially in cold weather.
The cord will come packaged as a coil (much like a garden hose) or looped into an oblong shape with a sleeve around the middle. The first thing you need to do is unwind the cord and stretch it out somewhere in the sun. It can be on the lawn, sidewalk, or driveway. Leave it out for about an hour to get the cord warm so it can “relax” and lose any memory it acquired during the time it was packaged. If it’s winter when you get your cord, place the cord somewhere warm until the cord is supple. Now you wind up the cord using the method you prefer.
To do the “over and under” method, begin with the end that has the pronged plug end. Hold the end of the cord in one hand and reach down along the cord and lift to create the loop size you prefer - but avoid small loops. Large, loose loops are best. Then, coil the first cord loop alongside the cord end in an “over” motion.
You’ll feel the cord rotate along its length. If you kept winding the cord in repeated “over” loops, you will have a cord that is actually twisting along its length - essentially a cord “spiral”. Not good.
To avoid this, this is where the magic comes in. You simply counter the right-hand twist by doing an “under” loop next. Again, reach down the length of the cord, grasp, and lift while rolling the cord slightly in the opposite direction and then tuck up the loop alongside the loop waiting for it.
Continue this alternating pattern until you reach the end of the cord, and then you can plug the pronged end into the slotted end.
An easy way to remember this method (as well as keep track of where you are), the phrase “overworked and underpaid” is useful!
When it comes time to use the cord, unplug the two ends, and let the end play off the stack of loops naturally. Don’t pass the end of the cord through the center of the loops or you won’t like the result!
This method works for power cords, AV cables, and music equipment cables (I use this method for the cable for my electric bass guitar). In fact, it is the “go-to” method that professionals use in entertainment, film, corporate entertainment, and concert industries.
Cables play out beautifully, lay flat, and minimize twisting of the cable so it will last longer.
Check out these other methods that trade professionals use as well:
View the "Daisy Chain" Method Here: COMING SOON
View the "Figure 8" Method Here: COMING SOON
View the "Cord Bucket" Method Here: COMING SOON
View the "Cord Spool" Method Here: COMING SOON
JUST DO IT YOURSELF!
Instagram: https://www.instagram.com/dirtfarmerj
Facebook: https://www.facebook.com/dirtfarmerjay
-
 2:34:02
Barry Cunningham
6 hours agoLISA COOK | ADAM SCHIFF | LETITIA JAMES | ARE THEY BEING SACRIFICED BY THE DEEP STATE?
79.6K52 -
 1:36:19
Flyover Conservatives
14 hours agoOnly 17% of Millennials Hit These 5 Adult Milestones—Why?; What If Childhood Trauma Is Behind Your Health Problems? - Dr. Troy Spurrill | FOC Show
26.5K3 -
 4:49:04
HogansAlleyHero
16 hours ago💥CHASING DOPAMINE💥✅TRUMP SAYS BATTLEFIELD IS THE BEST✅
33.9K2 -
 1:57:40
MattMorseTV
6 hours ago $10.57 earned🔴Trump just SHATTERED the PROJECTIONS.🔴
48.9K41 -
 2:32:19
megimu32
5 hours agoOTS: From Star Search to Superstardom
34.9K4 -
 1:56:21
Joker Effect
4 hours agoInterviewing GREENMAN! Looks like he is coming to Rumble! Let's give him a warm welcome! REAL TALENT
21K1 -
 1:07:21
Anthony Rogers
11 hours agoEpisode 380 - Is Pain All In Your Head?
14.6K3 -
 1:46:17
Glenn Greenwald
8 hours agoGlenn Takes Your Questions on Censorship, Epstein, and More; DNC Rejects Embargo of Weapons to Israel with Journalist Dave Weigel | SYSTEM UPDATE #505
115K8 -
 3:26:34
Jokeuhl Gaming and Chat
10 hours agoHelldivers 2 - Spreading Democracy w/ Ryker
12.2K1 -
 27:47
27:47
Stephen Gardner
5 hours ago🚨BREAKING: Trump FURIOUS Over Kamala’s Latest Move – SHOCKING Details!
17.4K76