Premium Only Content

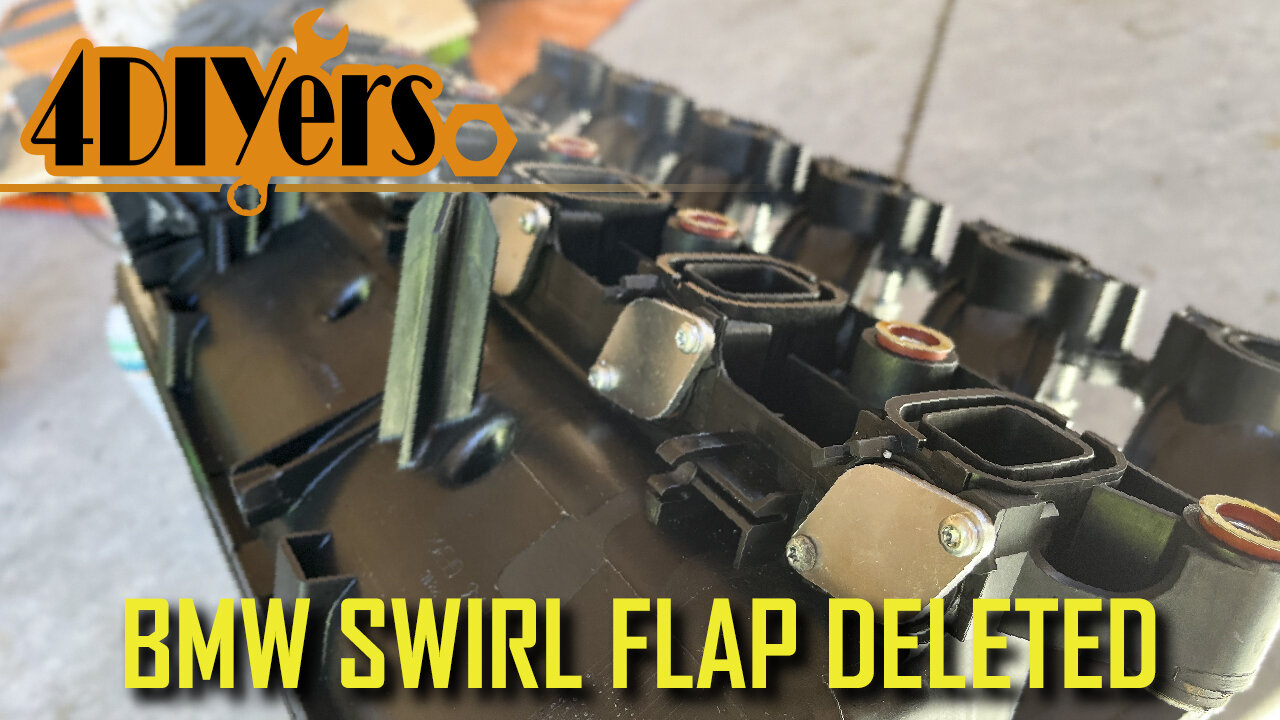
How to Install a Swirl Flap Delete Kit on a BMW M57 335d
How to install a swirl flap delete kit on a BMW M57 diesel. This particular car I am working with here today is a 2010 BMW 335d. This involves removing the swirl flaps and installing custom blocker plates. As a warning, this is an off-road modification and it is not approved for vehicles licensed to be driven on the road. The reason for installing this kit is to remove a common reliability issue where the swirl flaps can break and then end up in the engine potentially causing severe damage. #bmwm57 #bmw335d #turnermotorsport
Throttle body gasket: http://bit.ly/3IQ4Sob
Intake manifold gasket (round): http://bit.ly/3YWNJyJ
Intake manifold gasket (rectangular): http://bit.ly/3EyfYeJ
Teslong Camera: https://www.teslong.com/Industrial-Endoscope/Dual-Lens-5inch-Industrial-borescope-inspection-camera?ref=4diyers10
Teslong 10% discount code: 4DIYERS
Website: http://4diyers.com
Patreon: https://www.patreon.com/4diyers
Facebook: https://www.facebook.com/4diyers
Twitter: https://twitter.com/4DIYers
Instagram: https://www.instagram.com/4diyers/
Tumblr: http://4diyers.tumblr.com
Pintrest: https://www.pinterest.com/4diyers/
Tools/Supplies Needed:
-8mm, 10mm, 11mm, 13mm sockets with ratchet
-e14, e18 sockets
-5mm allen wrench
-degrease
-clean rags
-side cutters
-long magnet
-new gaskets
-swirl flap delete kit
-silicone spray
-small screwdriver or pick
-t20 driver
Procedure:
Before we get started, it’s a good idea to disconnect the battery. This requires a 10mm socket, which I have already done. Remove the 6 8mm screws holding down the cabin filter cover.
Then lift off the cabin filter cover. Unclip the sensor for the hood. Pull out the side tabs and remove the outer covers by the hood shocks.
Remove the 2 8 mm screws on each side of the windshield cowl. There will be one on each side.
If you haven’t already, unclipped the wire that goes across the engine bay under that plastic trim piece above the engine cover.
Lift that plastic cover and then pull towards the front of the car. There will be a wire clip that also needs to be disconnected to fully remove this cover.
Before getting any further, it’s always a good idea to vacuum up any debris which can potentially fall inside the engine. Using an e14 socket, remove the two bolts on each of the strut towers for the strut brace.
Remove the plastic cover at the center of the windshield cowl, then loosen the e18 bolt here. There is no need to remove it as the strut braces as they have a slotted hole where they slide in under the bolt head.
Then remove the strut braces for each side. Make note of their orientation as they only fit in one position.
Remove the 13mm nut for the power wire that goes across the engine bay. As mentioned earlier, you should have disconnected the battery so there is no chance of a short here.
Remove the 7 5mm socket head bolts using a 3/8 drive ratchet. This engine cover comes out in two pieces, I will show you that in a moment.
Once those fasteners are out, wipe around the oil fill location, then remove the filler cap.
Lift out the first part of the engine cover. Reinstall that oil fill cap.
Remove the 3 10mm bolts holding on the center section plastic trim panel on the firewall. There are two styles of fasteners here, make sure you note their location.
If you haven’t already, pull out that rubber gasket. Then lift out the cover, you may need to pull up on the windshield cowl to help with movement.
Now remove the back section of the engine cover. This is a tight fit and will require some patience when removing. Make sure you don’t damage the sound insulation.
Remove the 2 10mm bolts towards the back corner of the intake on the driver's side. There will be one for the engine oil dipstick bracket and another for a bracket on the rear.
Disconnect the electrical plug for the MAP sensor. Simply press the tag and pull it off.
Disconnect the electrical connector on the rear behind the intake. And then disconnect another below the MAP sensor. Using cutters, remove the cable tie holding on the one wiring harness. Using a standard screwdriver, gently pry off the electrical connector for the butterfly flap motor.
Disconnect the wiring harness from the bracket. Disconnect the electrical connector on top of this assembly along with removing the harness from the wiring retaining clip.
Thank you to all those who watch my videos and support my content. Don't forget to subscribe to my channel for future tutorial videos and like my video if you found it helpful. New videos are always being uploaded every week!
© 4DIYers 2013
All Rights Reserved
No part of this video or any of its contents may be reproduced, copied, modified or adapted, without the prior written consent of the author.
-
 LIVE
LIVE
The Big Mig™
3 hours agoICE Will Use Private Bounty Hunters, LFG
5,072 watching -
 1:08:17
Chad Prather
9 hours agoHow to Get Along With People You Don’t Even Like (Most of the Time)
68.6K24 -
 1:45:29
MTNTOUGH Podcast w/ Dustin Diefenderfer
9 hours agoTaya + Colton Kyle: Can American Marriages Survive 2025? | MTNPOD #140
4.78K -
 1:12:23
MikeMac - Say Something
17 hours agoSay Something Beyond W/MikeMac: JOKER - Ep.12
5.42K -
 1:30:13
Game On!
14 hours ago $10.41 earnedChiefs Dynasty OVER, New Longest FG RECORD, and Patriots Are Winning The Super Bowl!
29.5K3 -
 4:02:17
The Bubba Army
3 days agoIS AMERICA OVER TRUMP? - Bubba the Love Sponge® Show | 11/03/25
90.6K34 -
 48:57
48:57
Man in America
19 hours agoThe Sinister Reason They Put Fluoride in Everything w/ Larry Oberheu
373K108 -
 1:06:56
Sarah Westall
17 hours agoAstrological Predictions, Epstein & Charlie Kirk w/ Kim Iversen
106K75 -
 2:06:49
vivafrei
1 day agoEp. 289: Arctic Frost, Boasberg Impeachment, SNAP Funding, Trump - China, Tylenol Sued & MORE!
298K221 -
 2:56:28
IsaiahLCarter
20 hours ago $16.08 earnedThe Tri-State Commission, Election Weekend Edition || APOSTATE RADIO 033 (Guest: Adam B. Coleman)
68.5K8