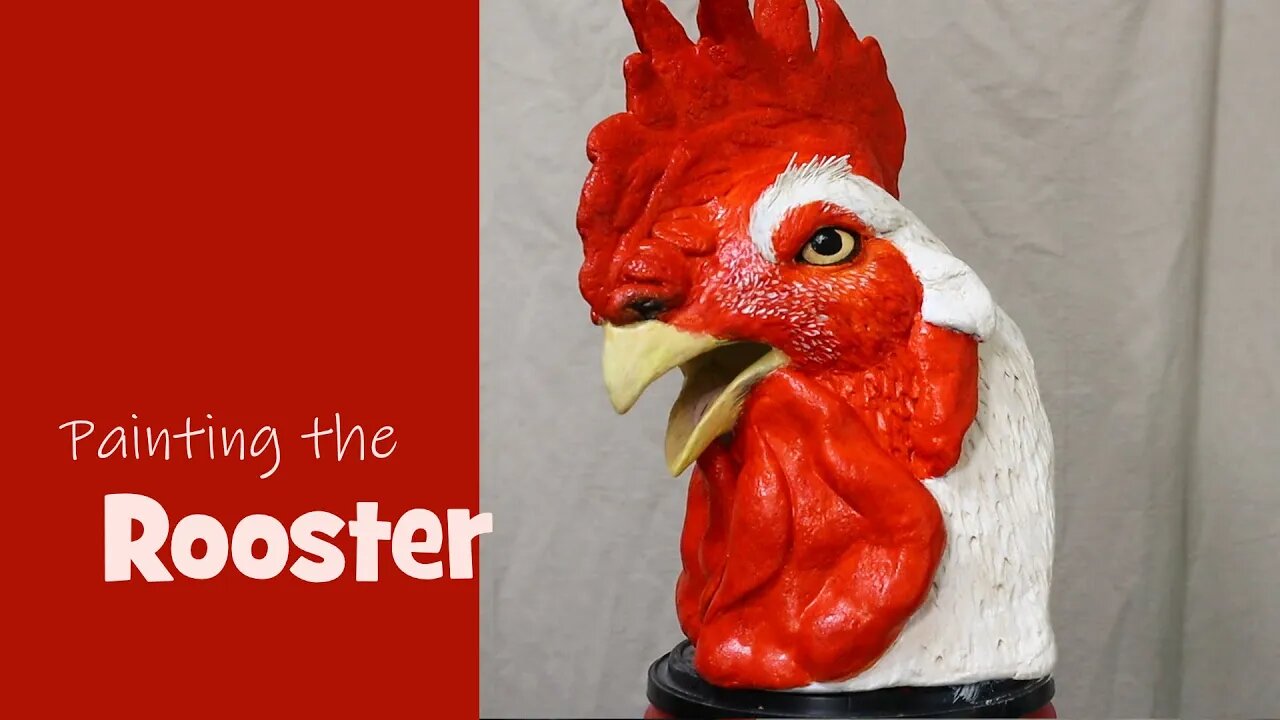
Painting The Rooster
I painted my rooster sculpture today. As you can see in the two previous videos, he started out with a wet clay model that I sculpted with the use of a cardboard pattern. Then I added the plaster cloth shell, and finally the Magic Sculpt epoxy clay. And today he got his bright red comb and wattles and his white feathers, when I put on a coat of acrylic paint.
If you want to use my free pattern and make your own rooster head sculpture, you can find it here: https://www.ultimatepapermache.com/sculpting-a-rooster
The second video in the series, showing how the Magic Sculpt was added: https://youtu.be/abaw9ZYuxTs
Products used in the project:
WED clay: https://amzn.to/31azFXq
Magic Sculpt: https://amzn.to/2BzG8jA
Golden acrylic glazing liquid: https://amzn.to/2CAw0Yz
You could use my air dry clay recipe instead of the epoxy clay: https://youtu.be/YOiovGN-yHA
If you decide to use some epoxy clay for a project of your own, please let us know how it turns out. You can upload a photo on the Daily Sculptors page on my website: https://www.ultimatepapermache.com/daily-sculptors-group-page
-
 1:10:07
Dear America
3 hours agoElon DESTROYS Congress Over Trump’s Spending Bill!! Is This The Worst Congress Ever?!
89.8K142 -
 11:44
11:44
James Klüg
19 hours agoPortland State University: Professor ASSAULTS Us For Talking About THIS…
6.49K12 -
 2:08:07
Matt Kohrs
11 hours agoStocks Set To Rocket, Breaking News & Live Trading $1M || The MK Show
33.4K5 -

Badlands Media
10 hours agoBadlands Daily: June 4, 2025
33K1 -
 LIVE
LIVE
Wendy Bell Radio
6 hours agoMusk Blasts Beautiful Bill
3,908 watching -
 4:11:49
The Bubba Army
1 day agoTrump Musk BreakUp? - Bubba the Love Sponge® Show | 6/04/25
70.3K8 -
 1:25:29
JULIE GREEN MINISTRIES
4 hours agoLIVE WITH JULIE
145K218 -
 1:40:14
Chicks On The Right
5 hours agoElon RIPS BBB, Hakeem still ranting about Project 25, & lack of pride merch is fascism
30.9K7 -
 1:39:17
Bitcoin on Rumble
3 hours agoBBB, Brrrr and Bitcoin
29K2 -
 2:05:45
AP4Liberty
3 hours ago $1.44 earnedElon Musk Calls Trump Megabill a ‘Disgusting Abomination’
22.1K3