Lynx L3000: Connecting an External Communicator
In this video, Darrell from Alarm Grid shows you how to connect an external communicator to a LynxPlus or L3000 panel from Honeywell. There are communicators that are made to work with the L3000 that can be installed inside the panel plastic and are hidden from view. However, those communicators are no longer available, so if you have an L3000 and you wish to upgrade it to an LTE communicator, this is how you do it.
IMPORTANT NOTE: The L3000 can support Total Connect 2.0, however, the LTEM-PA and LTEM-PV communicators will not support TC2 with the L3000 panel. So, if you plan to use Total Connect 2.0, you'll want to choose a communicator other than the LTEM-P Series. The connections will be similar, regardless of which external communicator is used.
Before you begin, be sure that both the L3000 and the communicator are powered down. This will involve unplugging their respective plug-in power supplies, and backup batteries. Once you're sure both pieces of equipment are powered down, continue.
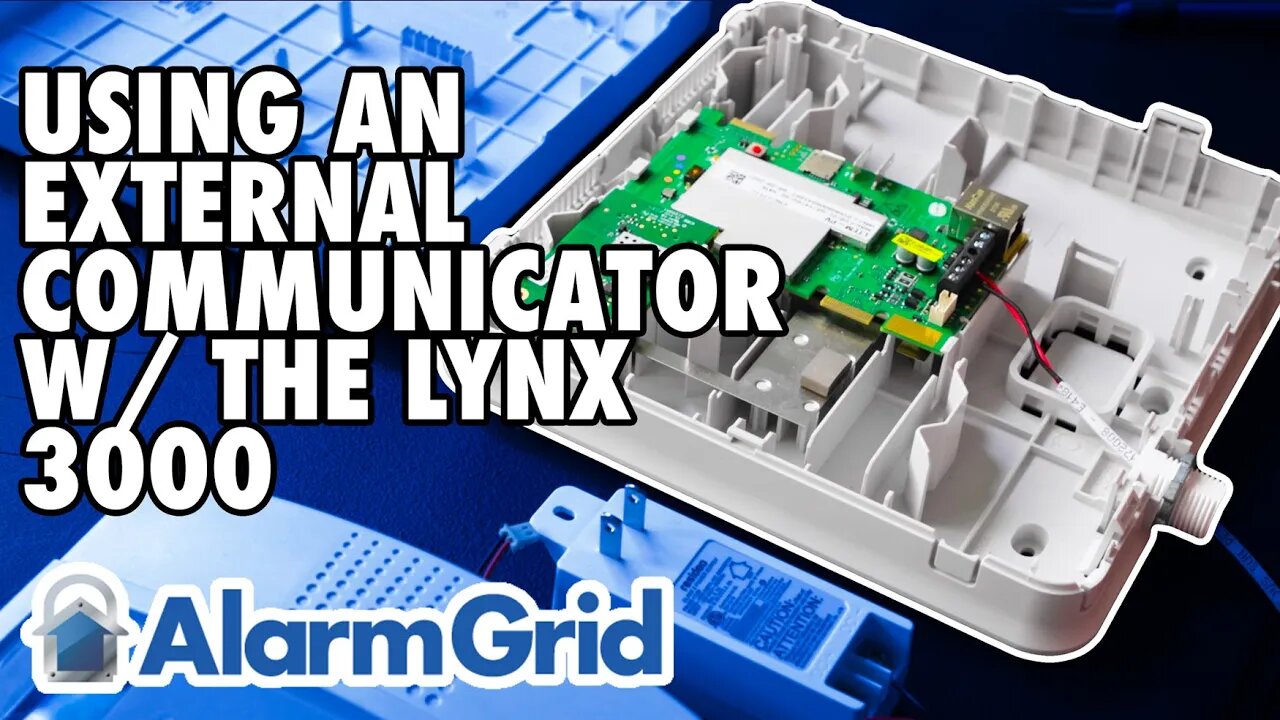
In order to make the proper connections, you will need an LYNXGSMEXTCB wiring harness. These are no longer available from the manufacturer, but you may be able to find one on eBay or a similar market. The LYNXGSMEXTCB plugs into a modular port on the L3000 main board. Depending on the version of the panel, the port is either located at the upper right side (when the panel is opened) of the board, near the hinges that connect the front of the panel to the back. Or it is located on the right side of the board as shown in this video. The cable has a keyed header, so it will only plug in using the correct orientation.
Once the cable has been connected to the panel, route the wires through the wiring access in the back. Now turn your attention to the communicator. Open the communicator and route the wires from the LYNXGSMEXTCB to the communicator through any available wiring access. In this video, we use the wiring port at the bottom of the LTEM-P Series communicator, but different communicators will have different wiring access channels. Just be sure to route the wire so that both the panel and the communicator covers can be closed properly to prevent any tamper warnings.
Because the communicator will need to use its own transformer, only three (3) wires from the L3000 panel will connect to the communicator. These are the Data In, Data Out, and Ground wires. Due to a quirk in the way the L3000 and the LYNXGSMEXTCB are made, the Black wire is actually DC Positive (+) and the Red wire is actually DC Negative (-). This means that you will not use the Black wire from the harness.
On the LTEM-P Series communicator, connect the Green wire from the L3000 to the terminal marked RX. Connect the Yellow wire to the terminal marked TX, and connect the Red wire to the terminal marked GND. If you are using a different communicator just remember that the Green wire will go to ECP Data In on the communicator, and the Yellow wire will go to ECP Data Out with the Red wire from the harness on the L3000 going to the communicator GND terminal. For full instructions, see the FAQ: https://www.alarmgrid.com/faq/how-do-i-use-an-external-communicator-with-a-lynx-l3000.
Once the wiring is completed, you can power up each device based on the instructions for that device. Connect the communicator's battery, then plug in its DC power adapter. Connect the battery to the L3000, then plug in its transformer. To register the communicator, contact your alarm dealer.
https://www.alarmgrid.com/faq/how-do-i-use-an-external-communicator-with-a-lynx-l3000
-
 6:05
6:05
Alarm Grid Home Security DIY Videos
2 years agoPROA7 or PROA7PLUS: Using Lyric Sensors
23 -
 LIVE
LIVE
Lofi Girl
2 years agoSynthwave Radio 🌌 - beats to chill/game to
194 watching -
 1:37:16
omarelattar
19 hours agoEx-Mafia Boss: I Made $8 Million Every Week Until The FBI Destroyed My Life! What I Learned...
1.58K -
 57:44
57:44
TruthStream with Joe and Scott
1 day agoShe's of Love podcast and Joe co-Hosted interview, Mother Claudia and Daughter Juliette: Traveling, Home School, Staying Grounded, Recreating oneself, SolarPunk #514
8.28K1 -
 2:32:42
CAMELOT331
2 days agoCAMELCAST 107 | CECIL SAYS | My Last Stream? Being Kicked Off Youtube
3.62K2 -
 1:16:28
Man in America
16 hours agoThe Study They Tried to BURY: Covid Shots Cause MASSIVE Spike in Cancer w/ Dr. Makis
201K46 -
 2:07:43
Inverted World Live
9 hours agoNASA Finds Strange Rock on Mars w/ Cody Dennison | Ep. 145
101K5 -
 3:29:04
TimcastIRL
8 hours agoTrump Calls For DEATH Of Democrats For Sedition, White House WALKS IT BACK | Timcast IRL
253K146 -
 24:13
24:13
Jasmin Laine
13 hours agoPoilievre Can’t Stop LAUGHING—Liberals IMPLODE After U.S. Ambassador Calls Them Out
27.8K21 -
 4:04:31
SpartakusLIVE
10 hours agoTexas FARMBOY turned WZ PRO turned REDSEC HERO turned ARC LOOT GOBLIN
62.1K