2GIG Edge: Entering Programming Mode
In this video, John from Alarm Grid shows you how to enter programming on a 2GIG Edge system. The 2GIG Edge is a 7" all-in-one color touchscreen system with WIFI and cellular communicators built in. It has a Z-Wave Plus V2 controller.
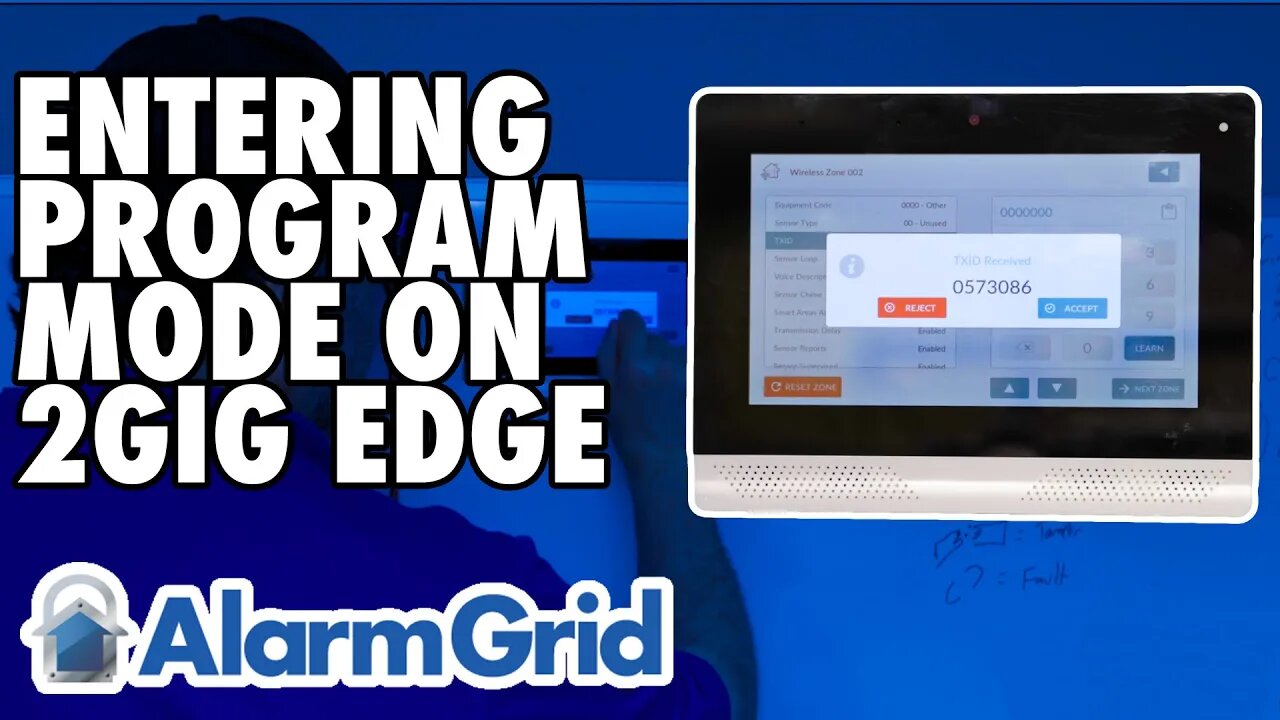
To enter programming, press the settings icon. This looks like a gear and is located on the lower right side of the Home screen. When prompted, enter the Installer Code. The default Installer Code is 1561. If you enter the Master Code instead of the Installer Code, you will enter the Master User menu, which offers different options, but panel programming will not be accessible from the Master User menu.
After entering the Installer Code, you'll be taken to the Installer's Menu. You may notice you have some of the same options given in the Master User menu, but there will be a number of options here that you don't see when you enter using the Master Code. Scroll down to the bottom row of the presented options. Press the Installer Toolbox icon. This brings you to the sub-menu containing Panel Programming.
Within the Panel Programming Menu, you will see options for Wireless Zones, Built-in Zones, Keyfobs, Keypads, Image Sensors, Network Settings, and Advanced Settings. Go through each menu option until you have configured your panel. In most cases, settings are saved automatically as you go (unless you see a Save button, which means you should manually save your work).
To exit programming, you can press the back arrow at the upper right side of each screen until you completely exit. You can also press the House icon in the lower right to return to the main screen.
https://www.alarmgrid.com/faq/how-do-i-get-into-programming-on-my-2gig-edge http://alrm.gd/get-monitored
-
 4:37
4:37
Alarm Grid Home Security DIY Videos
2 years agoQolsys IQ Panel 4: Change the Master Code
35 -
 16:11
16:11
RealMetatron
19 hours agoHasan Piker got HUMBLED in New York
7.43K5 -
 LIVE
LIVE
Viss
3 hours ago🔴LIVE - Helping Those That Need It Today - Arc Raiders!
185 watching -
 43:37
43:37
The Rubin Report
3 hours agoTriggernometry Hosts Try to Hide Their Shock at Sam Harris’ Charlie Kirk Claim
29.7K28 -
 LIVE
LIVE
SOLTEKGG
2 hours ago🟢 Live: Pro Player Returns to Battlefield 6 RED SEC
49 watching -
 LIVE
LIVE
StevieTLIVE
3 hours agoFriday Warzone HYPE: Come Chill, Chat, and Watch Me Fry
33 watching -
 1:00:57
Dr. Eric Berg
3 days agoThe Dr. Berg Show LIVE - November 21, 2025
19.9K9 -
 LIVE
LIVE
Film Threat
19 hours agoWICKED FOR GOOD + SISU 2 + LOADS OF REVIEWS! | Film Threat Livecast
73 watching -
 1:39:56
The Mel K Show
3 hours agoMORNINGS WITH MEL K - Globalists Continue to Pursue Agenda 2030-While Americans are Being Easily Distracted 11-21-25
18.5K5 -
 1:02:43
VINCE
5 hours agoDid The Democrats Really Just Commit Treason? | Episode 174 - 11/21/25 VINCE
211K220