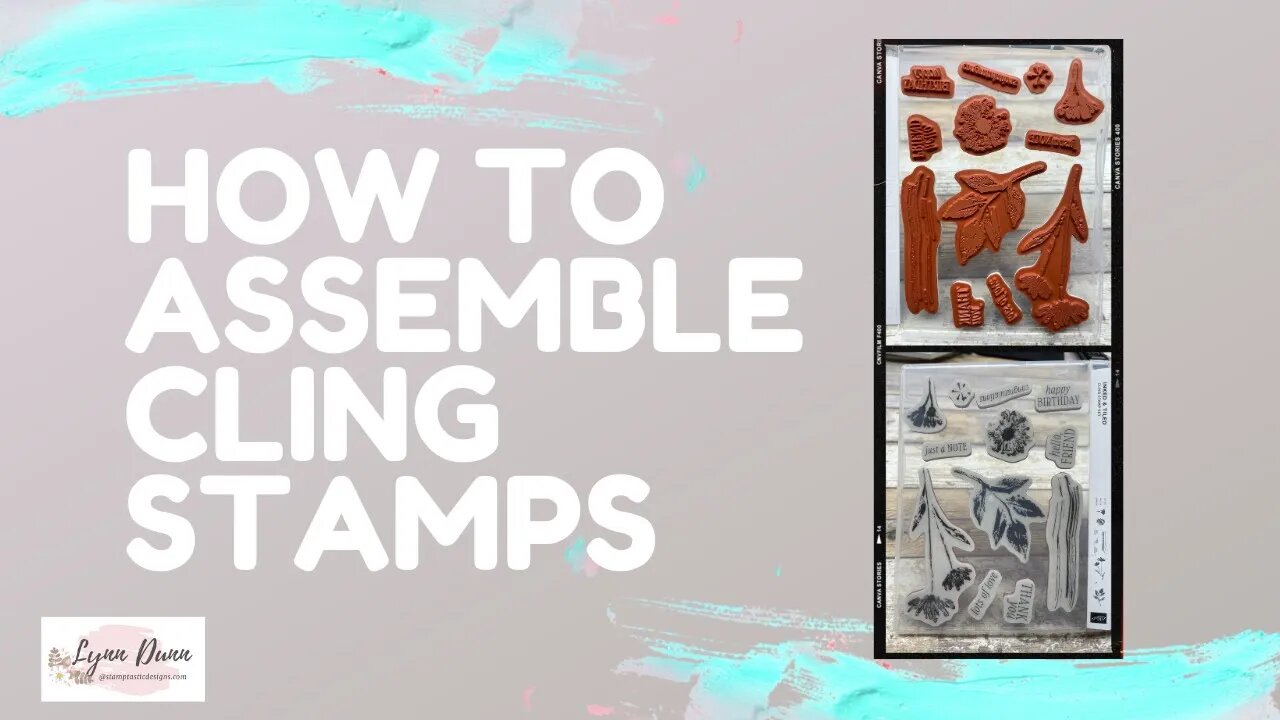
How to Assemble Your Stampin' Up! CLING Stamp Sets
2 years ago
2
This quick little video will help you assemble your Stampin' Up! CLING stamp sets. Each stamp set comes with the rubber stamps (cling) and a set of stickers.
Step 1: Remove each individual stamp from the packaging.
Step 2: Peel off the backing from each stamp
Step 3: Carefully remove the backing from each of the sticker images. The goal is to keep the stickers on the page, just remove the backing.
Step 4: Line up the stamp image with the coordinating sticker on the sheet and push it onto the sticker. Do this with all the stamps and images for the set.
Step 5: Peel off the stamps from the sticker sheet. The stickers will be perfectly applied to the stamp! Yay!
#stampinup #shorts
Loading comments...
-
 13:35
13:35
Stamptastic Designs
1 year ago $0.02 earnedHow to Create a Floating Focal Point in Card Making
431 -
 3:57
3:57
Data illusion
5 days agoEvolution Of Machine Guns
27 -
 18:09
18:09
SouthernbelleReacts
1 day ago $0.91 earnedThis Movie Crawled Into My Soul 👁 | Sinister (2012) | First Time Reaction (PREVIEW)
27.3K5 -
 28:35
28:35
marcushouse
21 hours ago $1.41 earnedSpaceX’s Wild New Plan to Launch Starship Fast… and NASA’s Booster Test Ended With a BOOM!
21.7K3 -
 LIVE
LIVE
Lofi Girl
2 years agolofi hip hop radio 📚 - beats to relax/study to
1,240 watching -
 8:01
8:01
MattMorseTV
1 day ago $11.27 earnedNYC Democrat is in HOT WATER.
55.3K107 -
 7:24
7:24
Warren Smith - Secret Scholar Society
1 day ago1 Guy Causes Entire Mob of Protesters to Implode & Get Arrested
81.5K48 -
 31:24
31:24
The Why Files
3 days agoSynchronicities | The Science Behind Your Meaningful Coincidences (STRIPPED)
55K44 -
 2:07:34
FreshandFit
9 hours agoWhy You Are Unhappy Dating!
63.8K20 -
 1:21:38
Badlands Media
1 day agoDevolution Power Hour Ep. 367
119K33