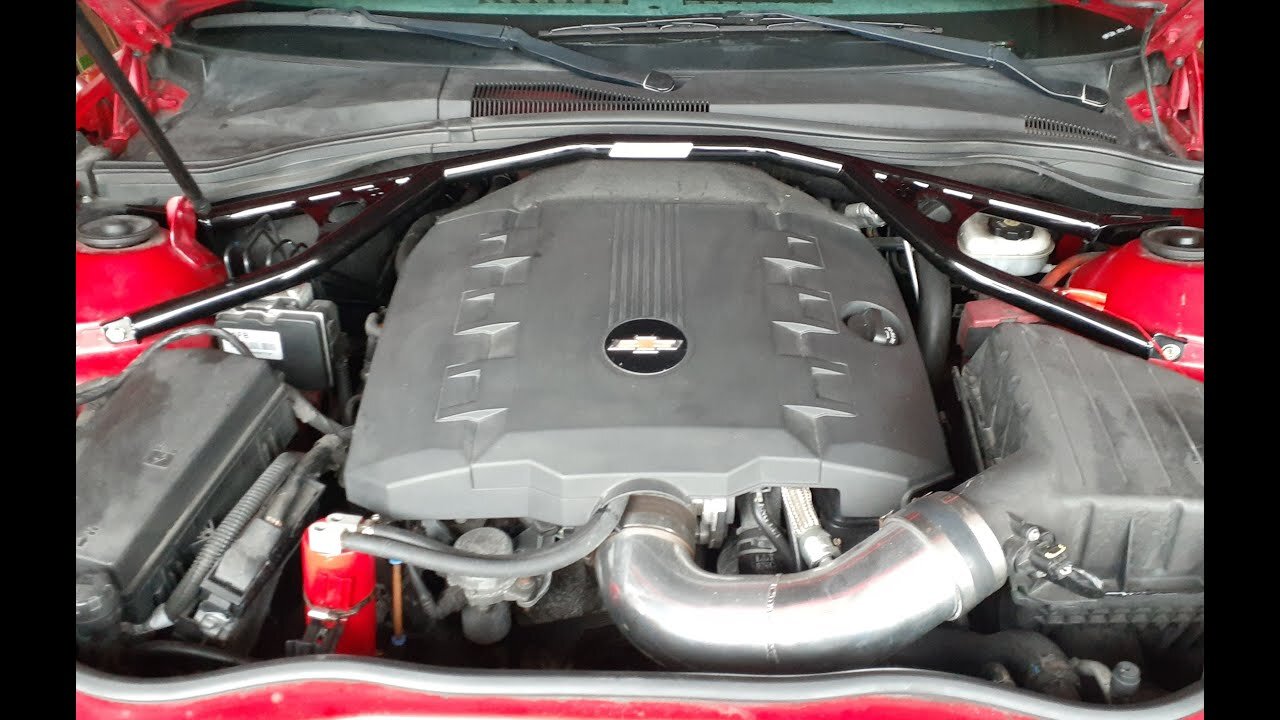
How to: 2010 Chevy Camaro 3.6L Hotchkis Strut Tower Brace install Part I (Driver Side) with struts!!
Welcome to our comprehensive tutorial on installing the Hotchkis Strut Tower Brace on a 2010 Chevy Camaro 3.6L! In this detailed video, we walk you through each step of the installation process, focusing specifically on the driver side.
Join us as we demonstrate how to enhance your Camaro's handling and stability with this high-performance upgrade. Throughout the video, we provide clear instructions, useful tips, and close-up shots to ensure you have a smooth installation experience. We cover everything from preparing the necessary tools to removing the factory components and mounting the Hotchkis Strut Tower Brace securely. Additionally, we show you how to work around the struts, ensuring compatibility and optimal performance.
By following our step-by-step instructions, you'll gain valuable insights into the proper techniques and precautions required for this upgrade. Improve your Camaro's chassis rigidity, minimize body flex, and enhance overall driving dynamics with the Hotchkis Strut Tower Brace. Don't miss Part II of this installation series, where we complete the process by installing the brace on the passenger side and provide additional tips and tricks for a professional finish. Subscribe to our channel and hit the notification bell to stay updated!
-
 LIVE
LIVE
Man in America
5 hours agoElon Says the Quiet Part Out Loud: AI Will RULE Humans, No More Money, BILLIONS of Robots
3,726 watching -
 LIVE
LIVE
The Connect: With Johnny Mitchell
6 hours agoInside The REAL Narco State: The Colombian Drug Cartels DOMINATING The Global Cocaine Trade
240 watching -
 LIVE
LIVE
MattMorseTV
3 hours ago $65.57 earned🔴Saturday Night NEWS + DRAMA.🔴
5,293 watching -
 UPCOMING
BlackDiamondGunsandGear
5 hours agoAfter Hours Armory / New Game Changing EDC Gear / Gunderware
119 -
 LIVE
LIVE
SpartakusLIVE
4 hours agoSaturday SPARTOONS || WZ to Start - REDSEC or ARC Later???
159 watching -
 19:23
19:23
Clintonjaws
21 hours ago $2.05 earnedKaroline Leavitt STOPS Trump's Meeting & Grills Reporters Leaving Them Speechless
4.04K10 -
 UPCOMING
DLDAfterDark
1 hour agoYou Keep a GUN Inside Your Draws?? Let's Talk About Your Tactical Undies
-
 LIVE
LIVE
DeadMomAlive
5 hours agoFace Paint Satur-SLAY! Fall Pumpkin! #BIRTHDAYMONTH
47 watching -
 LIVE
LIVE
RiftTV
5 hours agoThe Death Rattle Of Con Inc BEGINS | SLIGHTLY OFFENSIVE
926 watching -
 DVR
DVR
Mally_Mouse
10 hours ago🌶️ 🥵Spicy BITE Saturday!! 🥵🌶️- Let's Play: Shift Happens
58.4K1