Build Your Own Cyclone Shop Vacuum!
Dust removal and control are key in a woodworking shop, and a portable cyclone shop vacuum is one of the key tools to keep things tidy. Check out how the cyclone works and where you can get plans to build your own cyclone vacuum system!
#shopvac #dustcontrol #cyclonevacuum
Buy your DFJ T-Shirt, Cap, or Coffee Mug at https://www.dirtfarmerjay.com/shop
No matter if you have a full dust extraction system or not in your woodshop, you’ll also need a portable “shop vac” to do detail work, or to extract dust from a smaller tool that is not connected to the main dust vacuum system.
However, simply vacuuming dust into the standard vacuum is a losing proposition because the dust will overwhelm the vac filters in short order. The trick is to use a device to get most of the sawdust and fine powder dust out of the incoming air BEFORE it is expelled through the vacuum’s filters. Fortunately, it’s pretty easy to do this by using small-scale cyclone.
A cyclone unit works by separating the vast majority of dust, grit, and particulates from the incoming air stream in the vacuum system - and BEFORE the actual vacuum unit. This approach can be scaled up or down. The same basic shape of a cyclone is used in a variety of industrial settings where very large units are used, as well as compact units for medium and hobby shop settings, all the way down to the “micro” unit you’ll see demonstrated here.
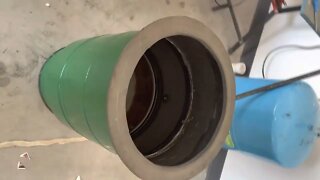
The basic principle is the same regardless of separator size. The incoming waste air stream is introduced to the cyclone “sideways” or horizontally, with a waste port at the bottom of the tapered cyclone, and the exit at the center top. When the dust-laden air enters the cyclone, it forms a tapered mini “tornado” along the inner surface of the unit. Using centrifugal force, almost all the dust and debris separate from the air and “twist” their way down into the collection bin, while the clean air rises up through the middle of the “tornado” and makes its way out of the unit and into the vacuum inlet.
Because the vast majority of the dust has been removed, the vacuum filter system has to do much less and last much longer. Also, the exhaust flow is better maintained over time with fewer changes and cleanings.
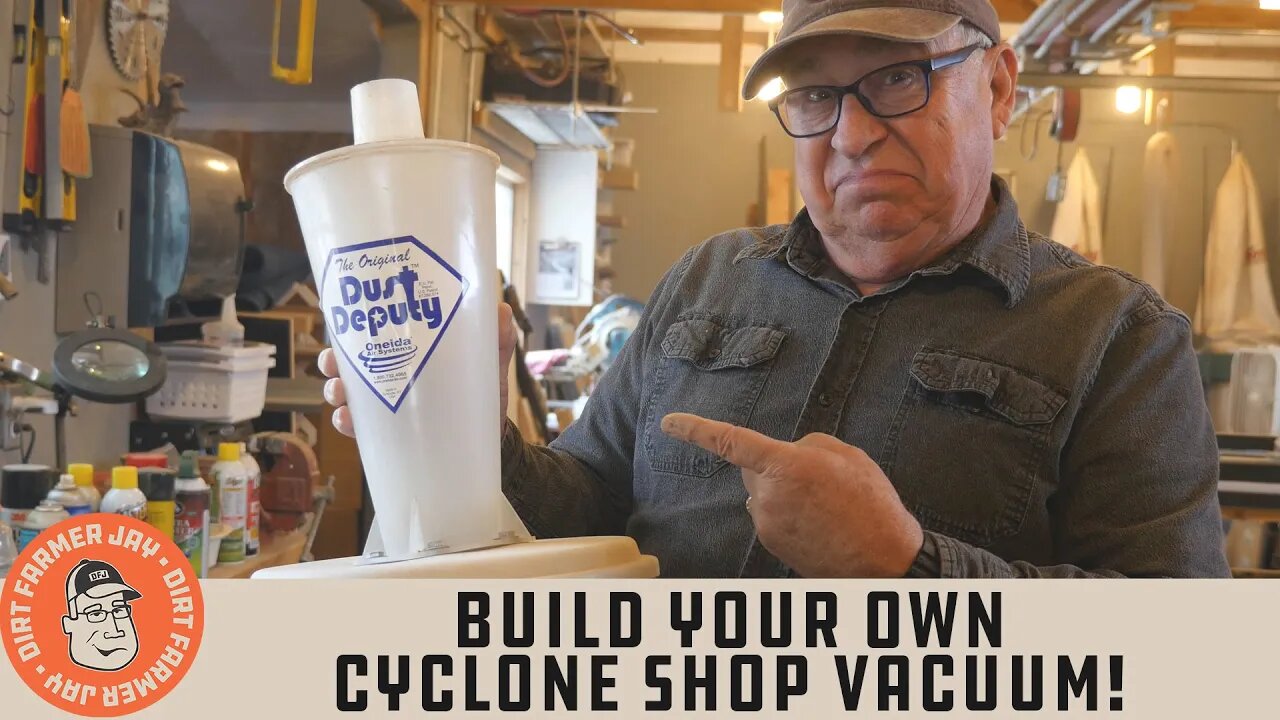
While there are several compact cyclone separator “knock-offs” out there, my favorite is the one that really fine-tuned and made small-scale cyclones readily available originally. Oneida Air invented the Dust Deputy®. It works well for a variety of dust types and can be readily installed on a variety of durable containers.
These units are made in America, take hoses and vac fittings ranging from 1.5 to 2.5 inches (38 to 64mm), and are very reasonably priced - about $40 at the time of the filming of this episode.
You can visit their website at:
https://www.oneida-air.com/anti-static-dust-deputy-diy-cyclone-separator
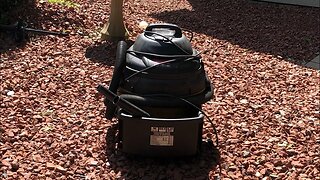
Several years ago, we built a portable combination shop vac, cyclone separator, and collection bucket. We used the plans that were available from our friends at Woodsmith® through their ShopNotes® publication. We’ve been pleased overall, but I recommend putting on bigger casters than they specify. The smaller ones don’t roll over cords and other obstructions on the floor as easily as larger wheels would.
Here is the link to get the plans:
https://www.woodsmithplans.com/plan/shop-vacuum/
I’ll warn you though. It can be mesmerizing to watch the “tornado” in the Dust Deputy®! Because it is made of translucent plastic, the cyclone action is quite visible and you can see how much dust is being captured before the air enters your vacuum.
JUST DO IT YOURSELF!
Buy your DFJ T-Shirt, Cap, or Coffee Mug at https://www.dirtfarmerjay.com/shop
Follow us on Social Media to know when we’re building projects or releasing new episodes!
Instagram: https://www.instagram.com/dirtfarmerj
Facebook: https://www.facebook.com/dirtfarmerjay
You can help support this channel by buying our merchandise or supporting us on Throne or Patreon
-
 13:35
13:35
EdwardJackson
2 years agoVacuum Chamber Build
12 -
 3:37
3:37
Ready_and_Repair
2 years agoRepairing broken shop vacuum
2 -
 0:49
0:49
The Positive Club
2 years agoBuild your own community first
16 -
 1:11
1:11
IAMACOMEBACK
2 years agoBuild your own stage
4 -
 1:11
1:11
IAMACOMEBACK
2 years agoBuild your own stage
4 -
 0:08
0:08
KOMshorts
2 years agoBuild Your Own Ebike ⚡️
4 -
 1:21
1:21
One4AllChannel
2 years agoBuild your own shipping container home
31 -
 0:59
0:59
Scramblin University
2 years ago $0.01 earnedBuild your own Camp Site - SuNeeKee - HipCamp
3 -
 0:46
0:46
Sales POP
2 years agoBuild Your Own Personal CRM #shorts #mentalhealth
-
 0:18
0:18
ChewinggummA
2 years agoBuild your OWN infrastructure!!
5