Premium Only Content

Homemade Buggy - Electric Crosskart: Limited Slip Differential Kit
Homemade Buggy - Electric Crosskart: Limited Slip Differential Kit
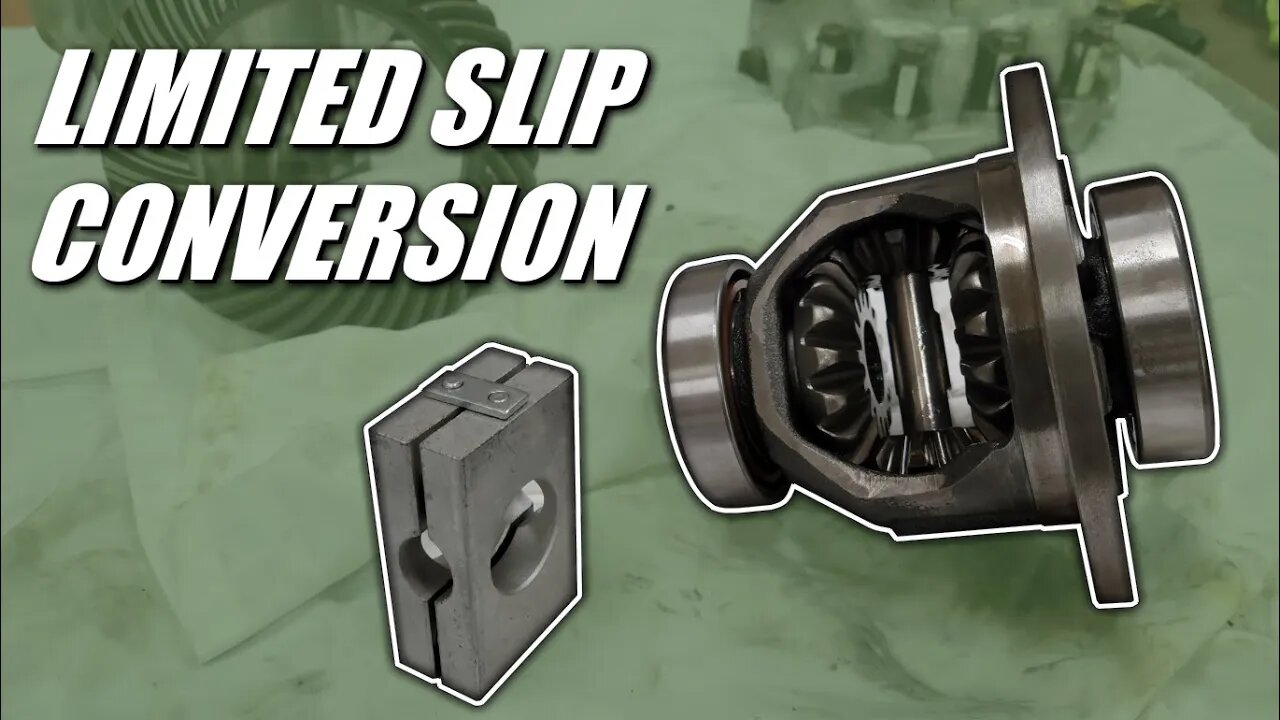
Day 1 of reassembly after painting. The first thing I needed to do before the wheels could go back on the electric buggy was to install the differential. But I needed to make a modification to it that I didn't have the chance to do in the previous drivetrain video. In this video I show how I installed a poor man's limited slip differential kit in the Honda CR-V open differential that I'm using for the electric buggy. If you don't know what a limited slip differential is or how it works, check out the video below from Lesics:
https://www.youtube.com/watch?v=WeLm7wHvdxQ
This modification works like a clutch pack to cause both rear wheels to lock up like a solid rear axle and dig in for more traction if one tire starts to spin too much or I want to fool around and do some donuts, but it'll also allow the differential to function like an open diff so that each wheel can turn at different speeds when cornering normally to prevent understeering. I had to do some light grinding and sanding on the gear faces to make things work, but only needed to remove ~0.2-0.3mm so there's no risk of weakening them, but if you do this then keep in mind that the device works by gripping against the bearing faces, so the flatter they are, the better.
LSD kit:
https://www.ebay.ca/itm/324197731749
Electric motorbike build:
https://www.youtube.com/watch?v=gYs_jYUyaoY&t=6s
Website: https://www.resystech.com
Support RST on Patreon or Youtube and earn membership perks:
http://www.patreon.com/resystech
https://www.youtube.com/channel/UCtrf6ZiE6hw3k77hGpnuQWg/join
Follow RST on Facebook:
https://www.facebook.com/RenewableSystemsTechnology
-
 LIVE
LIVE
Nerdrotic
2 hours ago $0.70 earnedInvestigations Into Earth's Moon | Forbidden Frontier #110
467 watching -
 LIVE
LIVE
Quite Frankly
7 hours ago"The Unconscious Mind & Hypnosis" ft. Giulio Anselmo 8/7/25
456 watching -
 1:06:01
vivafrei
3 hours agoTrumps Crackdown on the Census! Corruption in Canada, Eh! Tulsi's Interview! Carville's Apology!
32.2K15 -
 15:32
15:32
AndresRestart
7 hours ago $0.11 earnedTHESE Mario 40th Anniversary Rumors Make Way More Sense Than That Collection "Leak"
6.39K1 -
 2:11:45
Redacted News
4 hours agoThis is HUGE news, and neo-cons are already trying to DESTROY it | Redacted News Live
113K81 -
 30:53
30:53
Kimberly Guilfoyle
6 hours agoThe Trump Doctrine Delivers, Interview with Daily Signal Producer Virginia Allen | Ep244
28.7K14 -
 1:03:56
Sarah Westall
3 hours agoBy Design or Organic? Profound Culture Change Oncoming and Accelerating w/ Dr. Drew
29.3K3 -
 30:00
30:00
BEK TV
21 hours agoCounter Culture Mom
3.93K -
![🔴LIVE - DR DISRESPECT - [DROPS ON] BATTLEFIELD 6 BETA LAUNCH DAY!](https://1a-1791.com/video/fww1/de/s8/1/E/W/g/9/EWg9y.0kob-small-LIVE-DR-DISRESPECT-DROPS-ON.jpg) 9:03:49
9:03:49
Dr Disrespect
10 hours ago🔴LIVE - DR DISRESPECT - [DROPS ON] BATTLEFIELD 6 BETA LAUNCH DAY!
132K15 -
 2:57:45
Barry Cunningham
7 hours agoMUST SEE: PRESIDENT TRUMP HOSTS PURPLE HEART CEREMONY | AND MORE NEWS!
35.3K22