Premium Only Content

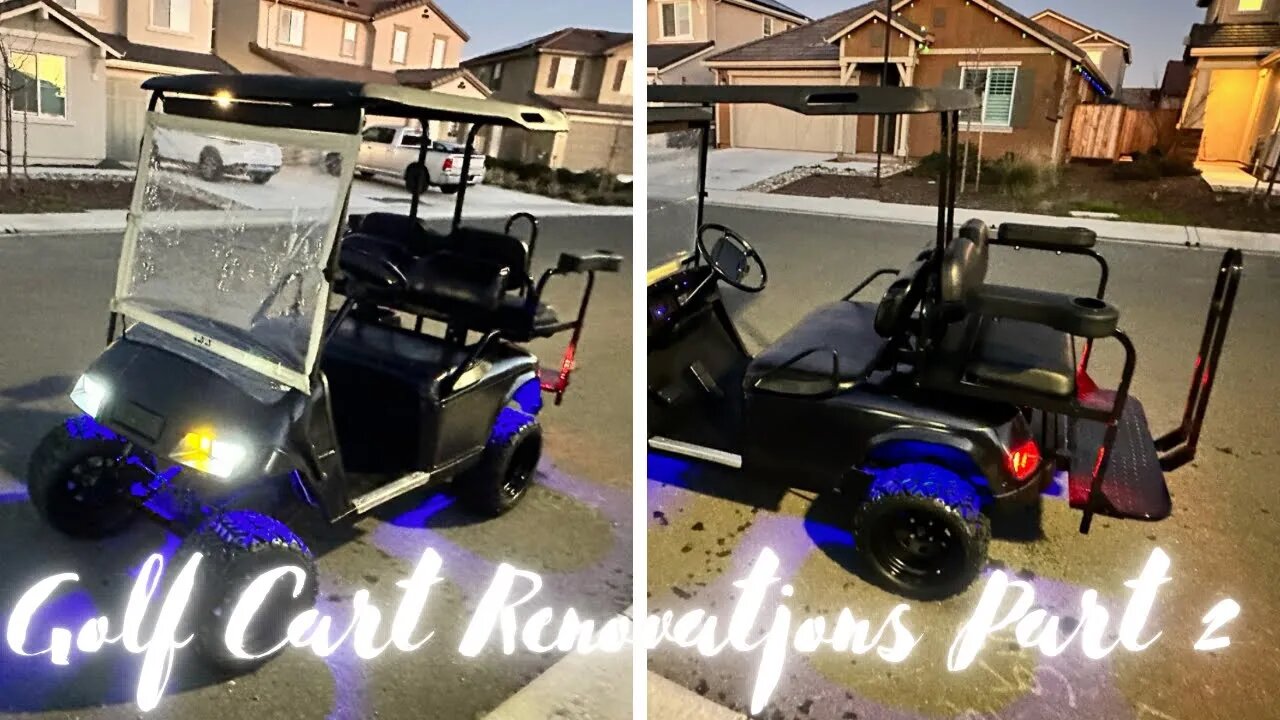
Golf Renovations Part 2 (Windshield, Painting and Back Seat Install)
This is part 2 of our golf cart renovation series. Watch Brandon complete the remaining renovations including painting, adding a windshield and a rear back seat kit. - Sarah
Part 1: Golf Renovations Part 1 (Lift Kit and Headlights Install)
https://youtu.be/rkHgsLidwDU
Vinyl & Fabric Coating Spray Paint: https://a.co/d/azOW5C3
Bondo Body Filler: https://a.co/d/hWTNISp
Spray Gun Kit: https://www.homedepot.com/p/Husky-HVLP-and-Standard-Gravity-Feed-Spray-Gun-Kit-HDK00600SG/203497812
Enamel Auto Paint: https://a.co/d/19PldYz
Watercolor Clear Coat: https://a.co/d/aFg0JWM
Golf Cart Shock Brushing Kit: https://a.co/d/aFg0JWM
Windshield: https://a.co/d/8UgVcDK
Rear Back Seat Kit: https://www.amazon.com/dp/B084MFWNF6?ref=ppx_pop_mob_ap_share
*Not intended for kids or sponsored.*
✨Stay connected with us! ✨
📸 Instagram: https://www.instagram.com/stunningmisadventures/
📌 Pinterest: https://www.pinterest.com/smisadventures/
⭐️ Facebook: https://www.facebook.com/stunningmisadventures1/
SM Posting Schedule:
▷ Wednesday’s: DIY Projects
▷ Saturday’s: Recipes
See ya next time!
Michele, Tori, Sarah & Brandon
DISCLAIMER: Woodworking and the use of power and hand tools can be extremely dangerous. We do not claim to be professionals as we are a family of DIYers. Please realize that you are responsible for understanding the safe use of your tools and techniques. Your safety is your responsibility. We do not accept any responsibility or liability for any injuries, accidents or death that may occur if you attempt to replicate our projects. Stay safe.
The Stunning Fam
-
 LIVE
LIVE
Barry Cunningham
42 minutes agoIT'S MOVIE NIGHT WITH BARRY!
3,762 watching -
 LIVE
LIVE
Akademiks
1 hour agoWar in RAT-LANTA. Young Thug vs Gunna vs Ralo vs YSL MONDO. Who Will Le Bebe Pick. FINAL CRASHOUT!
1,927 watching -
 UPCOMING
Man in America
5 hours agoThe Final Battle: Nanotech, Transhumanism & the War for Your Soul w/ Dr. Ed Group
2.91K -
 31:05
31:05
The Why Files
2 days agoPeru's Most Terrifying Mystery | The Face Peelers
13.8K38 -
 1:32
1:32
Gaming on Rumble
8 hours agoWhat is the Rumble Creator Program?!?! | Lvl UP
3.74K3 -
 LIVE
LIVE
Flyover Conservatives
20 hours ago9/11 on Steroids: What’s Coming This Fall? - Bo Polny | FOC Show
407 watching -
 LIVE
LIVE
Precision Rifle Network
6 hours agoS4E27 Guns & Grub - Let's Talk About Gas Guns
55 watching -
 59:29
59:29
The Charlie Kirk Show
2 hours agoTHOUGHTCRIME Ep. 96 — The Great Flag Burning Debate
18.1K12 -
 57:56
57:56
The Mel K Show
1 hour agoMel K & General Mike Flynn | Betrayal of a Nation: Soros’ NATO World Order | 8-28-25
9.51K7 -
 LIVE
LIVE
Joker Effect
49 minutes agoInterviewing BEN JAMMINS! A personality with over 1 BILLION gif views. Let's give him a warm welcome
433 watching