How To Lay A Hyperadobe Earthbag Step By Step
In today’s episode we are going to show you how to lay a hyperadobe earthbag step by step!
We are Douglas and Keri and we recently quit our jobs, sold everything, and in September of 2022, after a lot of prayer and research, we took a leap of faith and moved to our off grid homestead property in the high desert of Cochise County, Arizona. Follow along with us as we build our off grid homestead property from scratch with our two rebels, Willow & Zoey and our 16 y/o kitty, Boo, and our newest additions Luna and Ursa!
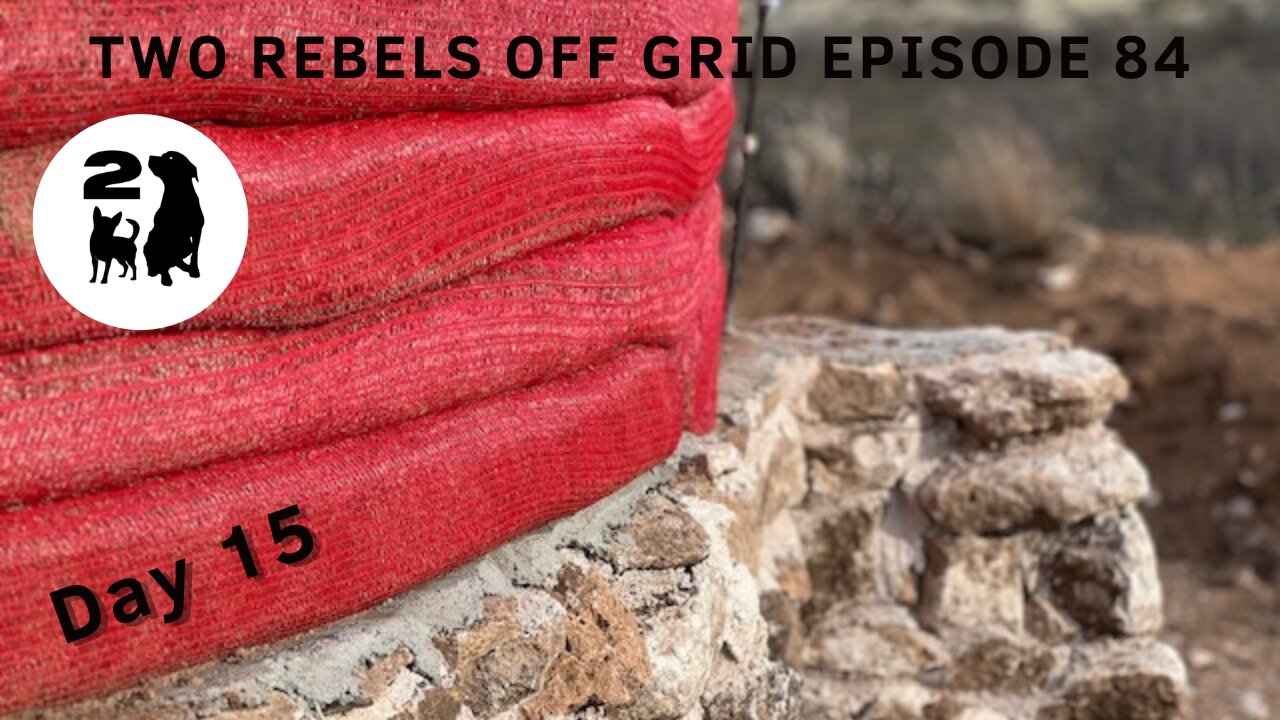
Having just finished course, or layer, number five, we found some ways to shave off a little time and know that we can now do 2 courses, or layers, in a typical day of work. Laying down hyperadobe earthbags is actually quite physical and can be especially tough on your low back. It's definitely slow going and important that you be patient with the process. This type of construction is very heavy on labor, but it is extremely economical and once it's built, it's incredibly solid…like concrete! Hyperadobe is weatherproof, rodent proof, pest proof, easy to maintain, and is efficient with heating and cooling because of the thermal mass effect of the walls. Some people living in hyperadobe in hot climates do not need air conditioning and they retain heat in the winter.
Using the tractor to do the heavy lifting makes a huge difference and it also speeds up the process significantly. Let's go ahead and break down step by step how we fill a hyper Adobe Earth bag.
1. We start by sifting our dirt for large rocks, jagged rocks, and organic material like twigs or leaves. You don't want organic material in your earthbags because as it rots and breaks down, it will leave air gaps inside of the bags. This could cause a loss of structural Integrity in those areas.
2. Next, we add 9 shovelfuls of the sifted dirt into the cement mixer and then add 3 more shovels of dirt or 3 shovels of lime.
3. Now, we add water to it as it's mixing. You don't want your mixture to be too wet because if it is, it will not hold its shape when you go to tamp it into place. Also, if the mixture is too dry, it will also not hold its shape correctly. You're going to want the consistency of a graham cracker crust mix. When you squeeze a fist of it, it should stick together decently, but you should not be able to squeeze water out of it.
4. We can fit 3 cement mixer full batches into our tractor bucket and we lift the bucket to the height we are working…it's much less tough on your back this way!
5. We tie the end of the bag off with a rebar tie and pulled the bag and all the slack up over the bucket. We secure the bag around the bucket with a big exercise band and this will keep the bag from sliding down as we fill it.
6. At this point, we fill the bucket almost to the top with the prepped soil before moving it. Once the bucket is full, you will pull the bucket along and prepare to fill it with the sifted soil again.
7. When you get to the end of your bag length, you'll tie it off We like rebar ties because they are cheap, the right length and they are really easy to work with.
8. Now you're going to tamp the bag flat and then tamp the sides square. Don't wait too long to tamp your bags, if they dry, they will be difficult to tamp or hardened into place. If this happens, you can easily wet the bag down until it's slightly damp again and then tamp it into place.
9. You will want to spray down each layer after it's been tamped before applying the next layer, or "course". The slightly damp bag will help it to adhere to the next bag that you lay onto it, allowing the clay to naturally "stick" together, which eliminates the need for using barbed wire between your courses. And that's it!
DISCLAIMER: Douglas and Keri are not professional contractors and the information contained in this video is for entertainment purposes only. Please make sure to do your own research!
OTHER WAYS TO FOLLOW & SUPPORT US
SUBSCRIBE to our website
https://outlawacresfarmstead.com/
SHOP our Merchandise
https://outlawacresfarmstead.com/
READ our blog
https://tworebelsoffgrid.substack.com
https://outlawacresfarmstead.com/
WATCH our journey
YouTube: www.youtube.com/@tworebelsoffgrid
Pinterest: www.pinterest.com/tworebelsoffgrid
Facebook: www.facebook.com/tworebelsoffgrid
Patreon: www.patreon.com/tworebelsoffgrid
Gab: www.gab.com/tworebelsoffgrid
Reddit: www.reddit.com/tworebelsffgrid
Instagram: www.instagram.com/2rebelsoffgrid
LISTEN to our story
https://www.buzzsprout.com/2107598
Music by: Licensed by Tunepocket
Video Editing by: iMovie for Windows
All the artwork for this channel are original creations by Douglas because he is an incredible artist!
-
 23:56
23:56
Two Rebels Off Grid
1 year ago $0.18 earnedWhy We Are Using Lime Plaster Over Our Cob Earthen Walls
4862 -
 11:37
11:37
tactical_rifleman
1 day agoRare Breed BEATS THE ATF | FRT-15 | Tactical RIfleman
1.42K14 -
 LIVE
LIVE
LumpyPotatoX2
37 minutes agoWhere Winds Meet: New Level Cap + Rumble Wallet - #RumbleGaming
1,245 watching -
 5:23
5:23
Memology 101
22 days ago $3.69 earnedReporter HUMILIATES Kamala Harris over "WORLD-CLASS" dodge during interview
3.82K25 -
 12:32
12:32
MetatronGaming
14 hours agoBLIGHT looks AMAZING - Trailer Reaction
6374 -
 LIVE
LIVE
The Sufari Hub
51 minutes ago🔴BLACK OPS 7 EXTRACTION MODE - LEVEL GRINDING
87 watching -
 44:51
44:51
American Thought Leaders
15 hours agoHow This Tech Can Break China’s Rare Earth Monopoly | Dr. James Tour
2.54K4 -
 9:46
9:46
MattMorseTV
17 hours ago $24.50 earnedTrump just SHUT DOWN a $287,000,000 FRAUD RING.
38.6K95 -
 LIVE
LIVE
JakRazGaming
30 minutes agoPlaying Hogwarts Legacy!! Playthrough Stream 4
96 watching -
 1:16
1:16
From Zero → Viral with AI
21 hours agoAI Isn’t Killing Work. It’s Killing the Wrong Kind of Work.
995