Vinyl Floor Installation | How to install a floating click together floor
Today we are completely changing the look of the damaged family lake house with a Luxury Vinyl Floor Installation | LVP Flooring Install over existing Plywood and NASTY Laminate Flooring. These new vinyl plank floors are very easy to install, they cut very easily, click together fast as you can move and don't require a backing pad as it is included as part of the flooring plank.
👕Rugged work wear you will like from Key Apparel! (I was decked in Key from head to toe in this video, love the stuff!) https://linktr.ee/DIYTyler
📔📙All our Digital Plans: http://bit.ly/2Mm6slA
I am not exactly sure what was wrong with people in the 80s and why they installed such nasty one sheet laminate flooring! I suppose it was all that was available and it was the rage back then just like these LVP floors are all that right now. Maybe young bucks will be making fun of this floor 30 years from now!
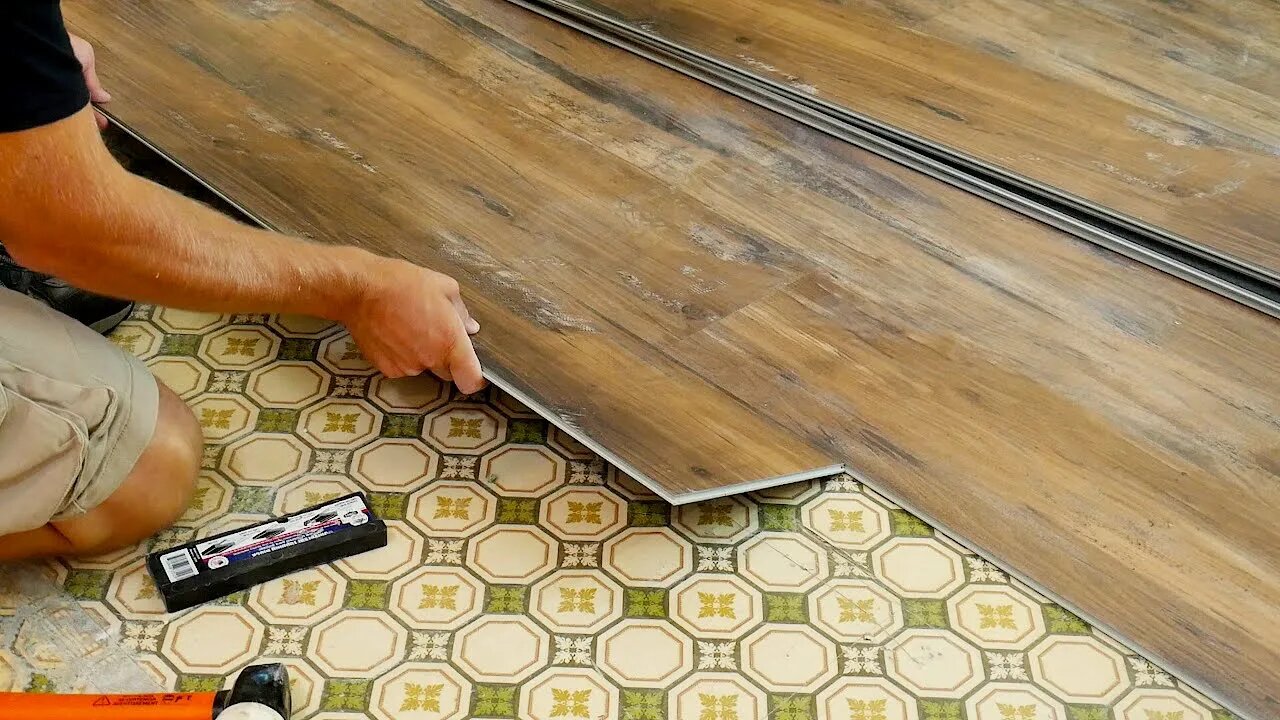
LVP Installation is very easy:
1) Measure to make sure your room is square and accommodate if needed. If you need to hide some "Unsquareness" you can break up the difference and hide it under the trim board that will go around the room after the floor installed.
2) Make sure all nails, staples and foreign objects are removed from the floor or they will not allow the floor planks to sit flat and can telegraph through the planks.
3) Make sure the sub floor is flat, you can hide a bit of unevenness under these floors but it needs to be over a large distance. We had two spots that were no good, one I needed to plane and sand down, the other we used several layers of tar paper to fill the "hole". Worked perfect!
4) Installed your first row of planks making sure to leave a 3/8" gap along the walls. Again, you can hide some of the room unsquareness here if you need to, just make sure you are not tight against any wall as this can cause the floor to pop up as the seasons change. Yes, LVP floors still expand and contract a bit.
5) Install away! We found it best to tip up the plank and insert the long grove, make sure it is tight against the previous plank, snap down and use a mallet to close the short seam. Use a tapping tool to make sure the long seam is closed tight.
6) If you need to cut or drill holes in the vinyl planks it is very easy, this stuff cuts like butter!
7) That is really it! There are a few tips and tricks in the video to help you install the floor easy and to help prevent measurement mistakes.
Some tools I like (some affiliate links):
Laminate floor Installation Kit: https://amzn.to/3laawTs
Flooring Knee Pads: https://amzn.to/3irmrKS
Mixing-Mate Paint Lid: https://amzn.to/2vXsq7P
Kreg ACS Track Saw: https://amzn.to/2OZXVVw
EDC Tool Belt: http://goo.gl/XZnWRx
Kreg K5 Pocket Hole Jig: https://amzn.to/355jfOC
Kreg Forman: https://amzn.to/2OXvyaA
Kreg R3: https://amzn.to/2OZy8gc
Switchpod (mini tripod): https://bit.ly/2JUMET1
Moisture Meter: https://amzn.to/2SwBy9i
Nail Puller Pliers: https://amzn.to/37frZUq
Miter Spring Clamps: https://amzn.to/2O8oYhv
IsoTunes Xtra: https://amzn.to/2NBu7zw
Kreg Drawer Jig: https://amzn.to/355rIBp
Fuji Q5 5 Stage Turbine Spray System: https://goo.gl/ZAJF5g
FastCap 16oz Glue Bot: http://goo.gl/X5aNZ0
FastCap 4oz Babe Bot: http://amzn.to/1KEuIUf
Swanson Combination Square: http://goo.gl/EYuGAn
Bessey Quick Clamps: http://goo.gl/jVAzeu
FastCap Tape Measure: http://goo.gl/t2lWJD
Brayer Roller: http://goo.gl/bc5uIE
3M Respirator: https://goo.gl/ZexRQd
3M Respirator Filters: https://goo.gl/92Ejh0
RIDGID Stealth Force Impact Driver: https://goo.gl/K2jKgG
Katz-Moses Dovetail Jig: http://bit.ly/DVTJig
Titebond TiteWrap: https://amzn.to/2F9AALM
Mirka 6" ROS Sander: https://amzn.to/2Eijyfv
10 Million Dollar Stick: https://amzn.to/2SrKvjS
Follow us:
https://DIYTyler.com
https://www.instagram.com/diytylerg/
https://www.facebook.com/DIYTyler/
#vinylfooringinstallation #lvpinstall #LVPtipsandtricks
-
 1:00
1:00
Wood, Metal, Everything
2 years ago $0.02 earnedA Good Base is ALWAYS Important! #ddggamers
191 -
 19:53
19:53
MetatronHistory
18 hours agoRome VS Greece - Ultimate Clash of Civilizations Explained
38.7K9 -
 LIVE
LIVE
The Big Mig™
4 hours agoThe Big Mig Show's Greatest Hits w/ Americas Future, Karmageddon, Operation Gideon,..
109 watching -
 1:32:33
VapinGamers
3 hours ago $4.46 earnedTools of the Trade - EP12 The Art of Story Telling with MidnightinTheMountains - !rumbot !music
23.6K2 -
 LIVE
LIVE
SOLTEKGG
3 hours ago🔴LIVE - Battlefield 6 - Going Pro in RED SEC
181 watching -
 LIVE
LIVE
Midnight In The Mountains™
4 hours agoThe Midnights Play Arc Raiders | Loot Scoot and KILL | Crypto Wallet up n running GO JOIN THE BETA!
94 watching -
 53:25
53:25
X22 Report
6 hours agoMr & Mrs X - Trump Is Using The Same Tactic As Our Founding Fathers To Rebuild America - EP 17
89K24 -
 LIVE
LIVE
PudgeTV
3 hours ago🟣 Arc Raiders - Gaming on Rumble | Going Topside w My Daughter’s Husband
77 watching -
 2:05:43
LFA TV
22 hours agoRUMBLE RUNDOWN WEEK 7 with SHAWN FARASH 11.22.25 9AM
148K9 -

ttvglamourx
3 hours ago $1.14 earnedGLAMOURX VS CALL OF DUTY LOBBIES !DISCORD
18.4K3