Premium Only Content

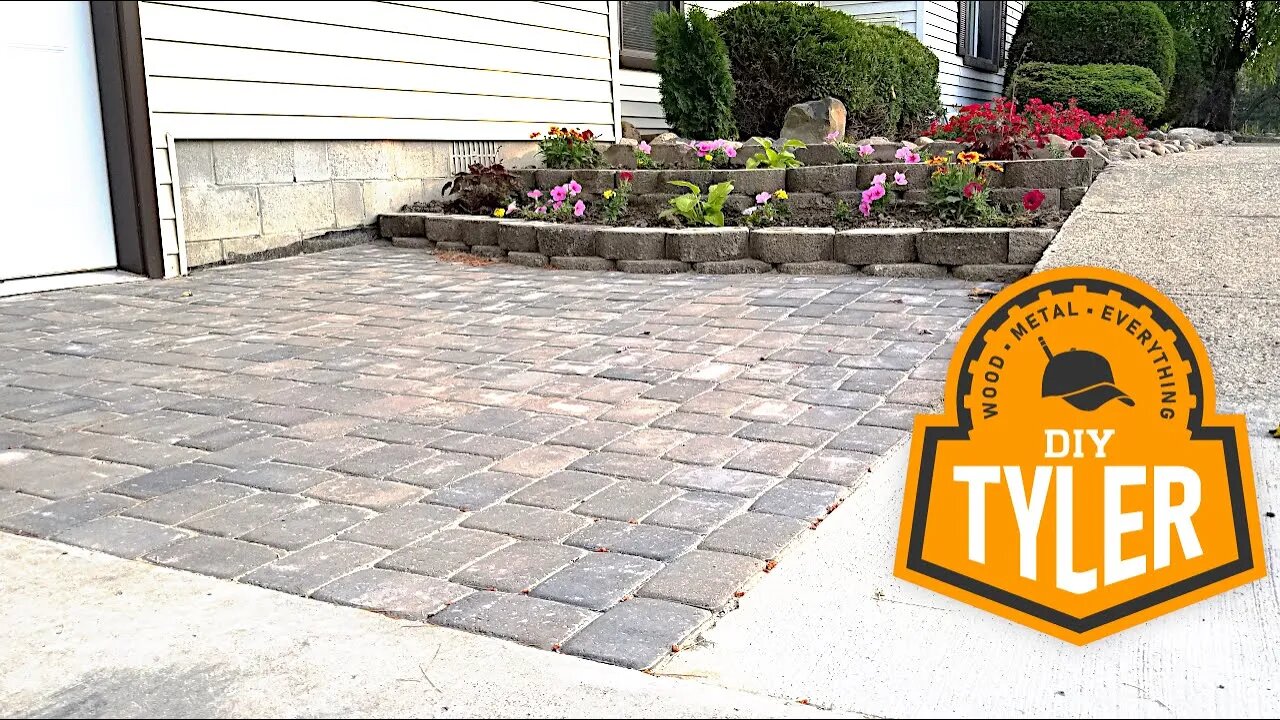
How to Lay a Paver Patio (Like a Pro!)
Thanks to Nite Ize for sponsoring this video, check out some of their innovative products https://www.niteize.com/ A few of my favorites are the Gear Ties and Rechargeable Headlamp!
Obviously this is not woodworking but it is DIY and Home Improvement! If you miss woodworking maybe one of these will be your fix!
https://www.youtube.com/playlist?list=PLsk0VxaVqgZHUdH0TKPNG5uNaXyG0eTcS
👕👕👕👕👕👕👕👕👕👕👕👕👕👕👕👕👕👕👕👕👕👕👕👕👕👕👕👕👕👕👕
Get your Shirt on!! http://bit.ly/DITylerMERCH
👕👕👕👕👕👕👕👕👕👕👕👕👕👕👕👕👕👕👕👕👕👕👕👕👕👕👕👕👕👕👕
It was always part of the big plan to finish the landscaping in front of the new addition as soon as it got warm, well it took FOREVER to get warm and dry up but the time has finally come! In this video I will share my process for laying pavers like a pro! I have laid a LOT of pavers in my time and 15 years later they are still looking great even with our harsh Michigan winters.
It all starts with the base and to get a proper 4-8 inches of 21AA crush limestone or concrete we had to dig out a fair amount of dirt in the patio area. This worked out well as we also had to connect a gutter downspout to a drain pipe that needed to be found again. All fairly easy work as I had grabbed by dads backhoe tractor to help with the digging, it made quite work of everything! Once we had the area dug out to the level we needed I laid down black landscape fabric to prevent the mud from eating all the gravel that we are about to put down. You want to make sure you have fabric that will allow water to flow though so don't use a plastic underlayment.
Used my truck to get the 21AA and was surprised how heavy the stuff is, was only able to get a half a yard at a time! Lucky I picked up an unloader that made easy work of dumping the gravel off the truck bed, some of the best money I have spent! Once the gravel was in place and spread out to a surface that we were after it was time for some serious time with the hand compactor. Another great tip is to give the surface a good soak with a hose, this will really help compact the area. After the 21AA is set it is a good idea to add some compacting sand or paver sand to make sure you don't have any bigger gravel rocks preventing a smooth surface.
Now it's time for paves! With my helpers we moved everything in place and went to town with an easy and repeatable pattern. Nothing special here, just make sure that you hold straight lines and check back with every few rows to make sure you don't stray. Angles can be easily cut with a tile saw or a concrete saw. Once the pavers are all set go back over with the compactor to make sure everything is smooth. After the first run with the compactor add some play sand over the pavers and sweep the sand into the cracks of the pavers, then go back over with the compactor and back over with the sand....you will need to do the process a few times to make sure you have the pavers set well.
Tools I Use (affiliate links):
Tool Belt: http://goo.gl/XZnWRx
IsoTunes Xtra: https://amzn.to/2NBu7zw
Hand Compactor: https://amzn.to/2JeZXgk
Workboots: https://amzn.to/2X3x8bG
Nerax Chisels: https://amzn.to/2KPVgw8
Pull Saw: https://amzn.to/31xnDoH
Coping Saw: https://amzn.to/31u3zU1
Marking Knife: https://amzn.to/2Ki5ZQv
Marking Gauge: https://amzn.to/2IIyaVp
Layout Calipers: https://amzn.to/2F6Ryuo
Diamond Sharpening Stones: https://amzn.to/2KPUC1G
12000 Grit Wetstone: https://amzn.to/31AsfKu
Flattening Stone: https://amzn.to/2Xcpdgs
Honing Stop: https://amzn.to/2KJZdlU
Glue Bot: http://goo.gl/X5aNZ0
1/8" Chisel: https://amzn.to/2XJQML7
Titebond TiteWrap: https://amzn.to/2F9AALM
Mirka 6" ROS Sander: https://amzn.to/2Eijyfv
SuperMax 16|32 Drum Sander: https://amzn.to/2QJ3iKi
10 Million Dollar Stick: https://amzn.to/2SrKvjS
Moisture Meter: https://amzn.to/2SwBy9i
-
 13:10
13:10
Wood, Metal, Everything
2 years ago $0.02 earnedTrying to Glue up the Largest Slab Table I have ever Made and Keep it Flat! EXTREME Weight!
240 -
 40:24
40:24
MetatronGaming
1 day agoSomething is REALLY Wrong with this apartment...
21.4K2 -
 LIVE
LIVE
SpartakusLIVE
5 hours agoHUGE NEW UPDATE - Aim Assist NERF, New META, New MOVEMENT || #1 King of Content
586 watching -
![battlefield 6 with the crew! [RGMT CONTENT Mgr. | RGMT GL | GZW CL]](https://1a-1791.com/video/fwe2/7f/s8/6/w/D/y/F/wDyFz.0kob.18.jpg) 2:32:26
2:32:26
XDDX_HiTower
4 hours ago $1.67 earnedbattlefield 6 with the crew! [RGMT CONTENT Mgr. | RGMT GL | GZW CL]
27.5K -
 2:28:57
Nikko Ortiz
5 hours agoVirtual Reality Milsim... | Rumble LIVE
32.8K4 -
 DVR
DVR
StevieTLIVE
4 hours agoNEW UPDATE Warzone WINS w/ The Fellas
14.9K -
 9:00:32
Dr Disrespect
14 hours ago🔴LIVE - DR DISRESPECT - WARZONE x BLACK OPS 7 - SEASON 1 INTEGRATION
149K7 -
 1:25:00
Sam Tripoli
6 hours ago $3.30 earnedPunch Drunk Sports LIVE!
22K2 -
 55:45
55:45
MattMorseTV
5 hours ago $13.78 earned🔴Trump scores 3 VICTORIES in ONE DAY.🔴
25.6K41 -
 2:28:12
Badlands Media
10 hours agoSITREP Ep. 137
25K12