Installing Radiant Barrier And The First Paneling In My Tiny House S9
Monday I started on the inside of my tiny house on wheels. This meant cutting furring strips for my walls, installing radiant barrier and then homemade paneling.
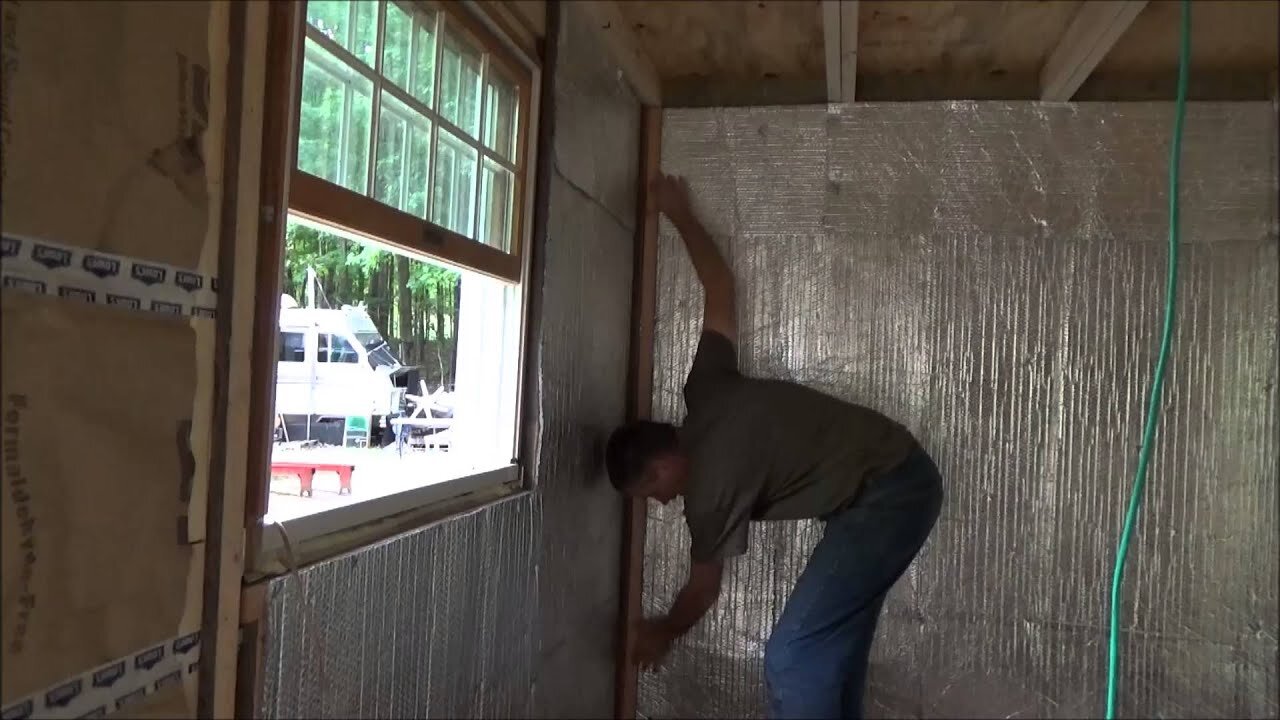
I started out by cutting some furring strips out of the scrap lumber I have from the lumber yard clean out job I did a while ago. I set my table saw for 3/4 inch wide strips and cut the 2x4s lengthwise to make my furring strips.
These I nailed to the wall studs with finishing nails. They will only hold the radiant barrier so only a few nails were needed per piece.
Then I used a stapler to attach the radiant barrier to the furring strips. I tried to keep it tight as well as possible. This is a double sided radiant barrier. This means that it will keep out the summer heat and keep in the winter heat. But it needs at least 3/4 inch of air space on each side in order to work.
That is why I have furring strips behind the radiant foil and in front of it as well.
After fastening the radiant barrier I used aluminum foil tape to tape up the seams. This gives me a vapor barrier as well.
Then I cut more furring strips to attach on top of the radiant barrier. These will hold my paneling.
I used 3 inch long screws to fasten these top furring strips to the wall studs. These screws go through both furring strips and into the wall stud behind. This will secure the whole setup onto the wall studs securely.
This also gives me a solid foundation to attach my paneling.
I had shaved off some paneling from some of the scrap lumber the other day and was itching to test it out on the walls.
I used an air powered brad nailer to fasten the DIY homemade paneling to the living room wall of my tiny house. This makes very fast work of the job and leaves no hammer marks behind.
I liked it so much that I went out and cut a few more pieces of lumber into paneling. This is aged wood which was sitting outside for about ten years in the weather. It has an amazing salmon color and look to it.
The boards look just like a fillet of salmon laying on a plate.
I am very excited and happy with the results of my tiny house so far.
Follow my daily progress on the path to self sufficiency on my off grid solar homestead.
https://www.youtube.com/user/techman2015/playlists?view=50&shelf_id=10&sort=dd
Please donate to help keep The Off Grid Project going: https://www.paypal.com/cgi-bin/webscr?cmd=_s-xclick&hosted_button_id=3TQSWXLLRZ6HW
Join The Off Grid Project and The Do It Yourself World forum and share your ideas, tips and projects.
http://www.thediyworld.com/forum
The Off Grid Project is presented by The Do It Yourself World.
http://www.TheDIYworld.com
Experiments and projects in off grid living, alternate energy, survival, hiking and more.
-
 18:58
18:58
Nikko Ortiz
15 hours agoMcMillan Tac-338 Is LETHAL
62.1K2 -
 13:36
13:36
MattMorseTV
14 hours ago $11.23 earnedTrump is GUTTING their ENTIRE SYSTEM.
17.4K44 -
 2:17:54
Side Scrollers Podcast
20 hours agoAsmongold vs DSP + Metroid Prime 4 CONTROVERSY + Disney DROPS DEI? + More | Side Scrollers
70.2K9 -
 22:26
22:26
GritsGG
14 hours ago4000th Warzone Victory! Most Winning Warzone Player!
13.8K2 -
 11:47
11:47
XDDX_HiTower
17 hours ago $2.30 earnedGZW LEVELS UP HARD WITH A PERFORMANCE AND GOL BULLSEYE
15.6K2 -
 31:59
31:59
Stephen Gardner
10 hours ago🔥TOP Dems CAUGHT in Epstein Payoff Scandal + Trump $2000 Check UPDATE!
22.5K74 -
 2:25:05
The Pascal Show
1 day ago $3.94 earned'THERE'S NOTHING TO HIDE?!' Trump SUDDENLY Urges House Republicans To Vote Release Epstein Files
15.6K8 -
 1:45:20
The Michelle Moore Show
21 hours ago'A Jaw-dropping Prophetic Word From the UFC Brawl On Saturday Night' Guest, Lt. Mark Taylor: The Michelle Moore Show (Nov 17, 2025)
29.3K47 -
 LIVE
LIVE
Lofi Girl
3 years agolofi hip hop radio 📚 - beats to relax/study to
249 watching -
 2:08:23
FreshandFit
15 hours agoDeVory Darkins Realizes Women Aren't Even TRYING To Get Married
207K101