Finished Framing And Insulating Tiny Home Wheel Well
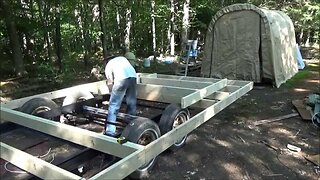
Thursday afternoon I finished framing in the wheel well of my tiny house on wheels.
After putting flashing on the bottom, I turned it over and check it on top of the wheel well area for fit. It fits nicely right in place. So I put glue on the wall studs and screwed the wheel well in place securely.
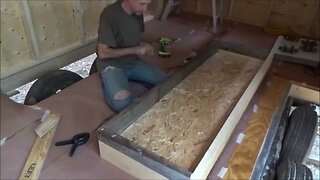
I cut some rockwool insulation to fit into the cavities and then put a bead of liquid nails on the edges of the wheel well. Then I dropped the top boards in place and screwed them on tightly.
The wheel well is not very solid. It fits very tightly to the frame of my tiny home. It is very rugged and can hold a lot of weight. This one will be under the kitchen sink which will hold my pots, pans and some canned goods.
It was gray out and dark so I was working by the light of a battery powered LED light the whole time.
It feels very good to have one of the wheel wells framed in now. I am one step closer to having my tiny home closed off to the outside.
Follow my daily progress on the path to self sufficiency on my off grid solar homestead.
https://www.youtube.com/user/techman2015/playlists?view=50&shelf_id=10&sort=dd
Please donate to help keep The Off Grid Project going: https://www.paypal.com/cgi-bin/webscr?cmd=_s-xclick&hosted_button_id=3TQSWXLLRZ6HW
Join The Off Grid Project and The Do It Yourself World forum and share your ideas, tips and projects.
http://www.thediyworld.com/forum
The Off Grid Project is presented by The Do It Yourself World.
http://www.TheDIYworld.com
Experiments and projects in off grid living, alternate energy, survival, hiking and more.
-
 29:09
29:09
TheDoItYourselfWorld
9 years agoFinished Framing The Floor Of My Tiny House On Wheels
57 -
 31:59
31:59
TheDoItYourselfWorld
9 years agoRain On My Tiny Home And Framing In The Wheel Well
26 -
 11:07
11:07
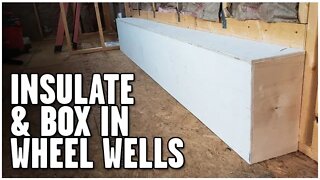
Will Mosbey
1 year agoHow To Box In and Insulate Wheel Wells | Tiny House Build
20 -
 19:35
19:35
Trampolien
1 year agoAmazing 5th Wheel Tiny House DIY Build
27 -
 10:41
10:41
Clarity Off-Grid
4 years agoHow Long Does it Take to Build a Tire Wall?
7 -
 24:31
24:31
Smoky Mountain Outpost
4 years agoS2 EP18 | WOODWORK | FINISHING THE WOODEN WALKWAY FOR THE TIMBER FRAME TINY HOME
6 -
 26:48
26:48
Will Mosbey
2 years agoHow To Build And Frame A Tiny House | Tiny House Build
32 -
 16:26
16:26
Nkulinich
3 years ago $0.11 earnedTiny House Build
6302 -
 20:31
20:31
danned
3 years agoBuilding Endwall Framing on our Solar Greenhouse, Ep3
53 -
 7:47
7:47
Tinkering and Travel
10 months agoTiny Home / Shop Build - Part 4 (Update & Insulation done)
215