Insulating Tiny House Plumbing & Much More
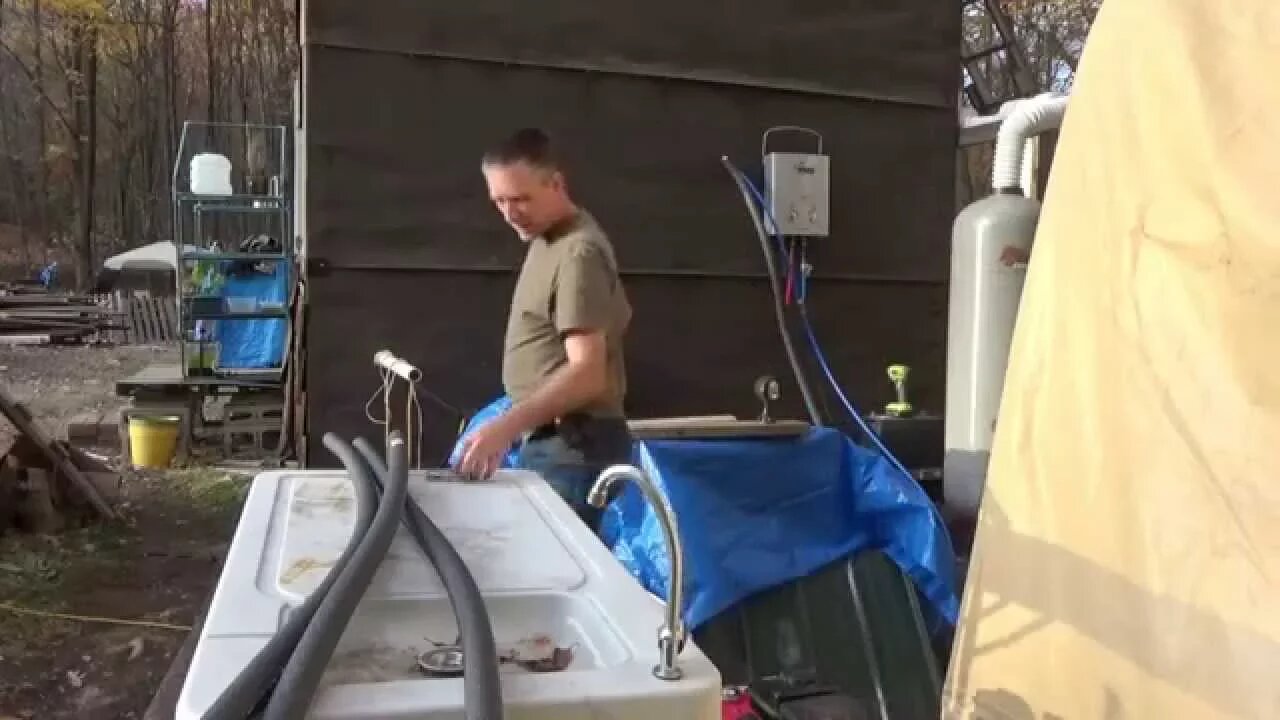
I insulated the water pipes and plumbing outside my tiny house on wheels. I am going to build an insulated shed out here but I want the pipes protected anyway.
While picking up supplies the other day for my rain water collection system I also got the pipe insulation. These are simply long foam tubes with a slit along one side and tape along the edges. You slide the foam around your pipe and stick the tape together.
This will protect the pipes somewhat from freezing.
I also worked on the bathroom shower fixtures a bit until I ran into a dead end.
I made a frame to hold the bathroom shower faucet in place. The original system requires you to simply attach the faucet to a super thin sheet of plastic and let if hang there. This would not last long term so I did not trust it.
I built a frame to hold the faucet and mounted that in my tiny house bathroom cabinet. This gives it a firm footing and will make the shower last longer.
But when it came time to fasten the faucet to the frame I found that the original retainer nuts will not fit. They are too thick. They are meant to fasten to the thin plastic and nothing else.
I have to find some thinner nuts to hold the tiny house shower faucet in place.
I mounted an LED lamp to the tiny house bathroom wall. I had previously wired it up but never mounted it to the wall. I got tired of working with portable battery powered LED lamps so I finally mounted this to the wall. It is a 7 watt LED light bulb in a nice light fixture that I picked up for free last year.
It really looks nice in there and lights up the bathroom very brightly.
Thanks for watching. Please subscribe, like and share.
Troy
The Off Grid Project
The Do It Yourself World
-
 1:17:10
Sean Unpaved
2 hours agoColt Knost Unplugged: Golf, 2025 Ryder Cup, & Football Fever
12.3K -
 DVR
DVR
Neil McCoy-Ward
1 hour agoIt’s About To Get Ugly Between JD Vance and Macron
4.94K1 -
 LIVE
LIVE
Total Horse Channel
18 hours ago2025 Gypsy Congress Championship Show | Thursday
496 watching -
 LIVE
LIVE
TheAlecLaceShow
1 hour agoJacob Frey MOCKS Catholics | Annunciation | Guests: Gordon Chang, Jim Pfaff | The Alec Lace Show
91 watching -
 LIVE
LIVE
Viss
2 hours ago🔴LIVE - Stacking Wins is What We Do! - PUBG Tactics 101
114 watching -
 LIVE
LIVE
Law&Crime
5 hours ago $1.23 earnedLIVE: Adelson Matriarch Murder Trial — FL v. Donna Adelson — Day 5
437 watching -
 LIVE
LIVE
The Mel K Show
1 hour agoMORNINGS WITH MEL K - Refusing the Lie & Standing Firmly for Truth 8-28-25
693 watching -
 LIVE
LIVE
The Shannon Joy Show
3 hours ago🔥🔥BREAKING: FOIA’d Government Docs Reveal American Citizens Might Be Worth More DEAD Than Alive. Exclusive With Sasha Latypova! 🔥🔥
241 watching -
 1:00:16
Trumpet Daily
1 hour agoTrumpet Daily LIVE | Aug. 28, 2025
10.1K2 -
 37:36
37:36
Nikko Ortiz
2 hours agoLive - Reaction Time, News, Politics, and More!
12.5K