Installing A Digital Meter On My Tristar Solar Charge Controller
This is a very simple project to install the Morningstar Tristar digital meter on the face of a Tristar solar charge controller.
Someone kindly sent me the meter to go with my new Tristar PWM solar charge controller. Up to this day I had no idea what was coming through the solar charge controller. I could switch the meter from the MPPT solar charge controller over to the PWM solar charge controller but then I would have no instant status update on that one.
My solar charge controllers are my off grid TV. I look at them multiple times per day. I have lived off the grid for 3 years now and I still look at my charge controllers and battery status many times per day. It is important to know how much power is coming into your home and how much you are using so you do not damage your batteries.
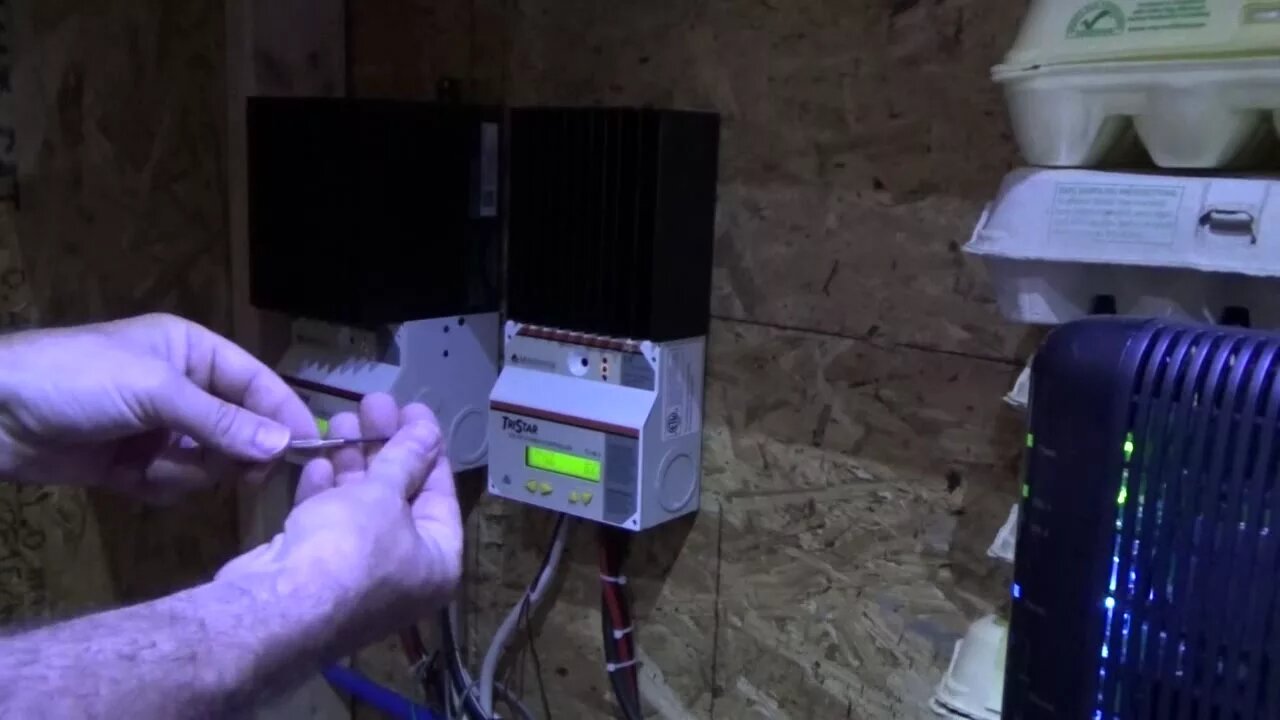
To install the Morningstar TS-M-2 digital meter you simply remove the original face plate on the solar charge controller.
Then plug in the little wire that comes with the meter into the solar charge controller. This looks like a short phone plug.
Next plug the other end of the wire into the digital meter. Plug it into the port labeled "Tristar".
Now your digital display should be on and should say "Searching...."
In a minute or so it should be showing the status of your battery bank and solar panels.
Now run the wire inside the solar charge controller so it is out of the way and screw the new digital display onto your Tristar solar charge controller.
This is the same meter for the MPPT and the PWM solar charge controllers.
Thank you to my friend for sending this to me. It will very much improve my ability to monitor my power usage here in the off grid tiny house on wheels.
Follow my daily progress on the path to self sufficiency on my off grid solar homestead.
https://www.youtube.com/user/techman2015/playlists?view=50&shelf_id=10&sort=dd
Join The Off Grid Project ™ and The Do It Yourself World ™ forum and share your ideas, tips and projects.
http://www.thedoityourselfworld.com/forum
The Off Grid Project ™ is presented by The Do It Yourself World ™.
http://www.TheDoItYourselfworld.com
-
 LIVE
LIVE
SpartakusLIVE
4 hours agoI'M BACK from Florida || The RETURN to the Spartan Stronghold
366 watching -
 1:38:45
Joker Effect
3 hours agoWhy is everything so DIFFICULT?! Cuffem, Gypsy Crusader, WVAGABOND is getting SUED?! IDuncle is mad!
16.1K1 -
 54:46
54:46
Flyover Conservatives
22 hours agoInside the Kill Zones: Kidnappings, Camps & the War on Nigerian Christians Exposed - Judd Saul | FOC Show
20.6K1 -
 1:02:35
MattMorseTV
4 hours ago $20.94 earned🔴We just got the CONFIRMATION.🔴
33.9K68 -
 1:24:52
Glenn Greenwald
6 hours agoTrump Admin Preparing for New Regime-Change War Against Venezuela; Who Should Win Anti-Semite of the Year? See the Top 10 Finalists | SYSTEM UPDATE #551
112K64 -
 23:12
23:12
Jasmin Laine
8 hours agoCBC TURNS on Carney—Poilievre Speech Goes VIRAL, ROASTS Canada’s Elites
25.6K17 -
 1:16:21
The Daily Signal
7 hours ago $4.12 earned🚨BREAKING: Tim Walz Self-Destructs Over BILLIONS in Fraud Under His Watch, War Crime Allegations
23.4K6 -
 9:08
9:08
China Uncensored
9 hours agoIndia And China Are Headed To Another War
9.68K10 -
 12:04
12:04
Vedic compatability astrology
5 hours ago"My Persian grandmother's secret beauty potions now on Amazon"
7.14K -
 12:44:59
LFA TV
1 day agoLIVE & BREAKING NEWS! | MONDAY 12/01/25
210K23