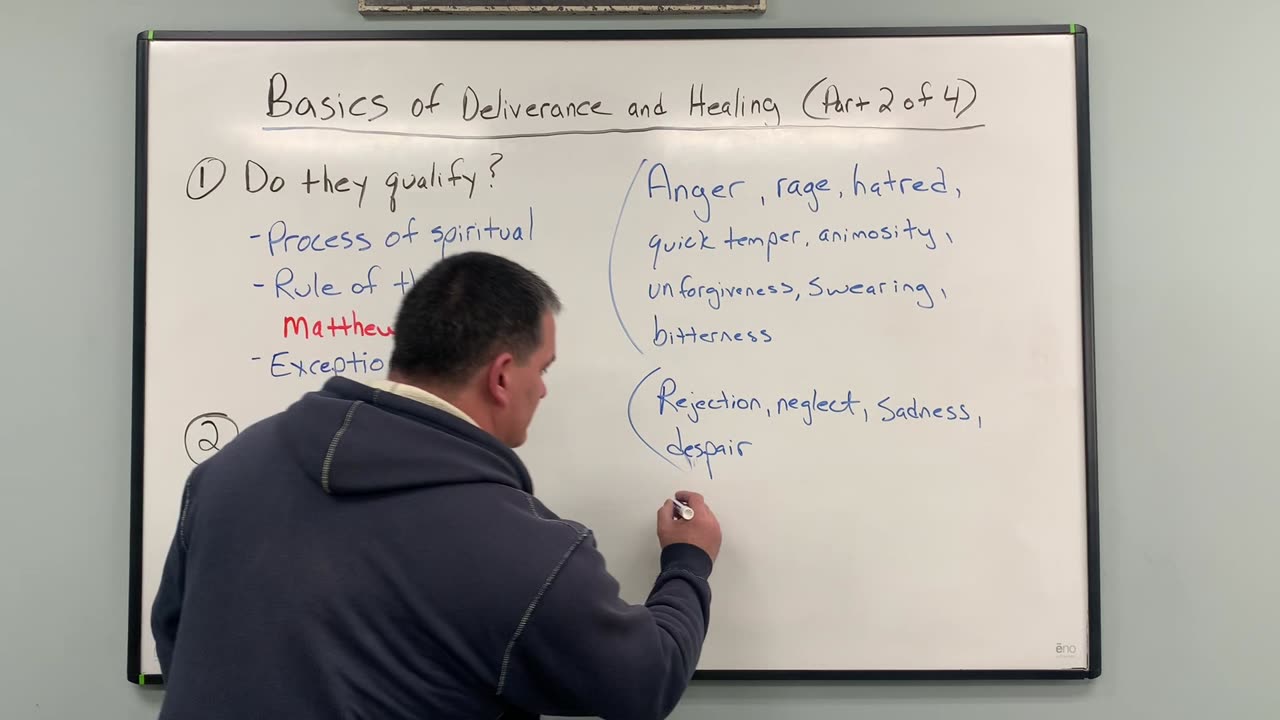
Basics of Deliverance & Healing (Part 2 of 4)
Loading comments...
-
 20:43
20:43
The Training Ground
2 years agoBasics of Deliverance and Healing (Part 1 of 4)
96 -
 36:35
36:35
KLAntoine
2 years agoHEALING AND DELIVERANCE #142
1 -
 1:52:13
Derek Prince Library
2 years agoBasics of Deliverance
557 -
 1:00
1:00
ProphetKhathazile
2 years agoDELIVERANCE AND HEALING
2 -
 55:08
55:08
Michael W Smith Teachings
2 years agoChristian Judgements 021723: Deliverance and Healing Session
167 -
 49:55
49:55
Michael W Smith Teachings
2 years agoSeminar Divine Healing Part 2 121622 Deliverance
151 -
 51:00
51:00
Michael W Smith Teachings
2 years agoSeminar Divine Healing Part 3 012723 Deliverance Session
157 -
 2:33:10
Joyful Hope TV
2 years agoBreakthrough Healing Workshop: Healing and Deliverance Prayers
17 -
 56:16
56:16
Derek Prince Library
2 years agoBasics of Deliverance Part #2
283 -
 52:42
52:42
Derek Prince Library
2 years agoBasics of Deliverance Part #1
327