Johnson Outboard Lower Unit Crack Repair/Rebuild #10
Video #10 is on the re-installation of the lower unit. What you will see being completed in this series of videos will be questionable to many. This is the second lower unit I have repaired in this same fashion, and both went on for many more years of service and saved the owners in the $1000.00 range. If you attempt this I cannot stress enough do not force anything, take your time. Please check video #1 for more of a description.
Link to exploded view of the lower unit: http://www.sterndrive.info/outboardmotor/1978_1998_v4_90_degree_.html
This video is very detailed and will also help you in assembly: https://www.youtube.com/watch?v=_2OV7sL8Zgg
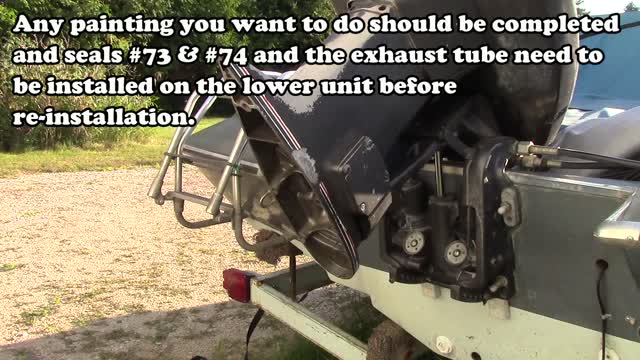
Any painting you want to do should be completed and seals #73 & #74 and the exhaust tube need to be installed on the lower unit before re-installation.
The gear shift on the lower unit must be all the way in reverse to install the lower unit in order to hook up the linkage.
See how the shift link on the lower unit faces forward or down in this case.
You will need to rotate the propeller shaft while exerting upward pressure on the lower unit during installation to get the driveshaft splines lined up, sometimes a little jiggling helps.
Too far yet to get a bolt started.
Have all the bolts laid out as you will need to hold the lower unit in the upward position until you get a bolt started.
Pull all the bolts up evenly, working from one side to the other and from front to back.
I will pick up the tempo since it’s just bolting up!
To install the shift linkage these are the tools you’ll need.
This is the bolt you’ll be installing.
This is the location of the installation.
And this is a close up with the bolt installed.
You will have to move the shift lever in the boat to align the shift cable with the shift rod prior to installing the bolt.
It helps to put the bolt in at a little upward angle in the flexible claw tool.
Got it in.
Now to get it screwed in with a long straight blade screwdriver.
Tighten it with a ¼” drive, long extension, swivel, and 7/16” socket.
Fill with marine gear lube from the drain connection and watch for oil to seep from the full plug hole.
There’s the oil.
Install the upper full level plug.
Remove the fill setup, and install that plug, and your done.
Hook up your flushing ears, turn the water on, start the engine, and test your work. Be careful there is no water to slow the propellers rotation; do not shift from reverse to forward or vice versa until the propeller stops rotating.
How about a little happy dance music? Good luck and happy boating. I hope the series was helpful!
https://www.youtube.com/@HRIservicesllcSturgeonBay
https://www.instagram.com/hri_services/
https://www.facebook.com/HRIServicesllc/
https://www.millerwelds.com/
-
 11:54
11:54
Tundra Tactical
5 hours ago $2.11 earnedIf You Laugh at These Gun Memes, the ATF Gets Your Dog – Tundy Meme Review
26.8K1 -
 LIVE
LIVE
Cewpins
1 hour agoSunday Sesh🍃weed💨420🔥!Giveaway !mj
63 watching -
 2:05:32
Nerdrotic
4 hours ago $2.02 earnedForbidden Inventions and Shadow Cover-ups | Forbidden Frontier #109
27.5K -
 LIVE
LIVE
JahBlessGames
54 minutes ago🎉THPS w/ Cheap | Variety Ting | Music too??
16 watching -
 3:21:46
Barry Cunningham
11 hours agoPRESIDENT TRUMP HAS EXPOSED BARACK OBAMA AS A TRAITOR! AND MORE NEWS!
47.9K77 -
 LIVE
LIVE
THOUGHTCAST With Jeff D.
51 minutes agoLATE NIGHT FORTNITE. Game & News Chat with Jeff D.
27 watching -
 LIVE
LIVE
Cancel This Podcast
2 hours agoDRAGON QUEST X ONLINE VERSION 5.1: SUPER DEMON WORLD WAR! - CTP Gaming!
77 watching -
 1:51:35
CasualGaming916
2 hours agoHelldivers 2 - Super Helldive
3.02K -
 LIVE
LIVE
CharleyHornsePlays
1 hour agoGaming and SUNDAY NIGHT GIVEAWAY DRAWING!! | 7.20.25
22 watching -
 LIVE
LIVE
This is the Ray Gaming
1 hour ago $0.01 earnedSunday Night PUBG | Rumble Premium Streamer
13 watching