Perfect Prints with Cura & the Ender 3 from Creality
8 Steps to better Prints with Cura & the Ender 3 from Creality. Tune in there's a Shout-Out to Angus of Makers Muse. Links Below
─
Your Ender 3 is capable of Perfect Prints & in this video I’m going to show you my personal Cura Profiles, these are profiles I use in my workflow to get decent prints. Give them a shot I think you might be impressed.
Frankie Hovers here - World Famous Flying Junkies, I have nothing but great respect for Angus over at Makers Muse the man is a pillar in the community and I would hate to have his crew of cronies show up at my door to break legs & take my printers. Okay so recently Angus was printing on an Ender 3 and I could see the Printer struggling, I cringed as he pulled a stringy sloppy mess off the bed, I thought to myself if Angus can’t do it no one can, I mean look he was plagued with so many of the same issues I went through, for me it took a good week of trial and error to get this thing to print to properly, I was having issues with stringing & extrusion, issues I didn’t seem to have on a cheaper Instone 3D Printer. More on this later. This prompted me to compare my setting between the two printers and create a mashup of the two. Also keep in mind that Cura does not provide a profile for the Ender 3, instead you're left with the CR-10 Profile which for some reason doesn’t play well on the Ender 3. Hey Cura Developers if your listening hook us up with a profile already?
Goals
Alright Let's get rockin’ our goal today is to get good prints with the Ender 3, for this we will use Cura as our Slicer.
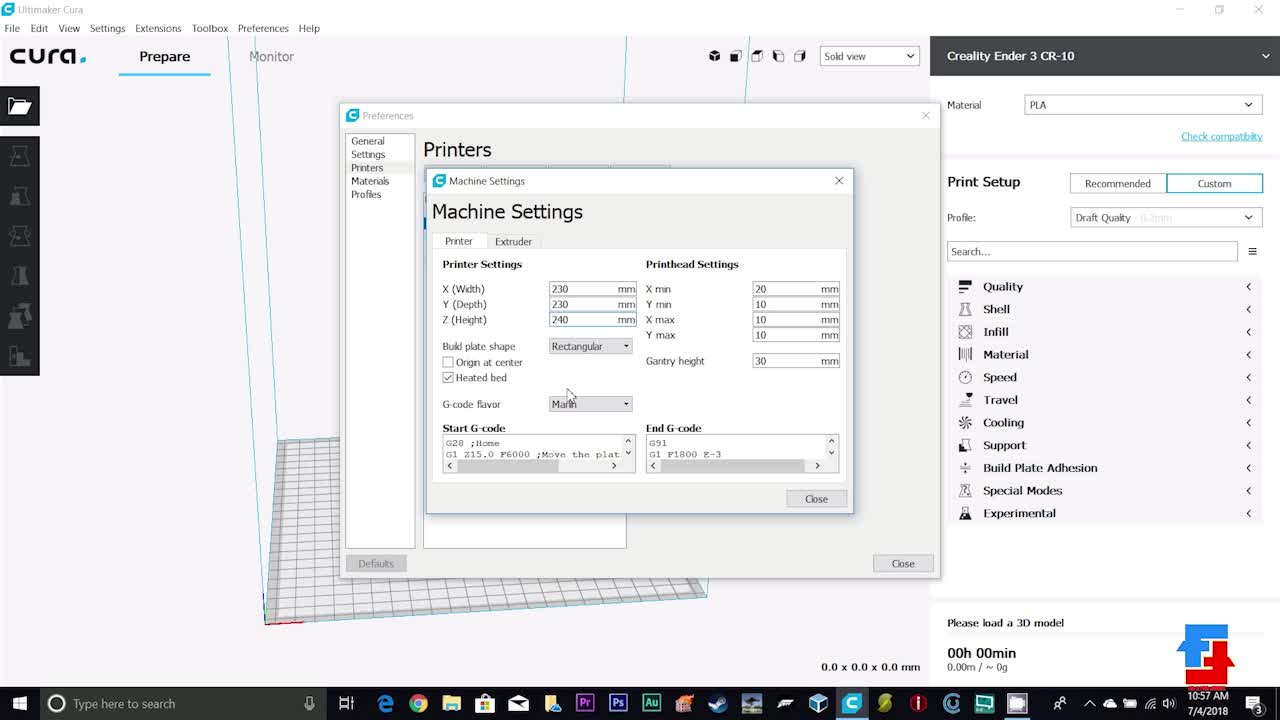
-Open up Cura and jump over to your Printer Settings here you will find various tweaks that will help you tune your 3D prints.
The 1st thing I did was try the built in profile for the Creality CR10, while it did produce a print, it wasn't a good print. I scraped the files and decided to print some old Gcode files from an Instone Branded version of Cura, this is usually bundled when you purchase a Instone Mini Printer. It proved itself and brought me 1 step closer as I could clearly see my prints had improved.
-At this point I figured there had to be some settings I could copy over to the Existing CR 10 profile, I toyed around for a week and applied what I had learned from other Ender owners. The following is what I refer to as "God Settings" for the Ender 3.
-I’m going to show you a series of screenshots go ahead pause your screen as they appear or click the link below to download the screenshots yourself.
Slideshow of Screenshots
I’m really enjoying my time here in 3D printing land, I’m not an expert, but I do hope this video helped you out and would appreciate if you subscribe and hit the bell for future updates.
Mailing Address
The Flying Junkies
585 Irene Dale Drive Casselberry Florida 32707 USA
Specifications
This Video Contains Music from: TAAvo.AM
Links to the Profiles mentioned in the video:
https://goo.gl/wWu8P9
Links to the Screenshots mentioned in the video:
https://goo.gl/jjXb3U
https://goo.gl/2XPf4y
Ender 2 https://goo.gl/sUHbfs
Ender 3 https://goo.gl/fLzEPD
-
 1:13:58
Sarah Westall
2 hours agoTimes are Changing: Big Pharma Gatekeepers Destroy Competition when they CAN w/ Kevin Trudeau
5.54K3 -
 13:51
13:51
Colion Noir
4 hours agoDid the SIG P320 Just Kill a U.S. Airman Without Anyone Pulling the Trigger?
34.1K40 -
 LIVE
LIVE
PapaFuzzyGaming
47 minutes agoalways shut the boor with hollow_phantom1
41 watching -
 LIVE
LIVE
KLW Gaming
3 hours agoKingdom Hearts Birth By Sleep Final Mix pt. 9 | FriEnDs EqUaLs PowEr
16 watching -
 LIVE
LIVE
Illyes Jr Gaming
27 minutes agoWhat a Mess!... Warzone!
42 watching -
 3:28:35
Spartan
4 hours agoSpartan - Pro Halo Player for OMiT | Scrims vs Mindfreak then ranked (probably)
8.3K2 -
 9:14:54
LumpyPotatoX2
9 hours agoKilling Floor 3 + SoulFrame: Co-op Showcase - #RumbleGaming
49.9K1 -
 2:10:50
vivafrei
10 hours agoEp. 274: Canada's War on Christianity! Is Candace Owens Cooked? SCOTUS, RFK Jr. AND MORE!
94.5K239 -
 38:09
38:09
The Mel K Show
7 hours agoMel K & Tim James | Are Hidden Dangers Lurking in Your Mouth? | 7-27-25
41.2K7 -
 3:38:01
sophiesnazz
4 hours agoTIME TO WIND PEOPLE UP !socials
13.1K1