
Fallout 3 Redesigned aka Project Beauty - White Face Fix
Many thanks to Bhut for helping me.
Disclaimer: I am not an expert on Gamebryo or FO3edit. I don't know what causes this problem, or if this is the only way to solve it. Always backup your files.
Generating Mod-Specific Face Textures: http://geck.bethsoft.com/index.php?title=Export_NPC_Face_Textures
"To generate textures only for the NPCs added by a specific mod, you may employ an undocumented method to generate the textures for specific NPCs. This is very quick — usually taking no more than a few seconds.
If the mod is not already an ESM, it must be converted to an ESM due to a limitation in the GECK. You will need to enable the mod's ESM flag by using WRYE BASH or FNVEDIT, or another similar utility.
In FNVEdit, load the plugin, select the File Header, and right-click on the "Record Flags" near the top. Tick "ESM". Then save the plugin.
In Wrye Bash, right-click on the plugin and choose "ESMify".
Load the GECK and load your plugin.
Select all NPCs added by the mod.
This is much easier when sorting by FormID (see How to Keep Track of Your Records).
Press Ctrl+F4 on the keyboard. A message box should pop up in short order saying "Done!"
You may close the GECK without saving — you do not need to save the plugin in the GECK unless you made any other changes.
If you had flagged the ESP as an ESM and want to distribute your mod as an ESP, you should reverse the ESMify process.
In FNVEdit, repeat the same steps as in 1, above.
In Wrye Bash, right-click on the plugin and choose "ESPify".
After following these steps, the mod's body textures and facial textures will have been exported to the following folders:
Data\textures\characters\BodyMods\yourespname.esp\ (or .esm)
Data\textures\characters\FaceMods\yourespname.esp\ (or .esm)
If you had renamed the file (e.g., if using Wrye Bash) to .esm but will distribute the plugin as an ESP, be sure to rename the folders to be .esp rather than .esm. Be sure to distribute these files along your mod so that your NPCs will always have perfect textures regardless of whether the end user has made any edits to their INI files."
BHUT post (all our comments): https://www.nexusmods.com/fallout3/mods/6341/?tab=posts&jump_to_comment=79715423
" OK, I can confirm that this solution works. Although there are some steps you need to take to make sure everything will work as it should.
1. First of all you need to import body and face textures from all mods with master files (.esm) that have records in 'Non-Player Character' section. So open FO3Edit and identify such mods. It doesn't matter if there are any conflicts in those records or not: if those records exist, you need to import textures from those mods. As far as I can tell mods with only .esp-plugins don't cause the "white faces" problem.
1a. For me it was Unofficial Fallout 3 Patch.esm, Project Beauty.esm and EVE.esm.
2. Now if you have some experience in using GECK chances are you've already done it. Anyway, find your GECKCustom.ini, find bAllowMultipleMasterLoads parameter and change 0 to 1.
3. Now open GECK, open File == Data..., double click on one of the .esms you've identified before, click OK. In the opened dialogue window choose 'Yes to all'. Let GECK to load the plugin, it can take some time.
4. In the left pane choose 'NPC', then mark all the records in the right pane. Yes, I know it's not optimal, but it's much easier than searching for all the records added by the mod. Then Ctrl+F4. In the opened dialogue window choose 'Yes to all'. Now you have to wait for a while. May be for a long while... Don't interrupt the process and let GECK do its thing. Eventually 'Done' will appear, but you haven't done yet.
5. Close GECK, don's save the plugin changes. If you're using Mod Organizer like most sane people do, imported textures will appear in the Overwrite folder. If you're using other mod managers, look for something similar in your mod manager's virtual data folder.
6. Now we don't need imported textures from Fallout 3.esm and .esms from official DLCs. When import is finished, inside your Overwrite folder you have 'textures/characters/' folder with two folders inside - 'BodyMods' and 'FaceMods'. Each folder contains imported textures from all .esms involved in this... undertaking. Delete all of them except 'that-mod-you've-loaded-in-GECK.esm' folder in both folders (BodyMods and FaceMods). So, now your are done importing face and body textures for the first mod. Repeat steps 3-6 for all previously identified mods. Eventually your newly created 'texture' folder will look similar to this - https://i.imgur.com/sQxssyg.png
7. As great and noble GamerPoets used to say, you want to keep Overwrite folder clean. In Mod Organizer right click on 'Overwrite' at the bottom of the mods list and choose 'Create Mod...' Name it 'Output'. Don't forget to enable it. And now you're finally done. "
-
 2:04
2:04
DCGhoul101 Channel
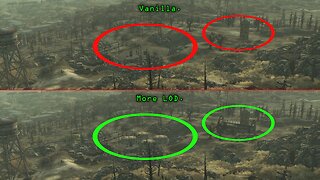
5 months agoFallout 3 Mods - More LOD by FaramH, port by Drarack
232 -
 LIVE
LIVE
Lofi Girl
2 years agoSynthwave Radio 🌌 - beats to chill/game to
308 watching -
 1:10:04
Jeff Ahern
4 hours ago $7.63 earnedThe Sunday Show with Jeff Ahern
36.7K6 -
 LIVE
LIVE
SpartakusLIVE
2 hours agoGames w/ @sophiesnazz || #1 SMOOTH Operator see SURGE in viewership after AESTHETIC reveal
142 watching -

GamerGril
3 hours agoGG Bingo | Doom Eternal With ☠ DoomGal ☠
8.8K2 -
 34:59
34:59
The Brett Cooper Show
3 days ago $29.99 earnedBig Personal Life Update & The Nepo Babies Disguised as Socialists | Episode 45
52.4K68 -
![Batman Arkham Knight [6K Reshade Mods] Hardest Difficulty ⋆ Western Retread](https://1a-1791.com/video/fww1/e7/s8/1/Z/r/V/Z/ZrVZy.0kob-small-Batman-Arkham-Knight-6K-Res.jpg) LIVE
LIVE
FusedAegisTV
7 hours agoBatman Arkham Knight [6K Reshade Mods] Hardest Difficulty ⋆ Western Retread
84 watching -
 13:54
13:54
Tundra Tactical
10 hours ago $21.90 earnedIS ACE VR WORTH THE HYPE?
72.5K6 -
 LIVE
LIVE
GritsGG
5 hours agoWe Are Winning Every Game! Win Streaking! 👑 2998+ Ws
41 watching -
 7:14
7:14
Michael Button
9 hours ago $13.77 earnedThe Most Controversial Footprints in the World
60.6K28