Premium Only Content

How to Hang a Wallpaper Border | ROMAN Products
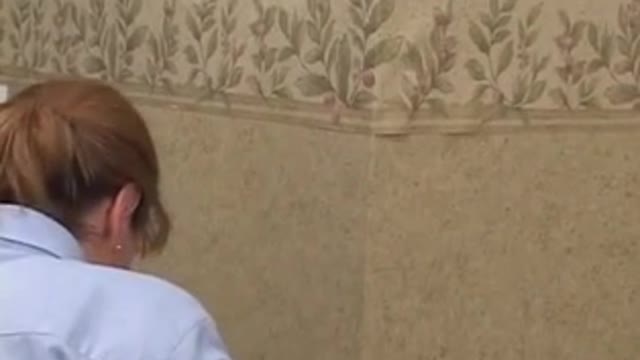
Border wallpaper offers a simple way to enhance the visual appeal of a room with just a modest amount of effort. As its name suggests, this type of wallpaper is intended to follow the borders of a wall—usually at the top, near the ceiling or just under the crown molding. Less commonly, it is hung along the bottom of the wall.
Border paper for walls typically displays an attractive design that provides a contrast with the other elements of the wall and the rest of the room. When it comes to trendy wallpaper borders, there’s certainly no shortage of options out there. Whether you’re looking for a modern wallpaper border or prefer a more antique look, it’s not hard to find a design that suits your fancy. It’s worth taking the time to explore a variety of wallpaper border ideas that can give your space—whether it’s a living room, bathroom, bedroom or the office—a dash of visual flair.
However, buying your border wallpaper is just one step in the process. Now you have to install it correctly. That can be a little tricky, especially if you’re doing it yourself. To aid our customers, ROMAN Products has made a brief video showing a simple DIY wallpaper border installation process that you can follow at home.
First, you need the right accessories. You can get high-quality wallpaper border paste at ROMAN Products. Our selection of adhesives can be found here: https://romandecoratingproducts.com/wallcovering-adhesives/.
A ROMAN wallpaper smoothing tool is helpful as well: https://romandecoratingproducts.com/product/roman-wallpaper-smoothing-tool/
If you have one available, be sure to have a 4-foot level on hand—it’s for a simple trick that we’ll explain in the video.
The installation of your wallpaper, as outlined in the video, goes like this:
1. Unroll a section of the border paper and spread it out so that the back faces up. A section about two feet long will do. You may wish to use a few towels or rags to hold the ends down as you perform the next step.
2. Using a roller, apply your ROMAN Products paste to the back of the wallpaper, making sure to spread it evenly across the surface.
3. Now we’re going to do what is called an “accordion fold,” otherwise known as “booking.” This involves gently folding over a section of wallpaper, paste to paste, without creating a crease. The purpose of this is to make the wallpaper more manageable. It’s much easier to manipulate folded wallpaper than an unrolled strip.
4. Unroll another section of the wallpaper and repeat steps #2 and #3 until you have pasted the entire strip you wish to install.
5. Now you can install the border wallpaper. You can do this by unpeeling one section at a time and applying it to the wall, starting in the corner. You will hold the bulk of the wallpaper in one hand while putting the unrolled section in place with the other hand.
6. Flatten out the just-installed section with your smoothing tool.
- Tip #1a: If you have drywall, you can use a pushpin to temporarily hold the rest of the wallpaper in place while you use the smoothing tool. The hole created by the pushpin will likely be too small to be noticeable, as the wallpaper isn’t installed anywhere near eye level.
- Tip #1b: Alternatively, you can use your 4-foot level to hold the unrolled wallpaper in place. Make sure you put a rag on the end of it to ensure that the level doesn’t cause harm to the wallpaper.
7. Keep installing the wallpaper border one section at a time until you are done.
For more information about hanging wallpaper borders, please visit https://romandecoratingproducts.com/howto/hang-wallpaper-borders/
Please check out our other videos for more tips and tricks on installing wallpaper properly. You can always find us online at https://romandecoratingproducts.com/.
-
 1:16:31
Omar Elattar
9 months agoThe Untold Story: How Vans Became a $3 Billion Dollar Shoe Empire In 75 mins
1.62K3 -
 LIVE
LIVE
Lofi Girl
2 years agoSynthwave Radio 🌌 - beats to chill/game to
250 watching -
 1:56:31
The Pascal Show
16 hours ago $1.17 earnedGHISLAINE FLIPS?! DOJ Receives SECRET LIST of 100 Epstein Associates!”
5.39K1 -
 10:17
10:17
Dr Disrespect
11 days agoIt's Time To Get Serious
178K27 -
 2:15:09
Badlands Media
22 hours agoDevolution Power Hour Ep. 375: Obama’s Orders, Ukraine’s Collapse & the Inversion of Justice
292K96 -
 2:32:03
BlackDiamondGunsandGear
12 hours agoAFTER HOURS ARMORY w/ DLD & John from GOA & FLR
26.6K3 -
 1:05:28
Man in America
13 hours agoTREASON? Obama, Hillary, and Soros in the New World Order Agenda EXPOSED w/ Mel K
86.8K76 -
 2:22:46
The Connect: With Johnny Mitchell
13 hours ago $6.07 earnedOne Man's Mission To Stop Human Trafficking: How A Billionaire Mercenary Saved Hundreds Of Children
23.8K18 -
 2:35:13
Tundra Tactical
9 hours ago $10.12 earned🔫 California Ammo Win, Sig Sauer P320 Controversy, Meme Review & Would You Rather! 🎉🔥
40.3K6 -
 16:24
16:24
Forrest Galante
6 hours ago6 Deadliest Man Eaters to Ever Exist
28.1K5