Push Fans on a CPU Cooler Radiator with Restricted Space Using 3d Printed Fan Adaptors - Part 3
This series covers how to 3d print fan adaptors to install push fans in restricted space for a top of the PC cabinet CPU cooler. A significant (10 degrees C) improvement in CPU temperature under load was the result.
I wasn't satisfied with the CPU cooling performance of my replacement EVGA CLC 280mm All-In-One RGB LED CPU Liquid Cooler with just two 140mm fans pulling air from the top and out of the case.
I previously had the same cooler mounted on the front of my case with push/pull fans on it and got good cooling. It was 5 years old (the warranty period) and I was upgrading other parts of my PC so I decided to replace this too. One reason was it was installed incorrectly with the top of the radiator *above* the CPU water block which allows any air trapped in the system to accumulate at the top of the radiator. That air can get sucked into the CPU water block which diminishes the efficiency of the cooler.
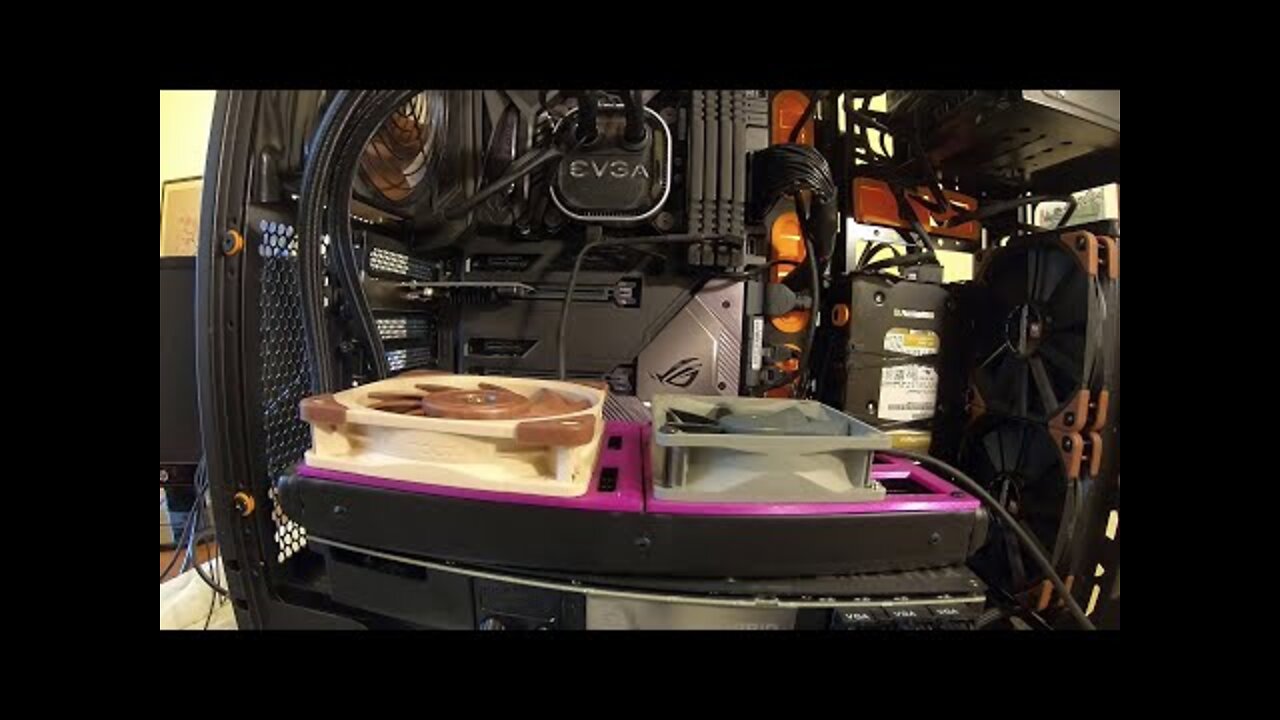
When the radiator is mounted on top of my "be quiet! Dark Base Pro 900" case, there isn't enough room for two 140mm fans pushing air up through the radiator.
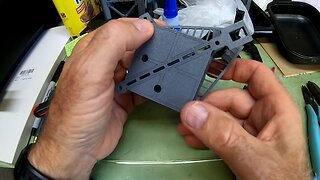
My solution was to 3d print adaptors so I could install a 120mm fan and a 92mm fan pushing up through the radiator. I designed them using OpenSCAD, and printed them on my FlashForge Dreamer NX 3d printer using YOYI PETG.
Part 1 covers explaining the problem, designing the adaptors, and 3d printing them
Part 2 covers installing the fans in the adaptors and figuring out which fans to hook up to which fan headers on the ASUS ROG MAXIMUS X CODE motherboard
Part 3 covers removing the CPU cooler radiator and installing the fans/fan adaptors on the bottom of the radiator so they can push air up through.
Part 4 covers tuning the fans using ASUS Fan Expert which comes with the motherboard and seeing how much we've lowered the temperature of the CPU under high load using CPU-Z & rendering a video with Vegas Pro.
---
Link to the 140mm to 120mm fan adaptor OpenSCAD project on Thingiverse (has the Simplify3D G-Code script used to change the wipe move to the left side of the print bed):
https://www.thingiverse.com/thing:5437803
-------------------------
Link to the 140mm to 92mm fan adaptor OpenSCAD project on Thingiverse (has the Simplify3D G-Code script used to change the wipe move to the left side of the print bed):
https://www.thingiverse.com/thing:5437805
----------------------------
I have a custom built (by me in 2017) PC powered by:
1) ASUS ROG MAXIMUS X CODE Motherboard
2) Intel Core i7-8700K 3.7 GHz 6-Core LGA 1151 Processor
3) be quiet! Dark Base Pro 900 ATX Full Tower: Orange case
----------------------------
Link to EVGA RTX 3080 ti RTX 3080 Ti FTW3 ULTRA HYBRID GAMING, 12G-P5-3968-KR:
https://www.evga.com/products/product.aspx?pn=12G-P5-3968-KR
----------------------------
Link to EVGA SuperNOVA 1000 T2, 80+ TITANIUM 1000W Power Supply (220-T2-1000-X1):
https://www.evga.com/products/product.aspx?pn=220-T2-1000-X1
--------------------------
Link to EVGA CLC 280mm All-In-One RGB LED CPU Liquid Cooler:
https://smile.amazon.com/gp/product/B01N16CAKN/
--------------------------------------------------
Link to Noctua NF-A14 PWM, Premium Quiet Fan, 4-Pin (140mm):
https://smile.amazon.com/gp/product/B00CP6QLY6/
--------------------------------------------------
Noctua NF-A12x25 PWM, Premium Quiet Fan, 4-Pin (120mm):
https://smile.amazon.com/gp/product/B07C5VG64V/
--------------------------------------------------
Noctua NF-B9 redux-1600 PWM, High Performance Cooling Fan, 4-Pin, 1600 RPM (92mm):
https://smile.amazon.com/gp/product/B00KF7S9F6/
-------------------
Link to HP Reverb G2 VR headset:
https://www.hp.com/us-en/vr/reverb-g2-vr-headset.html
----------------------
Link to USB-C card:
https://smile.amazon.com/gp/product/B089YN57TD/
-------------------------
Link to be quiet! Dark Base Pro 900 (Rev 2. - Mine is Rev 1. I bought it in 2017):
https://www.bequiet.com/en/case/1472
-------------------------
Link to ASUS ROG MAXIMUS X CODE motherboard:
https://rog.asus.com/us/motherboards/rog-maximus/rog-maximus-x-code-model/
----
Link to my review of YOYI PETG filament:
https://youtu.be/qtbpKDJL2WA
----
OpenSCAD website:
https://www.openscad.org/
-----
These are the spatulas I used to help remove the pieces from the print bed:
https://smile.amazon.com/gp/product/B075SLTY8B/
-----
Flashforge Dreamer NX on Amazon:
https://smile.amazon.com/gp/product/B07DPBRCYZ/
-------------------
Link to my Etsy Store:
https://www.etsy.com/shop/BetaCygniDesigns
---------------------
End Screen Video Acknowledgement: Cosmic Reef Video produced by NASA and the Space Telescope Science Institute (STScI).
https://hubblesite.org/contents/media/videos/2020/16/1277-Video
-
 24:40
24:40
Helping others to learn new things and experience other parts of the world.
2 months ago3d Printing & Assembly of a Complex Model: SpaceX Starship, Super Heavy, and Launch Tower - Part 16
181 -
 17:09
17:09
Bearing
9 hours agoHasan Goes NUCLEAR On Chat ☢️ ROASTED By JD Vance Over Dog Allegations 🚨
6.86K27 -
 LIVE
LIVE
The HotSeat With Todd Spears
1 hour agoEP 203: The Military "Whistleblower"
648 watching -
![[Ep 784] Election 2025: NYC is Screwed | Tatum Calls Out Kirk Conspiracists | Guest: Sam Anthony](https://1a-1791.com/video/fwe2/00/s8/1/U/Q/E/w/UQEwz.0kob-small-Ep-784-Election-2025-NYC-is.jpg) LIVE
LIVE
The Nunn Report - w/ Dan Nunn
1 hour ago[Ep 784] Election 2025: NYC is Screwed | Tatum Calls Out Kirk Conspiracists | Guest: Sam Anthony
141 watching -
 1:22:54
DeVory Darkins
4 hours agoTrump makes shocking announcement as Major ELECTION UPDATE drops after bomb threat
81.7K48 -
 10:11
10:11
Dr. Nick Zyrowski
8 days agoDoes Creatine CAUSE Hair Loss? (We All Got This Wrong)
6.85K2 -
 1:09:24
Timcast
4 hours agoZohran Mamdani BLAMES Trump Over Bomb Threats At Polling Locations
149K100 -
 3:09:52
Right Side Broadcasting Network
6 hours agoLIVE REPLAY: White House Press Secretary Karoline Leavitt Holds a Press Briefing - 11/4/25
69.8K14 -
 1:58:04
The Charlie Kirk Show
4 hours agoGo Vote! + Healthcare and the Shutdown | Dr. Oz, Baris | 11.4.2025
79.1K17 -
 58:49
58:49
The White House
5 hours agoPress Secretary Karoline Leavitt Briefs Members of the Media, Nov. 4, 2025
32.4K16