Stamp Print: Part 2
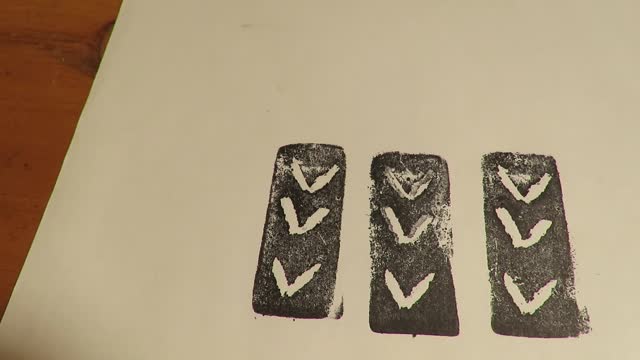
In this demonstration, I show you first how I decided to carve deeper into the eraser. I wanted to make sure that it was deep enough. I also mentioned earlier that this was like a relief printing process, meaning it was like a wood cut. Everything that is cut will be white and everything that is not cut (smooth surface of your matrix, which in our case is the eraser) will be the color of the stamp/ink pad (which in this case is black).
So putting that into consideration, there are a few different strategies that are used in order to get as much ink as possible onto the eraser (which in this case is the stamp/matrix). It seems the best is to use fingers to press evenly throughout the entire top of the eraser rather than using the heel of the hand to do it.
Consider as well, using a ruler (optional) to get your stamp/matrix design even and straight, if that is the look you are going for. Remember the more ink you have on your stamp/matrix, the better the image will come out when you stamp it. I called it "bang for your buck"--Hope this all helps you out!
Thank you! I hope you enjoyed this demonstration and most importantly I hope you enjoy this printmaking unit we are on.
Thank you again!
Look forward to seeing your work!
-
 LIVE
LIVE
FusedAegisTV
1 hour agoFUSEDAEGIS | They Put A Freakin' Blue Mage In THIS | Expedition 33 PART V
101 watching -
 LIVE
LIVE
Wendy Bell Radio
6 hours agoPoint Blank Hate
5,980 watching -
 LIVE
LIVE
MrR4ger
4 hours agoWARLOCK SOLO SELF FOUND HARDCORE - D4RK AND D4RKER HAPPY TURKEY DAY RUMBLEFAM
114 watching -
 1:33:31
Barry Cunningham
11 hours agoBREAKING NEWS: KASH PATEL AND DOJ HOLD PRESS CONFERENCE UPDATE ON NATIONAL GUARD ATTACK
96.3K27 -
 1:22:22
iCkEdMeL
2 hours ago $4.76 earned🔴 BOMBSHELL: DC Shooter Worked With CIA-Backed Unit in Afghanistan, Officials Say
3.3K1 -
 17:28
17:28
Tactical Advisor
1 day agoComparing the NEW Cloud Defensive EPL
6901 -
 LIVE
LIVE
freecastle
10 hours agoTAKE UP YOUR CROSS- THANKSGIVING MUSIC EXTRAVAGANZA!
66 watching -
 57:54
57:54
A Cigar Hustlers Podcast Every Day
6 hours agoCigar Hustlers Podcast Evere Week Day w/Steve Saka
81 -
 1:09:06
Mike Mac - Say Something
16 hours agoSAY SOMETHING w/ MIKE MAC
41 -
 30:15
30:15
DeVory Darkins
10 hours agoTrump drops NIGHTMARE NEWS for Afghan refugees after National Guard Shooter is identified
149K170