#4 Reverse Tie Hair minnow w/ easy listening music
How To Tie A Craft Fur Minnow
Hook: Straight eye, short shank streamer or saltwater streamer #6 to #1/0
Thread: White
Tail: Craft fur, colour to match baitfish
Body: Ice Dub, UV pink or red
Flash: Flashabou or Crystal Flash
Upper wing: Craft fur, colour to match the dark, dorsal surfaces of the baitfish
Lower wing: Craft fur, colour to match baitfish
Eyes: Molded, 3D eyes
Tying Instructions
Cover the hook shank with thread to just a wrap or two past the hook point. Prepare a sparse clump of craft fur. Tie in the prepared craft fur just back from the hook eye and secure down the shank, forming a tail that is two to three times the length of the hook.
The Craft Fur Minnow: Step 1.
The Craft Fur Minnow: Step 1.
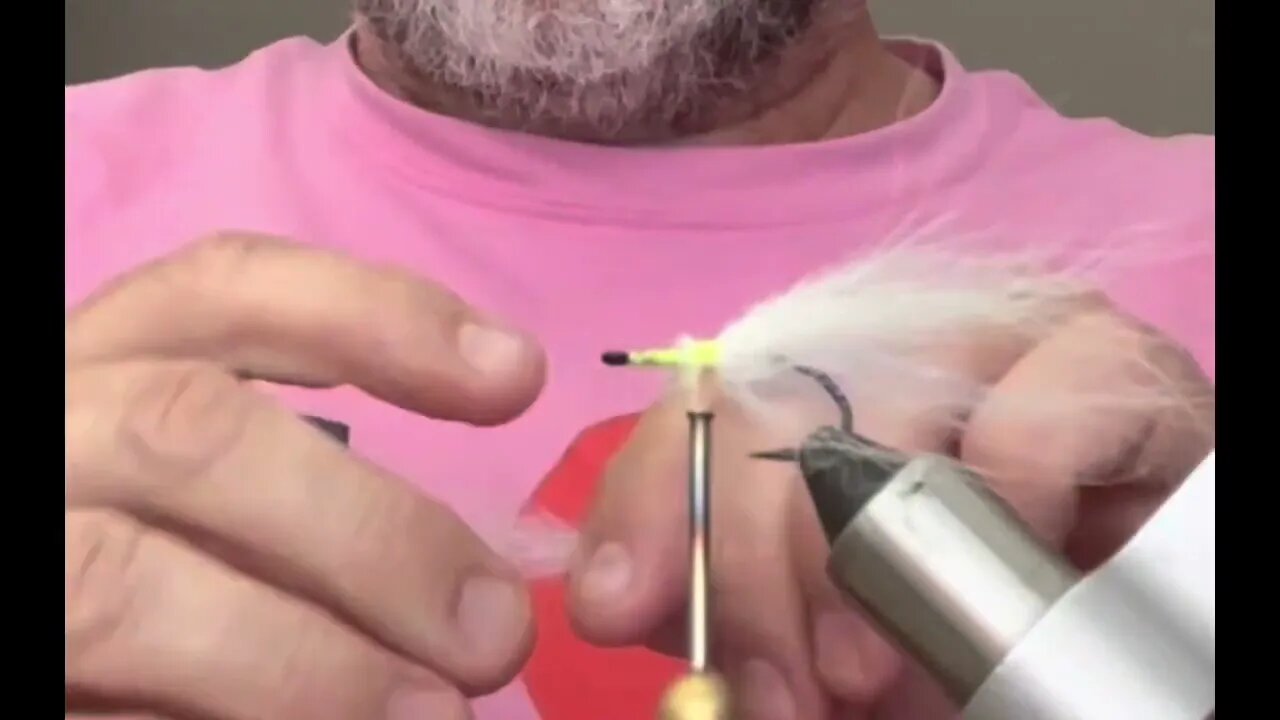
Prepare a sparse clump of craft fur for the upper wing, similar in volume to that used for the tail. Secure the prepared wing one hook eye length back from the eye on top of the hook, with the tips pointing forward past the hook eye. The upper wing should be approximately the same length as the tail, two to three times the shank. Once initially tied in, massage the fibres so they occupy the top half of the hook. When you are happy with the wing, secure it in place using additional thread wraps. Trim the excess butt material.
The Craft Fur Minnow: Step 2.
The Craft Fur Minnow: Step 2.
Prepare a similar amount of craft fur for the lower wing as you prepared for the upper wing. As with the upper wing, tie in the lower wing just back from the hook eye along the underside of the shank, with the tips pointing forward. The lower wing should be the same approximate length as the upper wing, two to three times the shank. Once you have initially tied the lower wing in place, massage the fibres, so they occupy the top half of the hook. When you are happy with the wing placement, secure it using additional thread wraps. Trim the excess butt material.
The Craft Fur Minnow: Step 3.
The Craft Fur Minnow: Step 3.
Dub a slender body from the base of the tail to the rear of the wings. Tie in six to eight strands of Flashabou, Crystal Flash or a mixture of both directly behind the wings, so it flows back over the body and tail. Stagger cut the flash, so it shimmers throughout the length of the fly. Leave a few strands slightly longer than the tips of the tail.
The Craft Fur Minnow: Step 4.
The Craft Fur Minnow: Step 4.
Work the tying thread forward to the hook eye. Sweep and hold the wings back over the tail and hold them in place. Build up a neat, tapered thread dam to push the wing fibres back over the hook. Whip finish and remove the tying thread.
The Craft Fur Minnow: Step 5.
The Craft Fur Minnow: Step 5.
Work a small amount of thin-viscosity resin into the head area of the fly. Massage the UV resin over the head area and slightly back into the wings. Hold the wings back to form a tapered body profile to match the baitfish you are trying to suggest. Thin and narrow or perhaps taller? Once you are happy with the wing placement and overall shape of the fly, cure the UV resin to hold the wings in place.
The Craft Fur Minnow: Step 6.
The Craft Fur Minnow: Step 6.
Glue a pair of eyes along each side of the head area, just back from the hook eye. Add thicker-viscosity UV resin between the eyes on both the top and bottom of the head area. Cure the UV resin. Place a drop of UV resin on each eye and work it just over the eyes’ edges to encapsulate them in resin. Cure the resin to lock them in place. If desired, use a permanent marker to add vertical marks to your fly or an additional thin dark strip to the upper wing.
The Craft Fur Minnow: Step 7.
The Craft Fur Minnow: Step 7.
#flyfishing #fishing #flytying #catchandrelease #trout #troutfishing #flyfishingaddict #browntrout #fish #fishinglife #flyfishingjunkie #flyfishinglife #rainbowtrout #flytyingjunkie #outdoors #troutbum #flyfishingnation #nature #bassfishing #flytyingaddict #fishingtrip #flugfiske #flyfishingphotography #onthefly #pesca #angler #flyfish #dryfly #fisherman #fluefiske
-
 2:12:43
TimcastIRL
9 hours agoErika Kirk Addresses Public After Charlie Kirk Assassination, Live Coverage | Timcast IRL
400K379 -
 30:59
30:59
The Charlie Kirk Show
8 hours agoCharlie Kirk's beloved wife, Mrs. Erika Kirk addresses the Nation.
551K1.53K -
 1:53:28
Man in America
16 hours agoLIVE: Assassin Arrested? Civil War? Are We Being Played?? | LET'S TALK
102K105 -
 2:10:33
Badlands Media
13 hours agoOnlyLands Ep. 24: Processing Tragedy, Cancel Culture, and the Next Spark
66.7K27 -
 2:27:53
TheSaltyCracker
9 hours agoGot Him ReeEEStream 9-12-25
283K353 -
 52:11
52:11
Sarah Westall
10 hours agoBread and Circus Keeps you Financially Ignorant – Its Better for the Elites w/ Chris Russo
70.8K8 -
 3:49:08
I_Came_With_Fire_Podcast
17 hours agoFriday Night Live Fire
64.2K6 -
 1:20:39
Flyover Conservatives
19 hours agoFrom Demonic Deception to Divine Direction: Sid Roth’s Radical Encounter With God | FOC Show
67.5K1 -
 2:50:58
Chrissie Mayr
7 hours agoChrissie Mayr Reactions to Charlie Kirk, Liberal Celebrations, and More
59.9K34 -
 1:05:46
AlaskanBallistics
7 hours ago $4.00 earnedRemembering Charlie Kirk
55.1K8