Premium Only Content

Series1 Pro 3D Printer Extruder Fan Replacement and X-cable Support
I missed filming the actual fan replacement but it's really simple, unplug the cable from the circuit board and remove 2 screws that hold the fan to the back side of the extruder heat sink. Secure new fan with the 2 screws and plug the connector back into the circuit board. Full details in the video below:
https://youtu.be/SMy5o7pG70I
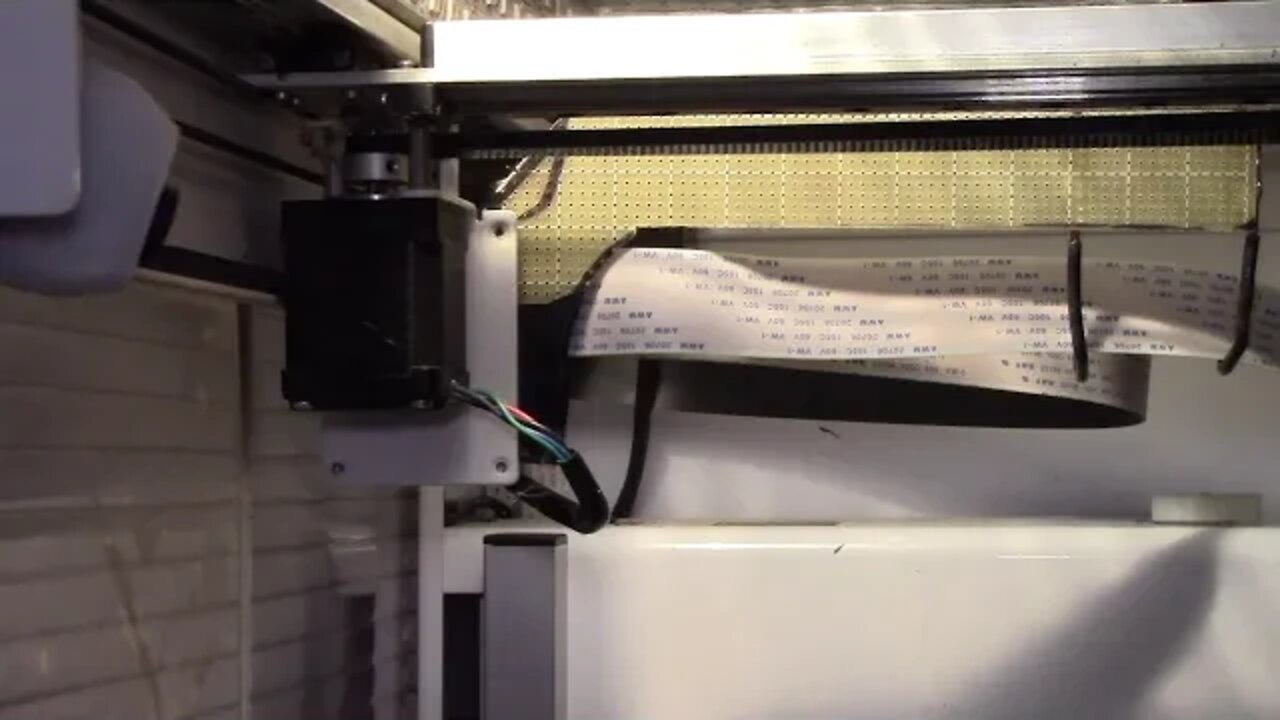
I had previously had one X-cable fail a few years ago. While I like the design with all the hot end wiring coming through that flat flex cable, the implementation was not well thought out. I felt that adding a support for that cable would greatly reduce the stress on the cable and connectors.
I designed a cable support that fit in between a 1/8" gap between 2 circuit boards where the X-axis stepper motor sits. There are 2 standoffs about 2-1/16" vertical and 1-1/2" horizontal spacing onto which the support fits. There's 1/4" dia. half holes for the top and bottom standoffs that hold the support in place. I cut a few prototype pieces out of card stock, trimming the lower end until I got a good fit.
The support was cut from 8" wide perf. board. The bottom of the support is even with the top of the circuit board and then extends up about 1" higher. The fiberglass PCB material is stiff and resists warping from heat and has the copper plating on the back side that makes it easy to attach the wire hooks to. I used some 14AWG solid copper wire, stripping 1" for soldering to the PCB and leaving the rest insulated. Then bend the hooks back and up to just support the flat flex cable in a straight line. Finally wrap the end of the support in electrical tape to insulate it and also to make for a tight fit into the gap.
More to come...
Subscribe for more content like this
Comment, rate, share & click the bell icon
And as always, thanks for watching
Intro/Outro:
Louisiana Fairytale by Austin Rogers
https://web.archive.org/web/20170402222425/http://drfiddle.com/show_tune.php?id=94
-
 LIVE
LIVE
Nerdrotic
1 hour agoReconstructing the Superhero | FNT Square Up - Nerdrotic Nooner 457
1,179 watching -
 1:00:13
The Dan Bongino Show
5 hours agoThe FBI Warns Of A Grave Threat, But Will Anyone Believe Them? (Ep. 2399) - 01/13/2025
536K742 -
 1:23:10
The Rubin Report
2 hours agoMark Zuckerberg Makes Joe Rogan Go Quiet with Never-Before-Told Details of Biden’s Lies
35.1K30 -
 LIVE
LIVE
Grant Stinchfield
49 minutes agoBe Wary of Viral CA Wildfire Conspiracies... But the Anomalies Can't be Ignored!
128 watching -
 LIVE
LIVE
The Dana Show with Dana Loesch
36 minutes agoThe Dana Show | 1-13-25
615 watching -
 LIVE
LIVE
The Shannon Joy Show
4 hours ago🔥🔥The LA Fires & OMNI War. The Enemies Are Within & The Rules Have Changed.🔥🔥
376 watching -
 2:58:58
Wendy Bell Radio
7 hours agoStone Cold Incompetent
64.1K76 -
 LIVE
LIVE
LFA TV
23 hours agoHUNTERS NOW THE HUNTED! | LIVE FROM AMERICA 1.13.25 11am
5,942 watching -
 1:24:35
Caleb Hammer
2 hours agoMost Childish Couple I've Ever Had On Financial Audit
13.8K1 -
 1:08:35
Graham Allen
4 hours agoNEWSOM IS TO BLAME! Fires Spread As Dems Blame Trump! + Biden Claims He Could Have “Beaten Trump”
72.2K23