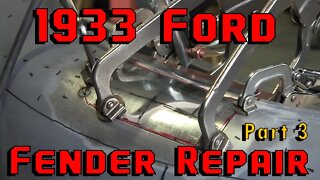
33 Ford Fender (Part 3) The Patch Panel
https://www.proshaper.com
Our Amazon Storefront:
https://www.amazon.com/shop/proshaper
33 Ford Fender (Part 3) The Patch Panel
This video has it all! Now that the Ford fender wire has been repaired, it's time to create the patch panel. Now when we weld the patch panel in, we want to make sure that the fender matches the other fender. To do this Wray fabricates a bar that fits perfectly inside the good fender and then bolt it into the fender we are fixing. This ensures that when we weld, it won't shrink back into itself.
The thickness of the steel is 19 gauge. Wray cuts out a piece about a half inch larger all around the flexible shape pattern to give him a little cheat room. Wray created another Gauge going across the fender to make sure it flows correctly from front to back and left to right.
Using all the information we have Wray slowly massages the patch panel with his hands to give it a slight radius. To make sure the crown is correct, Wray uses our ProShaper Mallet and a leather beater bag to add area to the center of the panel.
Wray cleans up the panel while adding a little more area using our English wheels, both large and small. Now that the panel matches the gauges, Wray uses the tipping wheel to add the bead down at the bottom.
Once this is all complete Wray slowly grinds away the excess material allowing for a tight fit. He finishes it up by tacking that patch panel to the fender and that's it for this video.
The video on Friday will so how we metal finish the weld, fix any dents and by the end it should look perfect!
Email: Wray@Proshaper.com
Website: https://www.proshaper.com
Facebook: https://www.facebook.com/ProShaper/
Instagram: https://www.instagram.com/proshaper/
Twitter: https://twitter.com/ProshaperM
Linkedin: https://www.linkedin.com/company/pros...
-
 23:47
23:47
ProShaper
1 year ago33 Ford Fender (Part 3) The Patch Panel
40 -
 51:33
51:33
ProShaper
1 year ago1933 Ford Fender Repair
55 -
 13:03
13:03
Skip's Messy Workbench
6 months ago03 1955 Ford Panel Truck - Part 03
23 -
 8:13
8:13
Living the Northern Life
3 years ago2009 Ford F-150 Repair - Part 1
4 -
 10:52
10:52
Classic Car Studio
1 year ago31 Ford Model A • Part 1 • Fabrication
48 -
 9:32
9:32
RodsShop Automotive How To Tutorials
3 years ago1970 Duster Quarter Panel Patch Panel Install
65 -
 16:00
16:00
Classic AirCooled Volkswagen Channel
7 months agoDIY Sheet Metal Bender Tool EASY BUILD GUIDE For Making Repair Panels etc
6 -
 11:43
11:43
Autorestomod
1 year agoFord Frame Repair
7 -
 32:47
32:47
bdp garage
2 years agoMetal shaping the final patch panel on my Chevy blazer
67 -
 6:35
6:35
Midwest Synthetic
1 year agoJeep Liberty Fender Flare Reattach - New Plastic Parts Hold the Fender Flare Firmly!
30