Premium Only Content
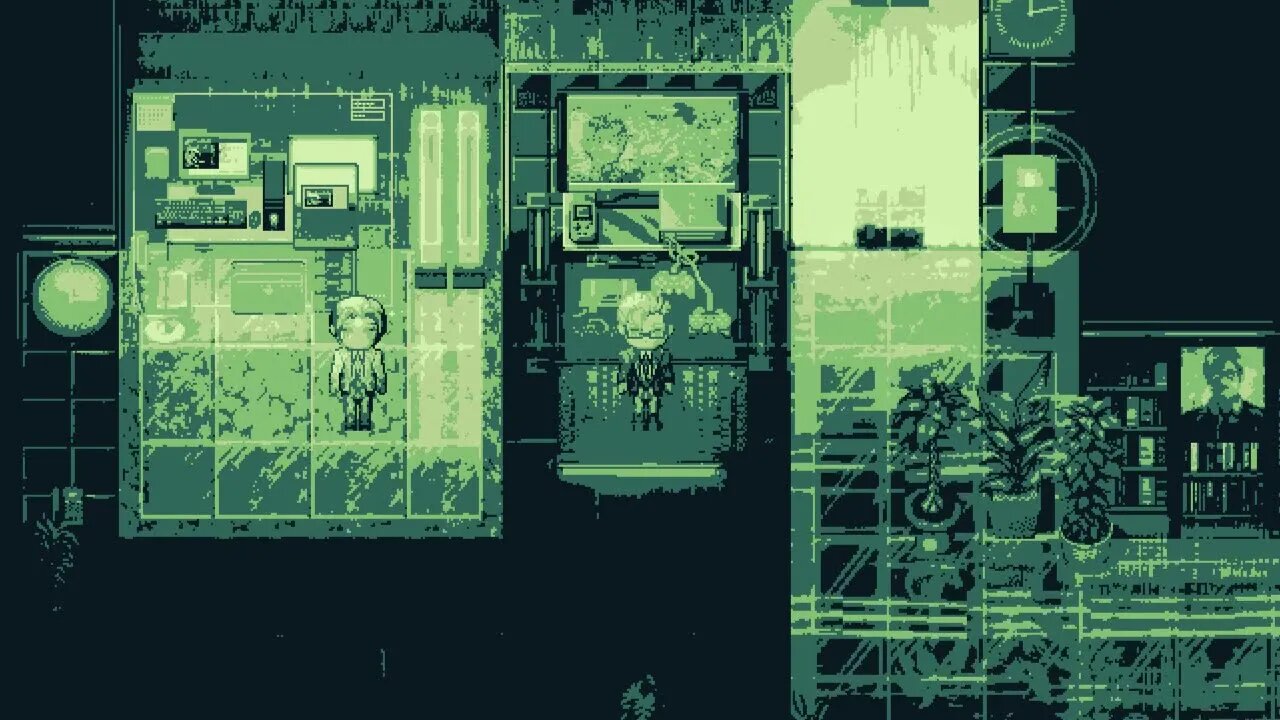
Plugging MV #46 Monochromatic Color Filters in RPG Maker MZ/MV
Discord Invite: https://discord.gg/hVVdm5Z
'Plugging MV' is a series where I showcase interesting (community-made) plugins for RPG Maker MV, as I discover them myself, while going through a list of 4000+ plugins.
#RPGMaker #Plugin #Cutscene
--- Plugging MV #46
Plugin:
MpiBrightnessColorFilter.js by Otobuki Nekoma
https://makonet.sakura.ne.jp/rpg_tkool/Old/contents/MpiBrightnessColorFilter.js
This plugin allows us to add monochromatic/color filter effects to our game screen.
A more technical explanation would be: This plugin allows us to assign different RGB values to a particular level of brightness in our scene. Allowing us to manipulate colors quite flexibly.
Plugin Tested on MV Version: 1.5.1 & 1.6.0+
Does this work in MZ? Yes, yes it does. (As long as you know how to do a manual plugin command input in MZ.)
------ HOW TO:
First, install the plugin, turn it on, and run this plugin command to test it out:
SetBrightnessColorFilter 1
It works? Let's get into the theory then.
'1' in the above plugin command represents the first color pattern from this plugin's parameter.
To set up a pattern, go to this plugin's parameters and double click ColorPattern1. (This is a template/sample that came with the plugin.)
You will find multiple rows of input already in there. Open any one.
Red
Green
Blue
TargetBrightness
...these are the four values you'll find. Red, Green, & Blue are RGB values. So from 0 to 255.
TargetBrightness can have a decimal value anywhere between 0 to 1.
0 means the darkest black, and 1 means the brightest white.
If the value for TargetBrightness is 0.112, and your RGB equals to the color red: then everything on your map that's between 0 to 0.112 brightness level, will turn red (or to the RGB value you selected.)
Press 'OK' and select the next row in ColorPattern1. If your next TargetBrightness value is 0.4, with the RGB value equal to blue: then everything on your map that's between 0.112 to 0.4 brightness level/intensity will turn blue.
You're basically swapping colors depending on how bright or dark a particular part of your map is.
You can continue adding more rows into your color pattern.
Hope this is making sense.
When starting out, use the first sample pattern as a template and mess with it. It'll start to make sense soon enough.
Once you are done setting up or creating a color pattern. (Out of total 4 in the plugin.) You can call/apply any one using this plugin command:
SetBrightnessColorFilter n
Where 'n' is the Color Pattern number. (1-4).
To return to your game's default color, simply replace 'n' with 0.
SetBrightnessColorFilter 0
That's it. Be sure to come up with cool & detailed color patterns!
------ BGM Used: 'You Are The One (Pop)' by Antti Luode
https://youtu.be/gYiEvhUd9pQ
------ Spreadsheet Link: (with the list of all showcased plugins and their download links)
https://docs.google.com/spreadsheets/d/1w2Zy5Gbp47ObutYiv7cU6DV82LK3reAncxM0weKR04Q/edit?usp=sharing
------ Watch the YouTube Playlist for the Whole Plugging MV Series:
https://www.youtube.com/playlist?list=PLalOiJrVKsOc_2PXrkigg3EpL3pvcljQO
------ Patreon page for those who'd like to financially support: https://www.patreon.com/SigmaSuccour
------ Check out my website and follow my game's devlog there:
https://sigmasuccour.wixsite.com/games
------ And Play Through The Games I've Made:
https://sigmasuccour.itch.io/
Thank you for watching the video, and for reading the description.
Be sure to comment your thoughts and ideas, and subscribe to this channel. (b ̄▽ ̄)b
-
 2:29:46
FreshandFit
7 hours agoAfter Hours w/ Girls
108K69 -
 5:28
5:28
Zach Humphries
13 hours ago $0.90 earnedNEAR PROTCOL AND STELLAR TEAM UP!
15.4K2 -
 1:09:57
Brandon Gentile
1 day ago10,000 Hour BITCOIN Expert Reveals Why $13.5M Is Just The Start
20.5K3 -
 2:03:55
Badlands Media
7 hours agoDevolution Power Hour Ep. 382: DOJ Coverups, Clapper’s Team Sport & Trump’s Countermoves
133K22 -
 2:06:30
Inverted World Live
10 hours agoDon't Approach the Zombie Rabbits | Ep. 95
53.9K24 -
 3:26:45
Drew Hernandez
6 hours agoISRAEL PLANNING POSSIBLE DRAFT IN USA & TRUMP'S VIEW ON ETERNAL LIFE ANALYZED PT 2
41.6K49 -
 3:08:07
TimcastIRL
9 hours agoTexas Republicans Win, House Passes Redistricting Map, GOP Looks To Gain 5 Seats | Timcast IRL
192K79 -
 1:30:34
FreshandFit
10 hours agoHow To Stay Focused While Pursuing Women...The Good, The Bad, And The Ugly
65.2K39 -
 1:47:05
Drew Hernandez
14 hours agoISRAEL PLANNING POSSIBLE DRAFT IN USA & TRUMP'S VIEW ON ETERNAL LIFE ANALYZED PT 1
46.6K62 -
 29:55
29:55
Afshin Rattansi's Going Underground
3 days agoProf. Omer Bartov: The REAL REASON the US, UK, and EU Have Not Recognised Israel’s Genocide in Gaza
43.2K29