How To Crochet; Magic Ring/Circle
Learn how to crochet the magic ring/circle stitch. A magic ring is a technique for creating a tightly closed center when you’re crocheting in the round. Usually, when a pattern calls for crocheting in the round, you are asked to chain a few stitches, create a loop and then work the first round in that loop. But the loop leaves a hole in the center of your round. Enter the magic ring. This stitch is perfect for the top of hats, amigurumi projects, or anything that needs a circle at the beginning of the project.
Begin by placing the tail of the yarn across the top of your index finger, then loop the yarn once around your four fingers. Place the working yarn (the yarn that’s closest to your skein) behind the tail. The working yarn will fall to the right and the tail will fall to the left.
Next, loosen the loop from your fingers, keeping the working yarn behind the yarn tail. Pinch the loop with your fingers where the two yarns cross. Use the crochet hook to pull up a loop from the working yarn and slip a stitch to secure the loop.
Chain 1.
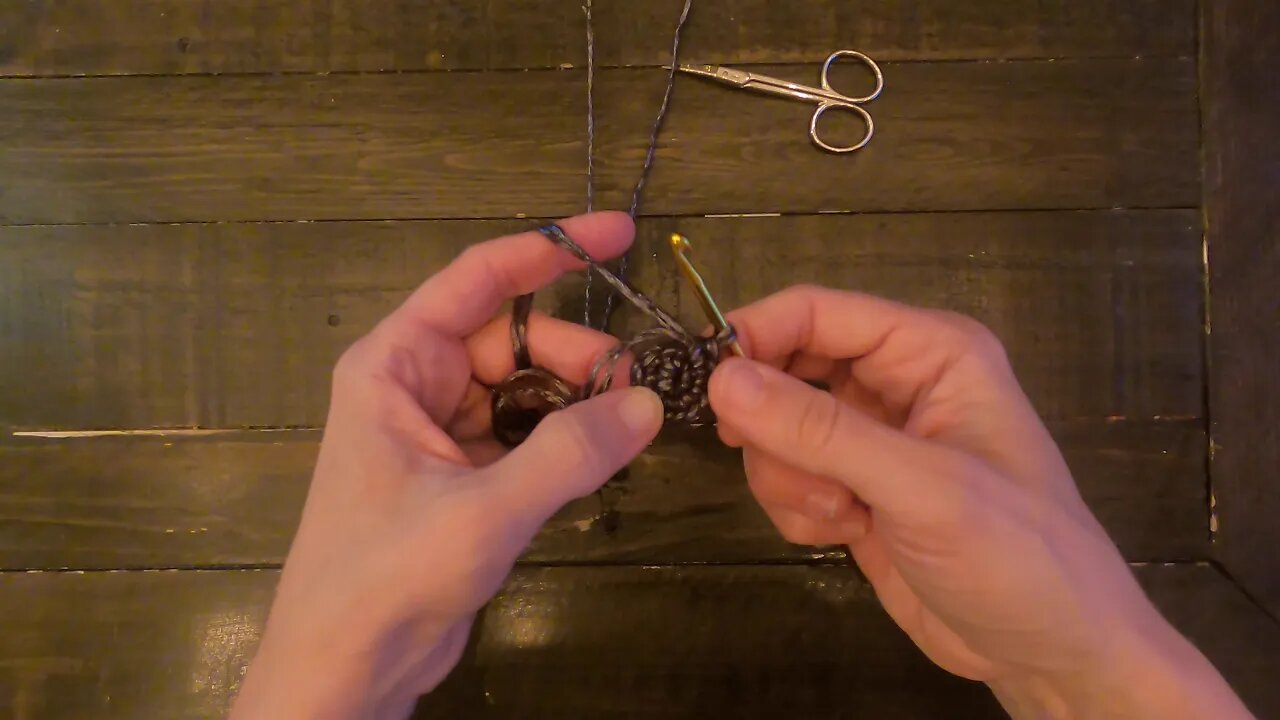
Single crochet around both the ring and tail yarn. Single crochet the number of stitches needed for the first round of the pattern. A good number of stitches is 6 for many patterns.
Pull the tail yarn to close the ring.
Slip stitch into the first stitch to join the round.
As you work the next round don't forget to weave in the yarn tail as securely as you can.
Shop for some of our favorite products with us: https://www.amazon.com/ideas/amzn1.account.AHFXU5A4FOKBFOB4ICXHF3ISHDVQ/2GIXYE5H0XIJ4/ref=as_li_ss_tl?type=explore&ref=idea_cp_vl_ov_d&linkCode=ll2&tag=wp.life-20&linkId=e4e8a829befe41e504c3f1d769ea8a5b&language=en_US
-
 5:00
5:00
Wisdom Preserved
11 days agoSpicy Chili Sauce Canning Recipe
1841 -
 1:13:18
Wendy Bell Radio
7 hours agoPet Talk With The Pet Doc
42.4K62 -
 5:54:39
dieseldesigns
6 hours agoExploring Labs In the DARK! // Abiotic factor
3.69K -
 LIVE
LIVE
BBQPenguin_
5 hours agoDragonball Z - The Android Saga
117 watching -
 LIVE
LIVE
Total Horse Channel
5 hours ago2025 URCHA Futurity | Derby & Horse Show | Saturday
37 watching -
 LIVE
LIVE
DynastyXL
5 hours ago🔴LIVE: Fortnite The Comeback Stream Starts Here🎃
48 watching -
 1:38:57
njgaming23
3 hours agoCoffee and Morning vibes #rumbletakeover
9.52K -
 1:09:19
Ami's House
2 days ago $18.19 earnedWhen Defending Israel Backfires: Are We Pushing Our Last Friends Away? With Karys Rhea
181K190 -
 8:13
8:13
WhaddoYouMeme
21 hours ago $1.57 earnedThis Gets More Tragic By The Second
13.3K10 -
 40:47
40:47
SouthernbelleReacts
3 days ago $1.94 earnedThe Faculty (1998) | Back-to-School Horror Movie Reaction | Alien Invasion in High School!
20.3K5