DIY Rustic Wooden Storage Box
It all started with broken bamboo blinds. Those blinds became a bamboo wall and one thing led to another and before you know it I had remodeled my entire guest bathroom finishing it off with making this rustic wooden storage box for under my bathroom sink. I love to repurpose items and the rustic look really appeals to me, so this was a fun project.
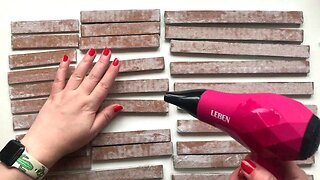
I picked up the box portion at a secondhand store. It is 2.5ft x 1.5ft. It appears as if it was originally the back of a cabinet. Because it is old wood there is more texture to it. The texture really stands out with this rustic painting technique. The box had at some point in its life been painted black and then some of its surfaces were painted white over the top. I thought this would work perfectly for what I had in mind and I brought it home.
The first step was to give it a full paint job with white paint to cover the areas that hadn't been covered and make it a little more even. I tried not to make it too thick or it would be harder to sand through later. (You could paint any dark color with a light color over it for a similar result.)
After the paint dried, I drilled the holes for my handles. I picked up a rope plant-holder at a secondhand store for mine. The key is to have the handle be sturdy enough for the box and secondly to secure it in such a way to stop it from coming undone. I used a drill bit that was the same size as my rope, so it would fit through but without too much extra room. When it goes through it will knock off a little extra so I go from the outside in because the wooden stopper or knot will cover any extra roughness of the hole. Besides, it is rustic so it doesn't have to be perfect.
Next, you will want to use medium-grit sandpaper to lightly sand through the white. This works better if you have more textured wood as the raised areas will show the black color well. If your wood is smoother just try to do an uneven sanding job. (Harder than you would think.) Sand all surfaces of the wood until enough of the darker color shows through for you to be happy with it. I also sanded around the holes I drilled so they were nice and smooth for the rope handles.
I then placed in my cut rope for handles. Since I would be using the wood end pieces as stops I was able to tape the end with electrical tape to prevent fraying and it was covered by the end piece later. In preparation for this step, I removed one of the end pieces, taped the rope end, and inserted that section through both holes starting from the inside to the outside and back to the inside. I then replaced the end piece and knotted it in place. The final step was to cut the knotted portions down to size.
I considered doing a layer of polyurethane but ended up deciding against it as I really liked how it looked at this point but that could be an option.
I love my little rustic box and the storage it provides. If any of you have repurposed projects you would like to share we would love to hear about them.
Website: https://wisdompreserved.life/diy-rustic-wooden-storage-box/
Shop for some of our favorite products with us: https://amzn.to/2P0cyKU
Music: Porch Swing Days - faster Kevin MacLeod (incompetech.com)
Licensed under Creative Commons: By Attribution 3.0 License
http://creativecommons.org/licenses/by/3.0/
Intro: (00:00)
What we are making: (00:11)
Technique Explanation: (00:35)
Timelapse: (01:48)
Outro: (04:00)
-
 8:59
8:59
BunkiesWoodworking
2 years agoDIY Wooden Boxes
96 -
 7:52
7:52
Fanger Woodworking
4 months agoDIY Wood Storage Cart
11 -
 7:21
7:21
Factor 85 Labs
2 years agoBuilding a Box | DIY
29 -
 10:05
10:05
Dream Fairy DIY
4 years agoDIY Handmade box | Box from cardboard
4 -
 11:17
11:17
Dream Fairy DIY
3 years agoDIY Beautiful cardboard box idea | Paper craft at home
3 -
 8:24
8:24
Dream Fairy DIY
3 years agoDIY Handmade Box from cardboard | Cardboard idea | imitation of a wooden box made of cardboard
-
 10:33
10:33
Dream Fairy DIY
4 years agoDIY Beautiful cardboard box | from cardboard
3 -
 14:44
14:44
Mheinrich
1 year agoAnother Mixed Material Memory Box #2
2 -
 9:16
9:16
Dream Fairy DIY
1 year agoDIY Organize in Style: Building Your Own Cardboard Storage Box
-
 15:23
15:23
DIY Creators
2 years agoDIY Outdoor Patio Storage Deck Box
3234