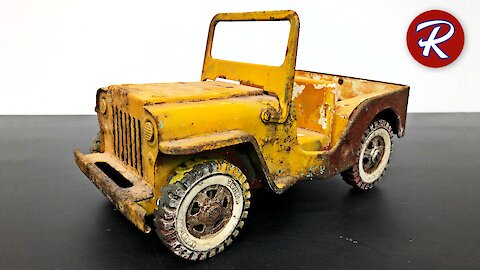
Vintage rescue restorations: 1960's Tonka toy Jeep
Watch as this person rescues & restores this Tonya toy Jeep. It's covered with layers of paint that are sandblasted, then powder coated for an awesome finish. Amazing!
562
views
3
comments

Vintage restorations: 1930's Wyandotte toy airplane
This person rescued & restored a vintage Wyandotte toy airplane. This rust was heavy but it was no match for the sandblaster. They removed all the old paint and rust then gave it a fresh powder coat. Enjoy!
394
views
2
comments
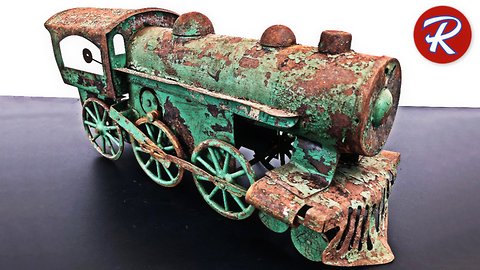
1920s Toy Train Restoration - Locomotive Engine Restore
Watch as I rescue & restore this 1920s toy train. This paint is chipping and the body is covered with rust. Lets bring some life back into this antique toy.
136
views

DIY vintage toy cash register restoration
Watch as this person rescues & restores this vintage Tom Thumb toy cash register. It's covered in rust and needs a full restoration. It will last for many years to come!
269
views
1
comment

Five cent candy vending machine restoration
Watch us rescue & restore this 5 Cent candy vending machine. It's a Northwestern model 60 candy machine that can dispense candy, gumball or small toys. The inside was surprisingly corroded but the restoration came out great.
404
views
3
comments

1960's vintage Tonka stepside truck restoration
Witness the rescue & restoration of a 1960's stepside Tonka truck. This truck was sand blasted then powder coated in midnight blue. The transformation is truly remarkable and brings new life to this aged classic.
397
views
4
comments

How to powder coat cups at home with decals
Powder coating is easy the results can amaze you. ShabbyDIY used candy lime green, candy teal, and silver sparkle clear on this cup. You can coat anything metal such as a Yeti cup or car parts. You shouldn’t use your kitchen oven to cook the cup, they used a meat smoker.
835
views
1
comment

Make a bar stool using pool cue sticks and a ball rack
Today we're going to show you how to take a few common billiards accessories and make a unique bar stool. This is a really neat stool that uses authentic billiards accessories to achieve the right look. This stool uses sturdy solid hardwood cue sticks as legs that have built in rubber ends to protect your flooring.
2.19K
views
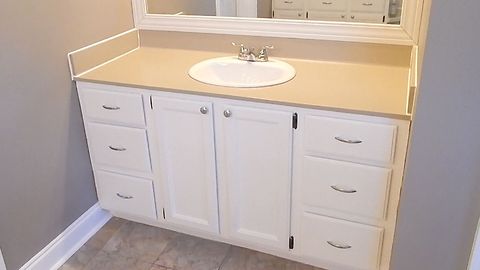
Update your bathroom vanity with Rust-Oleum countertop paint
Tired of looking at that old bathroom vanity? Now you can fix it up without breaking the bank! Rust-Oleum countertop coating is a durable solution to change the countertop color, while the cabinet pulls add an elegant touch. The final result is amazing!
1.74K
views

Remove LT1 Engine Fuel Rail And Fuel Injectors
Today we will be removing a fuel rail and fuel injectors from a 1994 Pontiac Firebird Trans Am.
109
views
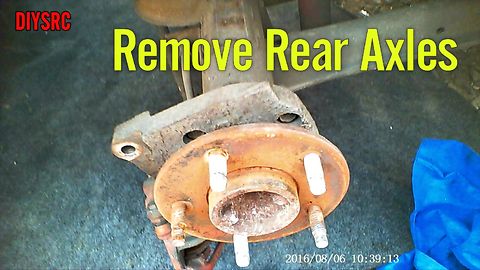
Remove Axles GM 10 Bolt C-Clip Posi Rear End
Today we removed the axle shafts from a 1994 Pontiac Firebird Trans Am with a factory 10 bolt posi rear end. This particular rear end has a 2.73 gear ratio with a 2 series carrier.
Filmed using: http://amzn.to/2aDA8U1
640
views
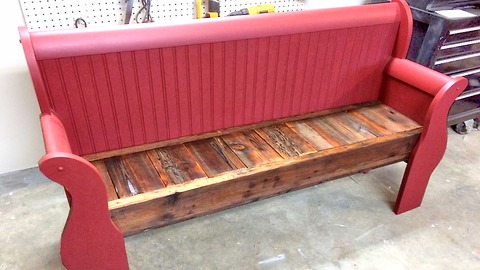
How to make a bench from an old sleigh bed headboard
Before you toss that old sleigh bed, we've got an idea for you. Today we going to take this old beat up sleigh bed and re-purpose it into a rustic bench.
880
views
2
comments
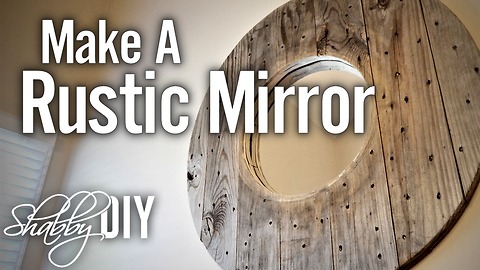
Make a rustic mirror from a wood spool
ShabbyDIY shows us how to re-purpose this wooden wire spool into a rustic mirror. This project is a great way to give a wood spool a charmingly and rustic feel for your home. You can find this and many other projects on ShabbyDIY.com.
1.27K
views
1
comment
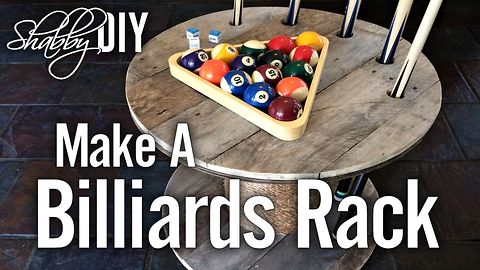
Make a billiards rack from a wooden spool
ShabbyDIY shows us how to re-purpose this wooden wire spool into a billiards pool cue stick rack. This rack is easy to make and it's guaranteed to look great in your game room. You can find this and many other projects on ShabbyDIY.com.
4.16K
views
16
comments
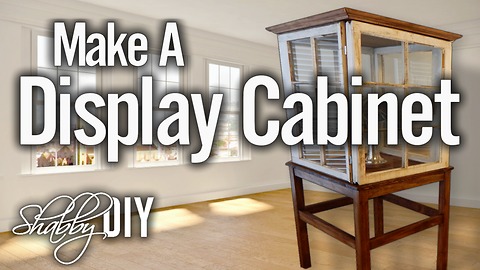
How to make a display cabinet using old wooden windows
In this tutorial, ShabbyDIY is going to build a rustic cabinet using four old reclaimed wood windows. This cabinet is full of character and is great for displaying your favorite items. Don't throw away those old wooden windows!
14.9K
views
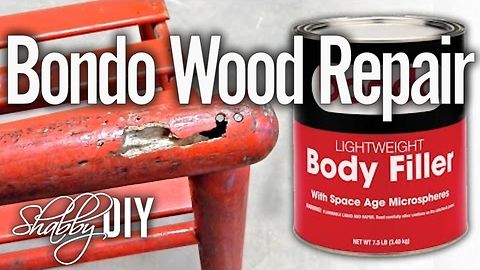
How to repair damaged wood using bondo filler
Learn how you can easily make wood repairs using bondo filler. The bondo repair is a great and long lasting solution to damaged wood. Bondo can be used to repair cracks, chips, dents and rot.
1.47K
views
1
comment

How to give metal an aged rusty patina finish
Today we are going to show you how to add patina to any type of metal. After about 2-3 hours you can take off the lid to reveal the beautiful patina. This method gives the appearance of decades worth of aging in about 2-3 hours. You will see vibrant shades of orange, teal and blue.
214
views

Make a coffee table from an old door
Learn how you can make a coffee table from and old door. This unique table is sure to be a conversation piece when guests come to visit!
123K
views
2
comments
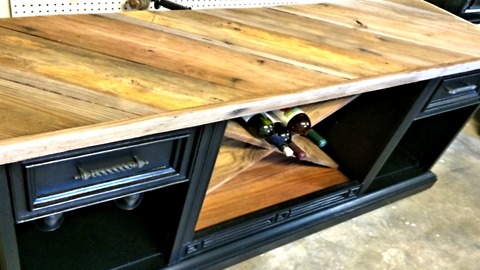
How to create an amazing wine bar from an old TV cabinet
Learn how to easily build a wine rack using an old TV cabinet! It's definitely a great place to store your favorite wine bottles.
65.5K
views

How To Create An Incredible Penny Table Top
ShabbyDIY updates the look of this old dining room table. They liked the large clawfoot legs so they decided to focus on the top. They show us how to create a penny table top using a durable product called glaze coat. The end result is simply amazing!
If you have about $35 dollars to spare and an old dining room table that needs upcycling, then this is the perfect Do It Yourself project for you!
Change your 35 dollars into all pennies and then spend a few extra dollars on some crystal epoxy resin. Make sure to get enough of the resin to cover the entire surface of the table; it might be a good idea to overestimate the amount you are going to need, just to be on the safe side.
Clear up the extra material on your old table and sand down any imperfections that may have appeared on the wood from age. Cut and nail down a round piece of plywood, enough to cover the entire top. Clean up the edges with some spare window blinds. Paint the top of the table a dark color and the bottom a light one. When the pain has dried, start laying out your pennies until you reach the center.
Mix the resin as per the instructions on the label and start pouring the liquid from the center out, letting it level itself out. Allow to cure for at least a day and reveal your new centerpiece! Good luck!
2.12M
views
22
comments