
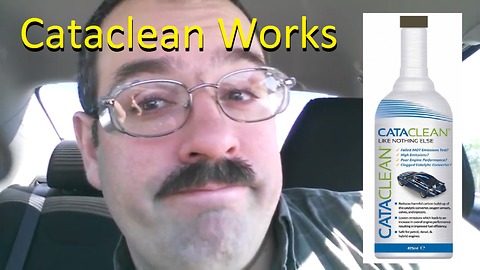
Cataclean Works
I wrote an article about "beating the P0420/P0430" http://carmilespergallon.blogspot.com/2014/09/beating-p0420p0430-catalytic-converter.html?m=1
This will tell you more things to check to fix this code. The article links to more articles and videos which will help teach you how to use basic live data to spot if there are other issues. I've found live data to not be helpful to see if spark plug issues have caused your catalytic converter to get worn out prematurely. I have a YouTube series on spark plugs which will help. https://www.youtube.com/playlist?list=PLh_yB9HJ4Gi5lsh8JE8lBq7cWMwCuyH_S
Start with seeing what your spark plugs can tell you about how your engine is running: https://youtu.be/6Bb3MogmUrQ In this video I was looking at a motorcycle's spark plug, but the lesson applies to any car.
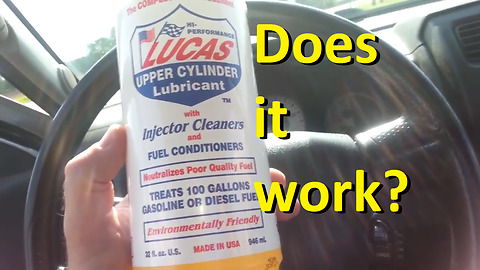
Try my other fuel treatment video by Lucas:
https://youtu.be/ATL19lVpmAk
Lucas Upper Cylinder Lubricant was tested for a year, while this cataclean was a 1 time test, with obvious changes on the sensors. While that is evidence, I'd love to hear from another diagnostic technician who saw it change sensor readings as well.
Granted, I've only found it worked when I did all other necessary repairs upstream of the catalytic converter and the dunderheaded PCM was still determined to call it a bad catalytic converter. Note the catalytic converter was replaced as well.
In my next video, you'll see where an upstream of the catalytic converter made it so the PCM no longer thought it had a catalytic converter inefficiency. https://youtu.be/roejxSSrn70
Please note: that when I was working for a reseller of cars at the time that they go with the cheapest of catalytic converters. I've heard that some people claim that that'll only keep you on the road for another year. They have to repossess their cars a lot and when they go cheap on their catalytic converters, they still don't find themselves to be replacing them, but this is just part of the conversation.
P0420 was the only possible catalytic converter inefficiency code on this car even though it was a V6, it only had 1 catalytic converter. This could help with scenarios where P0430 was the code for the bank 2 converter.
Due to factors beyond the control of DE Nichols/AutoBravado it cannot guarantee against unauthorized modifications of this information, or improper use of this information. DE Nichols/AutoBravado assumes no liability for property damage or injury incurred as a result of any of the information contained in this video. DE Nichols/AutoBravado recommends safe practices when working with power tools, automotive lifts, lifting tools, jack stands, electrical equipment, blunt instruments, chemicals, lubricants, or any other tools or equipment seen or implied in this video. Due to factors beyond the control of DE Nichols/AutoBravado, no information contained in this video shall create any express or implied warranty or guarantee of any particular result. Any injury, damage or loss that may result from improper use of these tools, equipment, or the information contained in this video is the sole responsibility of the user and not DE Nichols/AutoBravado.
57.2K
views
What Lucas Upper Cylinder Lubricant did for me.
Try another fuel treatment review:
Cataclean Works:
https://youtu.be/D3K_ErJlVKg - and this is a fair review. I outlined tons of repairs, which almost had the PCM happy and this took the brand new catalytic converter that baby step more to satisfy an overly sensitive PCM. I've tested a lot of catalytic converters, it was already good, this PCM just finally admitted it when the O2 sensor graph never wavered below rich. That's an unrealistic expectation, especially with cars now, which shut off fuel injectors when coasting. Of COURSE the O2 sensors flat line lean!
This fuel treatment, at least in my experience on my 2004 Nissan Frontier V6, made a difference in it's miles per gallon. Due to having to change my fuel pump a few times, I got to witness that it got that bit of rust cleaned out of my gasoline tank where I couldn't reach to clean it from the first fuel pump change. I've had to change a few. Thanks to all those changes, I saw that a year of driving didn't clean up the rust out of the fuel tank, but a couple months with Lucas Upper Cylinder Lubricant, it was all, nearly clean. It was very surprising.
To see all the rust that was in my filter, see my Nissan Frontier fuel pump replacement 2 video:
https://youtu.be/2C3Z7tGSsIM
Lucas says that it also has injector cleaners. I primarily did testing on my 2004 Nissan Frontier, which has a V6. It actually did nothing for my 2017 Yamaha WR250R. I'm thinking about whether I actually do a video on something that did nothing or not...but hey, if this video got you to try it in your motorcycle, me saying it seemed to do nothing may help you not waste your money, lol.
Due to factors beyond the control of DE Nichols/AutoBravado it cannot guarantee against unauthorized modifications of this information, or improper use of this information. DE Nichols/AutoBravado assumes no liability for property damage or injury incurred as a result of any of the information contained in this video. DE Nichols/AutoBravado recommends safe practices when working with power tools, automotive lifts, lifting tools, jack stands, electrical equipment, blunt instruments, chemicals, lubricants, or any other tools or equipment seen or implied in this video. Due to factors beyond the control of DE Nichols/AutoBravado, no information contained in this video shall create any express or implied warranty or guarantee of any particular result. Any injury, damage or loss that may result from improper use of these tools, equipment, or the information contained in this video is the sole responsibility of the user and not DE Nichols/AutoBravado.
31.5K
views

How to Know if your Battery is Bad with a Charger
Want another battery charging video? I have a few more ideas for you and a Happy Mother's Day!
https://youtu.be/95p85vwOh3c
Use a battery charger and understand the needle gauge and how it can provide helpful hints if a battery is bad. Besides, if you don't have a battery charger, this is yet another reason to get one with an AMPs gauge. It is so convenient to charge battery's yourself. Is it free locally? Yes, but charging a battery slower is key to battery recovery.
When I'm at work typically I use an expensive battery tester. Sometimes I need to use a battery charger at work, when I do, I don't have to go back to the battery tester to see if it's good because I can tell by paying attention to these gauges.
A battery shouldn't have leaves on it, rarely, I've seen poor connections make fire. Diagnosed one the other day. The car was acting like it had a bad MAF, battery, vacuum leak, or issues making consistent fuel delivery, all from resistance in the connections making a fire.
When cleaning up these connections get between them all. In the fire case above, the main clamp to the battery terminal had no issue.
Due to factors beyond the control of DE Nichols/AutoBravado it cannot guarantee against unauthorized modifications of this information, or improper use of this information. DE Nichols/AutoBravado assumes no liability for property damage or injury incurred as a result of any of the information contained in this video. DE Nichols/AutoBravado recommends safe practices when working with power tools, automotive lifts, lifting tools, jack stands, electrical equipment, blunt instruments, chemicals, lubricants, or any other tools or equipment seen or implied in this video. Due to factors beyond the control of DE Nichols/AutoBravado, no information contained in this video shall create any express or implied warranty or guarantee of any particular result. Any injury, damage or loss that may result from improper use of these tools, equipment, or the information contained in this video is the sole responsibility of the user and not DE Nichols/AutoBravado.
31.2K
views
5
comments
Motor Mounts Front & Back Installation Part 2 of 3
See Motor Mounts Front and Back uninstallation part 1 here:
https://youtu.be/s5MZJ9ge5Sc
Back and front motor mount final installation here:
https://youtu.be/tK3fUsbuVCI It turned out mostly to be about the end link installation.
If my more entertaining version of this video isn't blow by blow enough for you, I did find this picture and text version helpful on a few points I wasn't sure how to proceed. If you're actually going to do this job, this may help, but I feel direction and wisdom on how to get this circus of parts to line up for my video is helpful in a different way:
https://youtu.be/XhtwKGrHkss
Half the mess I cleaned up under the engine was from my timing chain tensioner. Link to the video for installation:
https://youtu.be/pWe-QSyn2to
The article I wrote, which is directly related to these front and rear transmission mounts:
http://carmpg.blogspot.com/2015/12/motor-and-transmission-mounts-on-chevy.html
The article I wrote when I last had my motor mounts changed:
Shocks, struts, and the Steadiness of your Car or Truck:
http://carmilespergallon.blogspot.com/2014/04/struts-shocks-and-steadiness-of-your.html
Chevy Prizms in most mechanical ways are the same from 1998 to 2002 except a few engine parts (the 1ZZ-FE VVT-i ran 2000 and later even up to 2008 in the Pontiac Vibe and Toyota Matrix), and they are in common with the Toyota Corolla for these years for most things, except some interior and exterior trim, most of which is interchangeable, but a few things aren't without customization.
Due to factors beyond the control of DE Nichols/AutoBravado it cannot guarantee against unauthorized modifications of this information, or improper use of this information. DE Nichols/AutoBravado assumes no liability for property damage or injury incurred as a result of any of the information contained in this video. DE Nichols/AutoBravado recommends safe practices when working with power tools, automotive lifts, lifting tools, jack stands, electrical equipment, blunt instruments, chemicals, lubricants, or any other tools or equipment seen or implied in this video. Due to factors beyond the control of DE Nichols/AutoBravado, no information contained in this video shall create any express or implied warranty or guarantee of any particular result. Any injury, damage or loss that may result from improper use of these tools, equipment, or the information contained in this video is the sole responsibility of the user and not DE Nichols/AutoBravado.
If you're still reading, check out this fun: comment with the time stamp on this and you'll get the nitpicking reward!
These longer videos are brutal to edit! You'll have to forgive a few second scene where I repeat myself before and after adding more light to reshoot the scene, lol. You get the nitpicking kudos reward if you can find the scene! lol :)
24.5K
views

Lucas Pure Synthetic Oil Stabilizer
To be clear, this is a product that I rarely use. I do use it with good cause during the hot climate if I still had winter oil in an engine that cares one way or the other, but it's not time to change the oil. It also helps in the winter. From a oil analysis from Blackstone labs, I believe it doesn't change the viscosity, and may just be additives. It's a tough call for me to say when I've only done one oil analysis, but while that's not a controlled scientific study, in the small amounts I use it, I get quieter engines in cold and hot, and my viscosity is still right on the money. See Pats comments below. Now bring on the science! :D I wasn't really that far off. :)
Engines are quieter on startup. Especially noticeable in the cold. Good use is also when the engine has gotten too hot in the summer the engine seems like it's running on too thin of an oil (not talking overheating, just that the oil is thinner than it should be in humid, hot situations). So for cold or hot, it keeps the engine running smoother. I like smooth. I like my engines to last the maximum they can. Other than keeping the transmission alive, these are the most expensive things to not mess around on in taking care of your vehicle.
Truly, I only use a few oz. or less on my Chevy Prizm and twice as much on my 2004 Nissan Frontier, and like I said, most years I won't need it, but as the "Corolla's" engine aged, I found myself using Lucas Pure Synthetic more in the summer and winter to help. My truck is pretty sensitive to it being colder and I feel a lot better about cold start ups even outside of winter.
Due to it's nature of probably being mostly additives, I highly don't recommend using this product on a motorcycle with a wet clutch. Extra additives is exactly what you're avoiding for wet clutches. That's why you don't use synthetic on many motorcycles. Synthetics have a lot more oil additives, which make for slipping, or a little later grab as you release your clutch.
Due to factors beyond the control of DE Nichols/AutoBravado it cannot guarantee against unauthorized modifications of this information, or improper use of this information. DE Nichols/AutoBravado assumes no liability for property damage or injury incurred as a result of any of the information contained in this video. DE Nichols/AutoBravado recommends safe practices when working with power tools, automotive lifts, lifting tools, jack stands, electrical equipment, blunt instruments, chemicals, lubricants, or any other tools or equipment seen or implied in this video. Due to factors beyond the control of DE Nichols/AutoBravado, no information contained in this video shall create any express or implied warranty or guarantee of any particular result. Any injury, damage or loss that may result from improper use of these tools, equipment, or the information contained in this video is the sole responsibility of the user and not DE Nichols/AutoBravado.
22.7K
views
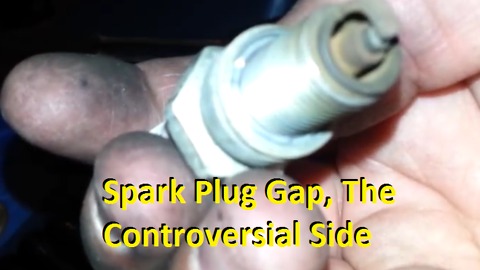
Balancing Spark with Spark Plug Gap and an extra secret! Shhh!
Balancing Spark with Spark Plug Gap and an extra secret! Shhh!
16.6K
views
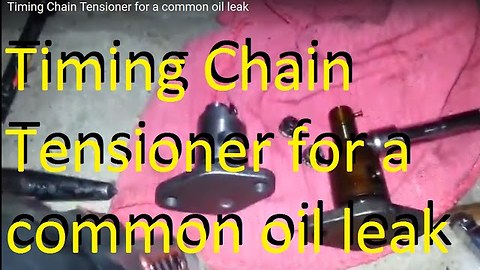
Timing Chain Tensioner for a common oil leak
Found a missing scene! Since I explain it well I'm not to worried about it, but in case you need to see it here it is. To catch updates between videos, follow me on google plus.
https://plus.google.com/+DENicholsAutoBravado/posts/S6hZi8GBeQK
Be sure to follow me on Google Plus to not miss out on extra things I post about this project and others. :)
This is the article I wrote about how I believed it was a leak from my head gasket. I was really getting mislead by those pulleys moving the oil to a new location! Plus, I wasn't thinking of the anatomy of the engine correctly. If the head gasket was leaking over there, then it'd just leak into the timing chain cover and I wouldn't know about it.
More importantly this link has many thought out plans for my engine rebuild!
http://carmpg.blogspot.com/2015/03/head-gasket-repair-on-1999-chevrolet.html
Original Description before I kept excitedly adding more, lol:
Chevy Prizm or 1998-2002 Toyota Corolla Timing chain tensioner?
Most people need to replace these due to an oil leak. It's as common as valve cover gasket leaks and oil pan gasket leaks. Though, I've done the oil pan gasket a few times due to a little off-roading and timing chain tensioner seals last better than that.
This silly little component leaked onto a pulley on the power steering pump making it look like I had a head gasket leak. Once I cleaned all the oil off from 2 vids later into my series, not yet release, but nearly ready to release 1 more, I realized that was even sillier. The block meets the cylinder head behind the timing chain cover, but hey, when it's all a mess (and there's still some mess) it's harder to tell.
Since some internal components change between 1999 to 2000 I'd be careful with any internal engine component across those years.
I could have messed up so easily, but I eventually discovered my 1999 has the little bit better 2000 engine, pretty cool! 5 more bHP stock or HP at the flywheel.
If you've read this deep into the description, you're a pretty rare subscriber. If you can't stand seeing all that rust, I've added to my Chevy Prizm/Toyota Corolla playlist a video showing some of the clean up. Just a minute of some tunes and some scenes of the few videos I had coming up (out now except 1, oil analysis!). Still, in my latest video about the motor mount installation, I at least spoke of the tool I use on big clean ups. I learned about it from Jafromobile (on YouTube, without him, I wouldn't be prepping for an engine rebuild). https://youtu.be/vDStX3GhDYc
Due to factors beyond the control of DE Nichols/AutoBravado it cannot guarantee against unauthorized modifications of this information, or improper use of this information. DE Nichols/AutoBravado assumes no liability for property damage or injury incurred as a result of any of the information contained in this video. DE Nichols/AutoBravado recommends safe practices when working with power tools, automotive lifts, lifting tools, jack stands, electrical equipment, blunt instruments, chemicals, lubricants, or any other tools or equipment seen or implied in this video. Due to factors beyond the control of DE Nichols/AutoBravado, no information contained in this video shall create any express or implied warranty or guarantee of any particular result. Any injury, damage or loss that may result from improper use of these tools, equipment, or the information contained in this video is the sole responsibility of the user and not DE Nichols/AutoBravado.
16K
views
1
comment
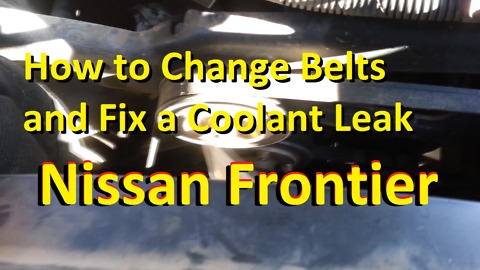
Nissan Frontier How to Change Belts and a Coolant Leak Fix
What's so hard about a belt you might ask? Assuming you're good at a serpentine belt and some experience I get what you mean, but this Nissan Frontier has some hiding bolts that gets 3 different belts adjusted into place. Here's my thorough and complete teaching of a how to on belts for a 2004 or generation 1 Nissan Frontier (Nissan Pathfinders even back to like 98 have very similar tech). I've worked on a lot of Nissans, and even though they're different, many of them use similar designs to make their belt tensions manually adjusted (you'll see similar on even their cars). It takes more experience or more trial and error to get right, but with this and my next video about proper tensioning you'll be in good shape.
Due to factors beyond the control of DE Nichols/AutoBravado it cannot guarantee against unauthorized modifications of this information, or improper use of this information. DE Nichols/AutoBravado assumes no liability for property damage or injury incurred as a result of any of the information contained in this video. DE Nichols/AutoBravado recommends safe practices when working with power tools, automotive lifts, lifting tools, jack stands, electrical equipment, blunt instruments, chemicals, lubricants, or any other tools or equipment seen or implied in this video. Due to factors beyond the control of DE Nichols/AutoBravado, no information contained in this video shall create any express or implied warranty or guarantee of any particular result. Any injury, damage or loss that may result from improper use of these tools, equipment, or the information contained in this video is the sole responsibility of the user and not DE Nichols/AutoBravado.
12.3K
views

A/C Not Cooling? FIXED! Tips and Tricks which will help with many cars on a Nissan Frontier
My 2004 Nissan Frontier has been hot for a couple years now. I've been driving more lately, and I'm getting pretty motivated to get it fixed.
I bought a set of manifold gauges to see what's going on the high and low side of my R134a A/C system. I bought a venturi purge device because it was the cheapest vacuum I could get. Plus, cheap motors die, and using one that uses my air compressor is actually a lot more reliable. It's important to do this, because moisture really messes up A/C systems and when you vacuum a system down, it lowers the boiling point of water below room temperature and it boils off all the water.
Please be safe when working with A/C! I didn't find my gloves, but you should wear gloves as refrigerant could give fingers instant frost bite if it escapes over your fingers. It's happened to me with gloves on a few times.
Due to factors beyond the control of DE Nichols/AutoBravado it cannot guarantee against unauthorized modifications of this information, or improper use of this information. DE Nichols/AutoBravado assumes no liability for property damage or injury incurred as a result of any of the information contained in this video. DE Nichols/AutoBravado recommends safe practices when working with power tools, automotive lifts, lifting tools, jack stands, electrical equipment, blunt instruments, chemicals, lubricants, or any other tools or equipment seen or implied in this video.
10.4K
views
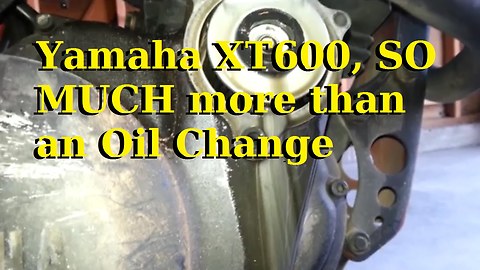
Yamaha XT600 SO MUCH more than an Oil Change
Lots of 1989 Yamaha XT600 Dual Sport Motorcycle manual stats:
N*m Ft.lbs.
Oil drain bolt 30 22
Oil tank 18 13
Oil filter cover screws 7 5.1
Oil filter cover bleed screw 5 3.6
Up and coming video about spark, here's the facts from 1989.
Spark plug stock is DP8EA-9, not to be confused with the TT600 with a DP7EA-9.
Gap .8 to .9mm or more accurately .0031-.035”
Idle 1,300 RPM
Crank HP 44
Gas mileage stock 44
Rear tire pressure 22, off-road 14.
I know I promised a video about the tire, but I had never done a motorcycle inner tube so I shot a lot of video while I figured it out. I'll sort through it to give something presentable. It's just not there yet.
That video is here now!
Yamaha XT600 Inner Tube Repair or Replace - you even get to see the use of professional tire changing equipment. :)
https://youtu.be/tq5SMchOVlk
I usually just run fully synthetic motor oil, but at the urging of my friend Joe I bought some semi-synthetic, by Pennzoil, as long as I was reaching lower, not knowing if this bike would be worth it, I honestly wanted conventional, but I only found Pennzoil in the 10w-40, like I wanted and is recommended by current owners of the bikes. These motorcycles are supposed to shift into neutral better when hot with 10w-40. I got into the Royal Purple 10w-40 a little since I followed the wrong procedure initially changing this oil. I didn't know this motor oil needed to be drained from way above the engine before I tried pouring some oil in!
Want to read more about synthetic motor oil? I have a lot more than that on my website, but here's a link:
http://www.autobravado.com/search/label/Synthetic%20Motor%20Oil
And here's a spinet to make you want to click:
Synthetic Motor Oil Controversy
I've met some old timers (said with great appreciation and respect) who have very valid negative experiences with synthetic motor oil. You see, what would happen, is if you'd switch from the regular mineral based variety to synthetic motor oil, your gaskets would shrink and you'd develop a leak. When I first thought about this problem, I thought, well gaskets aren't that bad to change, but I was only thinking of the oil pan gasket, some cars have other engine gaskets that are very laborious to replace, or very expensive to replace.
Careful. My bike doesn't like the stand that came with it. I use a ratchet strap overhead for more stability.
Due to factors beyond the control of DE Nichols/AutoBravado it cannot guarantee against unauthorized modifications of this information, or improper use of this information. DE Nichols/AutoBravado assumes no liability for property damage or injury incurred as a result of any of the information contained in this video. DE Nichols/AutoBravado recommends safe practices when working with power tools, automotive lifts, lifting tools, jack stands, electrical equipment, blunt instruments, chemicals, lubricants, or any other tools or equipment seen or implied in this video. Due to factors beyond the control of DE Nichols/AutoBravado, no information contained in this video shall create any express or implied warranty or guarantee of any particular result. Any injury, damage or loss that may result from improper use of these tools, equipment, or the information contained in this video is the sole responsibility of the user and not DE Nichols/AutoBravado.
7.49K
views
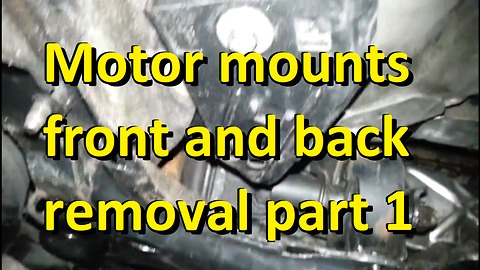
Motor mounts front and back removal part 1
I keep calling these motor mounts what they're normally called, and in fact these are the right words to find them for this car when you buy them; however, there is only 1 true motor mount on a Chevy Prizm. It's the only one easily seen without taking the car or part or having an intake short ram installed. It's on the passenger side top area next to the engine. The rest are actually transmission mounts. Chevy Prizms in most mechanical ways are the same from 1998 to 2002 except a few engine parts, and they are in common with the Toyota Corolla for these years for most things, except some interior and exterior trim, most of which is interchangeable, but a few things aren't without customization.
Motor Mounts Front & Back Installation Part 2:
https://youtu.be/vDStX3GhDYc
Back and front motor mount final installation here:
https://youtu.be/tK3fUsbuVCI It turned out mostly to be about the end link installation.
Actual title, "Motor Mounts Front and Back Installation part III Finishing End links"
An article about motor mounts for your reading pleasure. :)
Motor and Transmission Mounts on a Chevy Prizm or 1998 to 2002 Toyota Corolla:
http://carmpg.blogspot.com/2015/12/motor-and-transmission-mounts-on-chevy.html
1/4" Matco Infinium 12V Ratchet and Impact Screwdriver, first stand alone tool review:
https://youtu.be/0fjJlC8VPTU
Due to factors beyond the control of DE Nichols/AutoBravado it cannot guarantee against unauthorized modifications of this information, or improper use of this information. DE Nichols/AutoBravado assumes no liability for property damage or injury incurred as a result of any of the information contained in this video. DE Nichols/AutoBravado recommends safe practices when working with power tools, automotive lifts, lifting tools, jack stands, electrical equipment, blunt instruments, chemicals, lubricants, or any other tools or equipment seen or implied in this video. Due to factors beyond the control of DE Nichols/AutoBravado, no information contained in this video shall create any express or implied warranty or guarantee of any particular result. Any injury, damage or loss that may result from improper use of these tools, equipment, or the information contained in this video is the sole responsibility of the user and not DE Nichols/AutoBravado.
6.24K
views

Port and Airflow Theory, PolyQuad cylinder chambers, Creating Swirl
I now have Porting and Airflow Theory II https://youtu.be/yc1vkp41WcU
How I say it in "Layman's" terms is that I'm going to port and polish on my cylinder head, but really, there's so much more that goes into it! The Polyquad design is patented by David Vizard and I learned about it from his "How to Port and Flow Test Cylinder Heads" book.
This is one of the concepts that I will develop onto my 2000+ 1ZZFE which oddly resides in a 1999 Chevy Prizm.
One of the friends I was telling this to freaked out that I was going to reduce torque at lower RPM and that this was a terrible idea. He's quite right if it's wrong for this car, but I won't know until I try it! Error is part of learning. While I'd love to get it right or at least better on the first try, I expect to make mistakes and learn, just like I was talking about at the end of one of my last videos.
Airflow theory is incredibly complicated. Argonian Bilbo asked some great questions about opening the port and and how it could impact torque down low. I suggest you read the conversation below. It may be a spoiler for videos to come, but it also shows how things won't necessarily be as straight forward as "bigger is always better" - definitely not true.
At first I unwisely thought I needed a head gasket at the beginning of this year. It was really a timing chain tensioner oil leak (video coming, (came! https://youtu.be/pWe-QSyn2to )) that was falling on the power steering pump and being brought up to where the cylinder head meets the block.
I started an article at the time about how I planned on rebuilding the engine while I was in there. In it I discuss a lot of my other ideas and plans and preparations for the rebuild.
Check it out:
http://carmpg.blogspot.com/2015/03/head-gasket-repair-on-1999-chevrolet.html
Porting and airflow theory III:
https://youtu.be/DUfNwbmTQKs In this video I discuss machinist ridges, increasing flow, and the rule to work on where the restriction is the greatest. If instead you work on the part of the port where the flow is best, then you'll make a lazy port. You'll lose port velocity.
Due to factors beyond the control of DE Nichols/AutoBravado it cannot guarantee against unauthorized modifications of this information, or improper use of this information. DE Nichols/AutoBravado assumes no liability for property damage or injury incurred as a result of any of the information contained in this video. DE Nichols/AutoBravado recommends safe practices when working with power tools, automotive lifts, lifting tools, jack stands, electrical equipment, blunt instruments, chemicals, lubricants, or any other tools or equipment seen or implied in this video. Due to factors beyond the control of DE Nichols/AutoBravado, no information contained in this video shall create any express or implied warranty or guarantee of any particular result. Any injury, damage or loss that may result from improper use of these tools, equipment, or the information contained in this video is the sole responsibility of the user and not DE Nichols/AutoBravado.
5.96K
views

Yamalube vs Castrol, Synthetic vs Regular, K&N Oil Filter vs. OEM Oil Filter Yamaha WR250R
Related video:
How to change your oil on a 2015-2017 Yamaha WR250R(2008+ is very similar): https://www.youtube.com/watch?v=fOH-5fHOgPY
When changing your oil on a 2008-2017 Yamaha WR250R or XT250, what is the best oil? What's the best oil filter? I've now tried the conventional Yamalube and the fully synthetic Castrol. I've also bought the OEM Yamaha oil filter vs. the K&N. Please wade in with your comments and your experiences. I'll be happy to do more testing if this is what the people want.
I have done a lot of research as to why this is all true. Why do synthetics work so poorly in wet clutch motorcycles? Please note that Castrol I used was 10w-40 just like the Yamalube, but it was fully synthetic. The additives in synthetics make wet clutches slip. Even when the oil is designed for motorcycles. Some motorcyclists don't have the same results as my test. One reason could be that they have a motorcycle who's clutch is ready to slip and it has nothing to do with the oil they are using. Well, I've countered this variable. I switched back to a regular oil, conventional, or non-synthetic and my clutch kept getting more responsive over the next 3 weeks.
I hope my huge text block wasn't too confusing in the video. I tried to outline a lot of changes to the WR250R, but then I remembered that the intake recall was on the XT250, not the WR250R. You see, the XT250 is air cooled and the intake has to be made of more robust material to handle the extra heat. The XT250 having a lower compression engine, has less heat to contend with, but apparently it being air cooled versus water cooled was too much for it's initial intake design.
In the text of the video, in the limited space I had to write in, I referred to this as X&R or just R, so you if you know about these two models, it'd be clear as day, but if you aren't, it was probably confusing.
I have done a LOT more research since making this video and it looks like the Castrol motorcycle oil of 10W-40 or the Honda brand oil, is the closest to the Yamalube in design, so it'd be interesting to compare the results of these different oils. Does the most expensive one win out on top? Or, does their design being so similar make the differences meaningless?
The choice could be about expense or convenience, but until the research is done, it's all a new frontier, that I'm happy to explore with you.
The differences between the WR250R and the XT250 aren't that big in some respects. The WR and the XT both have 250 engines, but the WR is water cooled. The XT has a lower compression engine and the WR has a high compression engine requiring high octane fuel. There are a lot of parts which are better on the more expensive model vs. the less, but the less expensive model is also shorter so it's better for a smaller person. To read more about this, check my comparing these two great motorcycles with the CRF250L: http://autobravado.blogspot.com/2017/01/part-2-2015-2017-wr250rx-vs-2012-2016.html
Due to factors beyond the control of DE Nichols/AutoBravado it cannot guarantee against unauthorized modifications of this information, or improper use of this information. DE Nichols/AutoBravado assumes no liability for property damage or injury incurred as a result of any of the information contained in this video. DE Nichols/AutoBravado recommends safe practices when working with power tools, automotive lifts, lifting tools, jack stands, electrical equipment, blunt instruments, chemicals, lubricants, or any other tools or equipment seen or implied in this video. Due to factors beyond the control of DE Nichols/AutoBravado, no information contained in this video shall create any express or implied warranty or guarantee of any particular result. Any injury, damage or loss that may result from improper use of these tools, equipment, or the information contained in this video is the sole responsibility of the user and not DE Nichols/AutoBravado.
5.31K
views

DON'T POLISH when Porting and Airflow Theory III
Porting and Airflow Theory II
https://youtu.be/yc1vkp41WcU
I have three articles up now. The latest is this one, but you can always click for the other 2 articles. http://carmilespergallon.blogspot.com/2016/06/porting-cylinder-heads-whats-stage-1.html
Here was my first video on porting and airflow theory: https://youtu.be/51RmXBNbe7I?list=PLh_yB9HJ4Gi62n3o5MQxJSFbsvjMvLvtI
Here I cover theory of airflow through a cylinder head. Sure, it's theory without action, but education can guide choices and guesses as to what will help the airflow through your engine. You see, I took me forever watching videos showing practical application to learn the theory and this video will helped you learn if you have the names of items like cylinder heads, valves, ports, bowls, and more down pat.
If you run into safety issues with this video, then you need help...it's a theory video! That said, if you are porting, be sure to wear a breather mask. I'm talking about serious equipment, the kind that looks like a military breathing apparatus for your mouth, eye protection, and hand protection.
Due to factors beyond the control of DE Nichols/AutoBravado it cannot guarantee against unauthorized modifications of this information, or improper use of this information. DE Nichols/AutoBravado assumes no liability for property damage or injury incurred as a result of any of the information contained in this video. DE Nichols/AutoBravado recommends safe practices when working with power tools, automotive lifts, lifting tools, jack stands, electrical equipment, blunt instruments, chemicals, lubricants, or any other tools or equipment seen or implied in this video.
4.8K
views
1
comment

My Duralast Ratchet Issues. Years of professional use. Are Warranties Easy?
Giveaway details below the primary description. I like my Flex Head Duralast Ratchet. It's 11" long, 3/8" or 3/8 inches of a drive with only 36 teeth. Honestly, longer tools with more teeth don't make sense to me. They just break. I should say that imprinted on the tool is 72T referring to a tooth count that I believe over their websites description. Google any tool you want from AutoZone or the Duralast line. The website lookup won't find it as it's only designed to find parts unless you use the part no. 73-871. Or search on Google for 73-871 Duralast find's this 3/8 ratchet even faster.
This tool is 11 inches, Chrome Vanadium in material, and it isn't quick to click like a much more expensive ratchet, but I like how durable and affordable it is. I paid more for it a few years ago them what it goes for now.
Giveaway by AutoZone. The website is in the text during the video. I normally am not into Giveaways but I've been thinking about one and even if you don't win, everyone who's in the eligible area, I'd think, will get a $7 off a $30 purchase coupon. There are many ways to get more chances to win including coming back daily from Feb 6th to April 2nd 2018. Subscribing to me does not increase your chances but I'm always grateful. :)
The Flex design gets in the way of using it when you don't want flex, but tightening it up helps. It helps me move more naturally and helps save my muscles and tendons. I have an even longer 3/8" ratchet by Red Neck and I'll do a video on it if this video is well received. By the way, it is a breaker bar in length and when I am working like I'm bending metal it tends to break but modern cars demand not using half inch tools when it's actually needed. That's why this one is more durable.
Due to factors beyond the control of DE Nichols/AutoBravado it cannot guarantee against unauthorized modifications of this information, or improper use of this information. DE Nichols/AutoBravado assumes no liability for property damage or injury incurred as a result of any of the information contained in this video. DE Nichols/AutoBravado recommends safe practices when working with power tools, automotive lifts, lifting tools, jack stands, electrical equipment, blunt instruments, chemicals, lubricants, or any other tools or equipment seen or implied in this video.
2.6K
views

5 Tips for ASE Testing, and My Test Day
Here, I share my story test day, and I also show you resources to help you prepare for the your big day. I actually noticed many more than 5 tips in the video, but the ones I labeled are the best testing tips I mentioned.
This was a lot of fun to edit. I love tests and the effort that goes into them and I think it shows with the way I decided to v-log this day and help others with their testing day while I'm at it.
ASE testing is the only way on paper to show skills other than your word on a resume. It can be a valuable tool for jobs, but remember, it's just paper. This is a profession where you have to show with your actions that you know what you're doing. These papers back this up, or prove that you're good at books, versus real-life doing.
That's the arguments for and against that I've seen. My personal view on it, is that studying can teach you things, which combine with real-life experience and make you better at your job. I've had many moments where, because I studied deep behind a question on the ASE test prep, I saw through to the core of many problems, when I may not have been as able otherwise.
I could have chosen easier tests, but I specifically wanted to take 3 tests, 2 of which would show case my talents the most. The two? Electrical and Engine Performance. I threw brakes in there just because a boss figured it was a good first test.
I must say brakes were harder to study up for in a way than electrical because you can know brake systems very well simply on the surface, but the nitty gritties are deep in the world of brakes. Without that study, you'll miss some subtle clues if your not more book learned on top of experience.
Electrical was easier because I've had a background in since I was a child. I never went far, but if you have the basics down pat, it's not too hard to add to it. The resource I show in this video for studying has more modern electrical questions, which other sites often explain tools and procedures that no modern shop actually does any more. Testing tools, and parts have changed, but the electron, and how it behaves, remains the same.
Engine Performance, or how I prefer to refer to it, diagnostics, was the easiest for my to study up on, because it was my favorite to study. The actual test still managed to be very challenging, just like the others, but I finished it more under the maximum time allowed than for the brakes tests.
The tests I took by ASE designation:
A5 – Brakes
A6 – Electrical/Electronic Systems
A8 – Engine Performance
2.44K
views
Reinstalling the Nissan Frontier's Fake Cold Air Intake Part 2
Truly, fake, stock, cold air intakes is a very common problem for making power. It's not just Nissan, I notice manufacturers do it all the time. In this video, I show serious issues with my inexpensive eBay Short Ram as I discover through installation issues which were present also on the stock air box without realizing it! Understand, that while this particular example is on a Nissan Frontier, Pathfinders and 2002-2004 Nissan Xterra's should have identical engine pays if it has the V6. Know that if you have the supercharger, it doesn't effect the kit you need to run the short ram intake, which I'm talking about, but I do recommend upgrading one of the air filter components from the inexpensive eBay kit.
Again, more specifically, this is how to successfully install a stock air intake on the following vehicles:
1999-2004 Nissan Frontier
2002-2004 Nissan Xterra
1996-2000 Nissan Pathfinder
Also, it should work for these Nissan products to an extent, which I'm less familiar with as they are either not in the U.S.A. or I just haven't gotten my hands on them, but the have the same Nissan VG33E engine as my truck:
* 1996–2004 Nissan Pathfinder In Australian Models
1997–2000 Infiniti QX4
1997–2002 Nissan Elgrand
1999–2002 Nissan Quest/Mercury Villager
1999–2004 Nissan Paladin
(the previous years are according to wikipedia)
Don't want a fake cold air intake? After you've read and watched this series, you should be better equipped to see if their are issues with your stock intake on a variety of vehicles, which may be robbing you from pressure cold air, which increases fuel consumption for sure, but hopefully raise the almighty wHP as well! :)
Due to factors beyond the control of DE Nichols/AutoBravado it cannot guarantee against unauthorized modifications of this information, or improper use of this information. DE Nichols/AutoBravado assumes no liability for property damage or injury incurred as a result of any of the information contained in this video. DE Nichols/AutoBravado recommends safe practices when working with power tools, automotive lifts, lifting tools, jack stands, electrical equipment, blunt instruments, chemicals, lubricants, or any other tools or equipment seen or implied in this video. Due to factors beyond the control of DE Nichols/AutoBravado, no information contained in this video shall create any express or implied warranty or guarantee of any particular result. Any injury, damage or loss that may result from improper use of these tools, equipment, or the information contained in this video is the sole responsibility of the user and not DE Nichols/AutoBravado.
1.45K
views

Reinstalling the Nissan Frontier's Fake Cold Air Intake Part 1
You've got that right, it's colder than the Short Ram Intake, which I tried, but it sure as heck is FAKE. Be sure to watch to find out how it's fake and understand, I'm a mechanic for a living, I realize all kinds of original equipment from manufacturers have ways of making it look like you have a cold air intake when you really don't have one. For example. Your intake manifold is on one side of the engine bay. They won't take air from over there, they'll stretch to the opposite fender well so it looks cold, but it really is just another hot air intake to save gas. I like saving gas too, but don't be fooled if your goals are to make power.
In the last video I evaluated the Short Ram Air Intake as I got rid of it: https://youtu.be/7Zud8L9B32g
So Stock Air Intake vs Short Ram? Which is the winner? You may better decide yourself from my first video of the series: https://youtu.be/OOpdvqRYHms Depends on your climate but anything more than 70 degrees F outside or about 25 degrees C, plus non-moving traffic, and you've got an intake which is running very warm. Don't get me wrong it's efficient, but even though when you start moving the short ram sucks in cold air from behind the headlight, the IAT or intake air temperature sensor with this basic modification doesn't actually see that colder air and it throws your fuel trims showing rich. That's because the short ram really does immediately get cold air, but your computer can't see that since the IAT is in a pipe with relatively unmoving air. It's gone from an intake air temperature sensor to a engine ambient temperature sensor. It's next to the radiator and air does come past it, but the short ram being right behind the head light, it gets close to ambient air whenever it's moving.
You'll see these issues even better when I come out with part 2 of my Nissan Frontier's Stock Cold Air Intake Install.
From 1998 to 2004 there were a lot of V6's by Nissan which should apply to this information. There's the Frontier, the Pathfinder, and even the 2002 to 2004 Xterra as it exists in the same time frame. Get under the hood and you'd forget it was a different car. I got to work on one the other day at the shop. The SUV is way lighter than the truck so I bet the V6 in it feels like a lot more. Everything on the chassis is lightened that I looked out too. Probably really fun vehicles.
Due to factors beyond the control of DE Nichols/AutoBravado it cannot guarantee against unauthorized modifications of this information, or improper use of this information. DE Nichols/AutoBravado assumes no liability for property damage or injury incurred as a result of any of the information contained in this video. DE Nichols/AutoBravado recommends safe practices when working with power tools, automotive lifts, lifting tools, jack stands, electrical equipment, blunt instruments, chemicals, lubricants, or any other tools or equipment seen or implied in this video. Due to factors beyond the control of DE Nichols/AutoBravado, no information contained in this video shall create any express or implied warranty or guarantee of any particular result. Any injury, damage or loss that may result from improper use of these tools, equipment, or the information contained in this video is the sole responsibility of the user and not DE Nichols/AutoBravado.
868
views

Can You Get a Good, Long Ratchet For Cheap?
Initial impressions are often called tool reviews.
I'd prefer to wear a tool out and then tell you about it.
Today, I combined both concepts. Here's a full review. How's it look new and shiny? How's it holding up after a brutal job?
Watch to the end. Or you won't know which tool totally crapped out! Was it by AutoZone's brand, Duralast? Was it Harbor Freights Pittsburgh ratchet? So hard not to reveal...the tool which did fail felt SO good on the bench, but on a car. FIRED!
Here I compare Harbor Freight long ratchets from 3/8" to 1/2" against 3/8" ratchets by Duralast and my EZ Red - gone for warranty. I also talk about a possibly ultimate ratchet by Matco which is both long, ratcheting, flex-head, and locking. Each feature you dismiss including the comfort handle is a discount.
479
views
1
comment
Get Rid of your Short Ram Intake!
Short Ram Intake uninstall. I'm such a tease with this title. I did like the Short Ram Intake, but for this 2004 Nissan Frontier, it really didn't like the first afternoon that got warm! Fuel trims went nuts. They went very rich. The colder it is the more accurate the IAT or intake air temperature as unfortunately, this kit doesn't have a place for the IAT to plug in. Honestly, the wires are so short, they wouldn't reach this intake regardless.
I could prattle on, but I already have a video all about it so check it out here! :) https://youtu.be/OOpdvqRYHms
And below my safety message I explain a from very similar vehicles this video applies to and a few terms used in the video.
Due to factors beyond the control of DE Nichols/AutoBravado it cannot guarantee against unauthorized modifications of this information, or improper use of this information. DE Nichols/AutoBravado assumes no liability for property damage or injury incurred as a result of any of the information contained in this video. DE Nichols/AutoBravado recommends safe practices when working with power tools, automotive lifts, lifting tools, jack stands, electrical equipment, blunt instruments, chemicals, lubricants, or any other tools or equipment seen or implied in this video.
Short Ram Intakes and summer haven't worked for me for two of my builds. This 1st Generation Nissan Frontier was no exception. This short ram intake ot SRI doesn't even work in Spring or Fall like weather. 70 degrees F And up and you can't sit in traffic without issue.
Similar vehicles this work would work on are from 1998 to 2004 for the Nissan Frontier and Pathfinder. Looking under a Pathfinder's hood is like a double take for me! LOL. I saw some Xterra's after 2004 which looked the same under the hood too. Just has to have the V6 and it should look and work like this.
The MAF or mass air flow sensor should be accurate on this setup as the MAF comes in it's own tube which is unchanged going from the stock air intake to SRI. A MAF senses how much air is coming in via a hot wire.
458
views

Braun Slim Light by Harbor Freight and Multimeter Review
Here I briefly review the Braun Slim Light. You can read way more about it, down below. I heard it's largely popular because the battery is exchangeable and externally chargeable. I don't have extra batteries or an external charger, but that shouldn't be a surprise. I don't think if you get it, that you've found it from Harbor Freight. While this is the word on the YouTube street, I saw a lot of reviews before I even knew what I owned was popular, lol. I think most people don't even know about this as I watched a few videos and read many comments to even know about this.
390 Lumen Magnetic Slim Bar Folding LED Worklight. What a mouthful. It's easier to say it's item no. 63958. That's Harbor Freight's complete title for this product. A lot of popular mechanic flashlights use 2 AAA batteries and they produce maybe 220 lumens. I'm specifically talking about the Streamlight which goes in your pocket like a pen would. Very efficient to focus in on what you're working on, but working with more lumens over a bigger area can make the increase in light you get not seem as great as it really is. Having the slim bar focus the light forward helps as a lot of area lights have a wide angle to blind you as you work. That's still an issue with this light as I've found working with it. It's base for it's large battery is quite tall so it can be a challenge in tight places to use this and not get glare, especially if you where glasses as they can pick up glare from behind you. The Braun slim light twists and bends so while this sounds like a lot of adjustment, it'll feel limited under hoods, especially with modern cars actually having way less steel that you can use on it's magnet. Watch out for bolts. They more often have enough feral, or magnetic metal so you can still get a grip with this light.
More about multimeters. They're often called DVOM for digital volt ohm meter. Lots of people call them simply volt meter or oh meter. Thus the "multi" part of the name is they have a lot of options. Even amp measurements, but as my subscriber Terrace Balloon Man learned, the AMP meter is usually limited to a pretty low AMP, and if you go above it, you'll blow out your instrument. This can be true on a very expensive DVOM as well.
Be safe around electricity. These don't just test "safer" 12 volt systems on cars, they can also be used in the house, where electricity is far more capable of killing you.
Due to factors beyond the control of DE Nichols/AutoBravado it cannot guarantee against unauthorized modifications of this information, or improper use of this information. DE Nichols/AutoBravado assumes no liability for property damage or injury incurred as a result of any of the information contained in this video. DE Nichols/AutoBravado recommends safe practices when working with power tools, automotive lifts, lifting tools, jack stands, electrical equipment, blunt instruments, chemicals, lubricants, or any other tools or equipment seen or implied in this video. Due to factors beyond the control of DE Nichols/AutoBravado, no information contained in this video shall create any express or implied warranty or guarantee of any particular result. Any injury, damage or loss that may result from improper use of these tools, equipment, or the information contained in this video is the sole responsibility of the user and not DE Nichols/AutoBravado.
287
views
Does BG Fuel System Cleaner Really Work?
In this video DE Nichols explains using a 4 cans with 3 BG Products. Air Intake Cleaner System X2, Fuel System Drier (NEW!), and 44k for ongoing cleaning into the gas tank. The fuel system drier also goes into the gas tank and it used to not be part of BG's full fuel system cleaning service.
Remember, I have related videos, What Additives Really Work? https://www.youtube.com/playlist?list=PLh_yB9HJ4Gi4g_4FN6WIDzOnB0zsiiUd0
Honestly, you'll see in the video smoke coming out of this car like it has Seafoam! DE Nichols, longer known as AutoBravado has never seen BG Air Intake Cleaner System smoke out of the exhaust like this! Be sure to be safe around this exhaust. DE Nichols gets a headache from it and the other mechanics do too. If you have the option, run it on the vehicle outside instead of the garage, and if in the garage, don't just open the doors, take a tail pipe hose and get that exhaust even farther away.
After the intake cleaning service of this Toyota Camry, the catalytic converter looked like it was helping the rear O2 sensor get a more steady reading. This got this customer out of an expensive $1000+ catalytic converter repair! DE Nichols also talks about a Chevy Colorado with only 90kish miles. It was running terrible and misfiring. Only being a few years old, it shouldn't have had all these issues. DE Nichols checked the TSB's and found that Chevy said that if an intake cleaning service didn't solve it, then the cylinder heads would have to be removed and be manually cleaned. GM also stated that this can be done as normal for maintenance to prevent the problems from starting in the first place. You see Direct Injection engines don't have fuel injectors behind the intake ports which keeps those valves clean. Without that cleaning being in the design, these types of cars can be prone to having "failing engines" when really they just need a clean up! "Normal" or older cars have port injected engines and they are more reliable, but sometimes they need a service like this to run like new again too. Like the Toyota Camry which was cleaned up in this video.
Watch on Rumble, I make more money, join the bigger conversation no YouTube! :) https://youtu.be/cv63wy0PnHE
Regular safety/disclaimer message:
Due to factors beyond the control of DE Nichols/AutoBravado it cannot guarantee against unauthorized modifications of this information, or improper use of this information. DE Nichols/AutoBravado assumes no liability for property damage or injury incurred as a result of any of the information contained in this video. DE Nichols/AutoBravado recommends safe practices when working with power tools, automotive lifts, lifting tools, jack stands, electrical equipment, blunt instruments, chemicals, lubricants, or any other tools or equipment seen or implied in this video. Due to factors beyond the control of DE Nichols/AutoBravado, no information contained in this video shall create any express or implied warranty or guarantee of any particular result. Any injury, damage or loss that may result from improper use of these tools, equipment, or the information contained in this video is the sole responsibility of the user and not DE Nichols/AutoBravado.
105
views
Why a Short Ram Intake? The reason will surprise you.
For this project, I show you my Short Ram Intake, or SRI, on my 2004 Nissan Frontier. The Stock Intake looks like a Cold Air Intake on this truck, but I reveal secrets that I believe Engineers try to cover up on a lot of cars and trucks!
See my last Short Ram Intake project and how I turned it into too cold of an air intake for the fuel injectors to keep up!
https://youtu.be/SfTcm3J92E4
I installed this to try and get better miles per gallon for my truck in the winter. I believe it worked. I more often got 16 mpg, when I had been seeing a lot of 14 mpg. I still had a couple of 15 and 14 miles per gallon days, but they were a lot less frequent.
So the next time your trying car mods, try a short ram intake for the winter, or maybe a cold air intake or CAI for the hotter areas! (In the winter, you may find that if a cold air intake is succesful that this car mod will impact your MPG in the winter.
In the video I also reveal the wHP and Torque figures I experienced in real world conditions. The first picture is literally identical to multiple runs which I tried. The 2nd was a day one of the runs I did with the stock intake on an extra cold day, so of course wHP was up that day. Unfortunately, it's too rare for me to have that cold of a day with my stock intake to try it on the short ram, but I had other days which were more comparable on humidity and temperature and found the gap in wHP is greater on hot days, being that the SRI or hot air intake does worse, but Torque is actually always the same.
Due to factors beyond the control of DE Nichols/AutoBravado it cannot guarantee against unauthorized modifications of this information, or improper use of this information. DE Nichols/AutoBravado assumes no liability for property damage or injury incurred as a result of any of the information contained in this video. DE Nichols/AutoBravado recommends safe practices when working with power tools, automotive lifts, lifting tools, jack stands, electrical equipment, blunt instruments, chemicals, lubricants, or any other tools or equipment seen or implied in this video.
85
views

Increase Efficiency with TCW3? How does it compare to Lucas Upper Cylinder Lubricant?
In this video you'll see DE Nichols compare TCW3 to Lucas Upper Cylinder Lubricant. Either fuel additive has it's proven benefits, but how do they match up? How do they compare? Be sure to watch to find out.
Related videos:
DE Nichols learned a ton about Lucas Upper Cylinder Lubricant with injector cleaner from his last video on it. Be sure to not just watch but see the informed comments about it!
https://youtu.be/ATL19lVpmAk
This video and the last recommended video were about gasoline additives, but what about oil additives?
Lucas Pure Synthetic Oil Stabilizer.
https://youtu.be/l4achSOMO8c
DE Nichols talked a little about the oil additive in this video but in the above link you can learn a lot more!
Safety message:
Due to factors beyond the control of DE Nichols/AutoBravado, no information contained in this video shall create any express or implied warranty or guarantee of any particular result. Any injury, damage or loss that may result from improper use of these tools, equipment, or the information contained in this video is the sole responsibility of the user and not DE Nichols/AutoBravado.
42
views

What's a Snail have to do with Spark Plug Wires and a Motorcycle Jack?
Nissan Frontier Spark Plug Wires again? Yeah, well, sometimes even new wires start melting into each other. I did drive across the United States in the summer. Super long drives may warrant extra protection. That's my takeaway, 20/20 looking back at this video. Also, this video was super difficult to edit until I realized it was just a story. I'm working on my car, I realize I need a new part, and I end up buying something else which is a surprise while I'm at the store. The only reason this went more of a vlog style was because of that snail. That changed everything! My apologies about him changing his channel name. Do look out for him in the comments. Once he does, I'll get him better represented in this description.
Regular safety/disclaimer message:
Due to factors beyond the control of DE Nichols/AutoBravado it cannot guarantee against unauthorized modifications of this information, or improper use of this information. DE Nichols/AutoBravado assumes no liability for property damage or injury incurred as a result of any of the information contained in this video. DE Nichols/AutoBravado recommends safe practices when working with power tools, automotive lifts, lifting tools, jack stands, electrical equipment, blunt instruments, chemicals, lubricants, or any other tools or equipment seen or implied in this video. Due to factors beyond the control of DE Nichols/AutoBravado, no information contained in this video shall create any express or implied warranty or guarantee of any particular result. Any injury, damage or loss that may result from improper use of these tools, equipment, or the information contained in this video is the sole responsibility of the user and not DE Nichols/AutoBravado.
20
views