
Can this 13 year old Walmart Red Dot Still hold up?
Full review and where to buy: https://crackshot.tv/can-this-13-year-old-walmart-red-dot-still-hold-up/
I thought I’d do a fun video today and review the first red dot I ever purchased from my earliest days of gun ownership.
This Truglo Dual Color 30MM red dot is as vintage as they come. I purchased mine well over a decade ago for $50 from walmart back when Walmart used to actually sell gun stuff, and its still available on Amazon today.
The optic honestly isn’t as bad as you might think. I had it mounted for many years on an SKS, and it always held zero with the 7.62x39mm cartridge. But is this optic still relevant today?
The optic is built heavier than most modern red dots.
With a 30mm window, it actually has a pretty large window size. it featured red vs green options which was a popular feature at that time.
The larger 5MOA dot has also fallen out of popularity, especially on rifles. 2 MOA is pretty typical for rifle red dots nowadays. If you think about it, the 5MOA dot would cover a 5 inch target at 100 yards, and a 10 inch surface area at 200, so it is just way to wide for rifle shooting by today’s standards.
This optic is also quite heavy, weighing in at almost half of a pound, and that’s excluding any riser mounts.
Most modern red dots now-a-days weigh less than 5 ounces in weight.
The mounting hardware is also pretty dated on these. I’ve had the screws loosen up and need to be repeatedly re-tightened between range sessions. They definitely aren’t as secure as modern designs using hex screws that fit flush with the mounting hardware.
Also given the length of these red dots, you’d need a pretty long riser to really mount these comfortably on an AR-15.
That said, my particular optic has stood the test of time, but more recent reviews seem to indicate that perhaps the quality may have cheapened in recent years.
Are these optics still relevant today? Honestly no. They weren’t awful for their time, but they haven’t aged very well when you can purchase more modern choices like the bushnell TRS-25 for usually around just $10 more, which still has a sizeable 25mm window, but coming in at a much smaller package.
So I definitely can’t recommend these in 2024, but hey, if you want vintage like the Gen Z crowd. These have aged reasonably well and you can do worse for under $50.
I hope you enjoyed this vintage throw back video. Comment below if you ever owned one of these classics or with what your first starter red dot was.
94
views
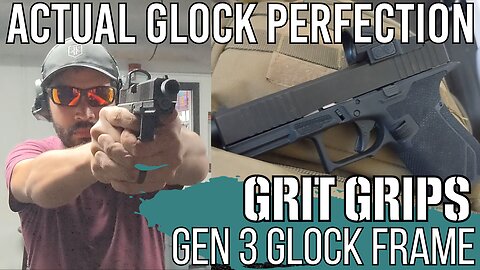
Grit Grips Glock 19 Frame - ONLY Frame to Consider for Gen 3 Builds
So I know what you're thinking, the Glock 19 frame market is completely over saturated. Why do we need another after market Glock 19 frame?
Well today I'm going to make the case that the grit grips Glock 19 replacement frame is the absolute best frame on the market bar none. It is my honest opinion that this frame is the Glock 19 frame killer, OEM or after market, this one is the best. There are many reasons for that so without further ado, let's dive in.
Let's jump into why. So the biggest complaint that I hear about people who don't like Glock is the Glock grip angle. Most people come from the 1911 that has an 18 degree angle off square. Standard Glock frames have a steeper 22 degree angle off square.
The story goes that where John Browning designed the 1911 to naturally point with your pointer finger, Gaston Glock designed the Glock like a handshake. You point a Glock with your thumbs as the saying goes.
The grit grips frame will be really popular with those of you who prefer an 18 degree grip angle. Personally, I don't care much, either grip angle is fine. With an active style grip, the grip angle honestly doesn't matter all that much But I wouldn't recommend jumping between them as the change in grip angle can make it harder to pick up the red dot on optics equipped pistols if you keep swapping between pistols that have different angles.
With an active style grip, the goal when gripping the pistol is to get as high up on the frame as you can while focusing pressure on the front of the grip. I'll explain more on why I like this grip on another video, but just know that this frame is optimized for that grip style.
The frame is cut in the back with as tight of a bore axis as possible while featuring an extended beaver tail to prevent slide bite, another common complaint that people have about Glock solved by this frame. The frame is also double under cut allowing you to get both your primary and support hands high up on the pistol. These factors result in a very low bore axis making this a very shootable pistol.
If that wasn't good enough, the stipple pattern on this pistol is the best I've ever seen, not just from after market Glock frames but on any pistol in general. I like stippling my pistols, so this was naturally up my alley, being stippled 360 degrees around the entire grip. Now you may think that this grip, given the brand grit grips, would be as gritty as sand paper. Oddly enough it isn't, this is still very comfortable for EDC while yet being extremely grippy. It's hard to explain the texture except that grit grips really got this one right. It's extremely grippy but not uncomfortable to carry.
And that leads me to my favorite part of this frame, the accelerator cut. The accelerator cut is stippled but it's also shaped such that a pedal is cut out, integrated right into the frame. With an active grip style like I mentioned before, I can actually torque my thumb down to help mitigate recoil. Combining this with the low bore axis makes this a very shootable pistol.
I also love the way that the grip is rounded. It's not boxy like other after market frames and it also doesn't have finger nubs like a standard gen 3 frame. This is by far the most comfortable Glock frame I've shot.
The 18 degree frame points very naturally. The grip is large enough for my average sized hands to get all my fingers around on my primary shooting hand. Since the grip is essentially a lever, your pinky plays a role in keeping recoil in check. These factors make it very easy to shoot one handed.
Reloads are straight forward with this frame as well, about the same as with any other glock frame.
I talked to the creator of the grit grips frame about after market magwells, and since the frame was designed from the bottom up, it isn't compatible with any after market magwells currently on the market. As you might have seen from my PSA dagger upgrade video however, the GG Magwell for the dagger is an excellent magwell, and grit grips has assured me that they'll be releasing another top quality magwell for their frame as well soon.
And speaking of easy to use controls, the frame has an ambidextrous mag release which is huge for gen 3 builds. Now the gen 3 sadly doesn't have an ambidextrous slide release options, but if you're left handed you probably train dropping the slide with your support hand anyway.
As far as shootability goes, I purposely ran this frame with a pretty basic setup. I shot it with a Brownells RMR cut slide and a lone wolf distributing threaded barrel, nothing fancy. It was very easy to control recoil with typical 115 grain blazer fmj ammo.
So overall the features of this frame are tailor made to my style of grip. I feel like this frame was made for me. It's literally everything I could ever want in a Glock frame. It addresses so many issues with the gen 3 Glock and other after market frames, I think this is really going to shake up the Glock after market.
184
views
1
comment

History of the H&K MP5
Want to learn more? Check out our full Firearms history series: https://crackshot.tv/category/history-of-guns/
Join us as we dive into the intriguing world of firearms with our latest video, "The History and Evolution of the Heckler and Koch MP5."
In this captivating exploration, we'll take you on a journey through time, uncovering the origins and milestones of this iconic weapon. From its conception to its modern variations, we'll showcase the incredible engineering and innovation that have made the MP5 a legendary firearm in the industry.
With insightful analysis and expert commentary, we'll provide a comprehensive understanding of how the Heckler and Koch MP5 has shaped the landscape of firearms technology.
Whether you're a passionate collector, an avid shooter, or simply curious about the intriguing history behind this firearm, this video is a must-watch.
So, grab your popcorn and get ready to be amazed by the remarkable story behind the Heckler and Koch MP5. Don't forget to like and share this video with your fellow firearm enthusiasts!
112
views

Field Strip Any Glock Pistol in Under 30 Seconds
Field stripping or disassembling a glock down to the bare parts is extremely simple. After you've mastered disassembly, it can be done in under 30 seconds.
In this short video, we'll show you how to field strip a glock down very quickly and the tips and tricks that we've learned over doing this many, many times.
153
views
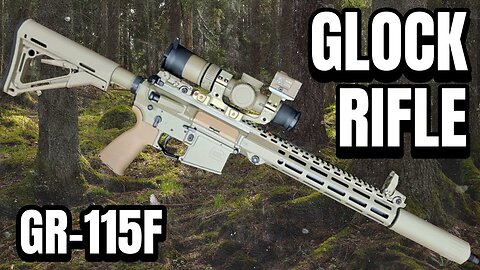
GR-115F : The Fabled Glock AR-15
Want to learn more? Check out our full Firearms history series: https://crackshot.tv/category/history-of-guns/
In this engaging video, we delve into the intriguing story behind the British commissioning a new rifle to replace the SA-80 / L85A2 rifle for its special Forces. Glock's entry for this contract was the GR-115F. Join us as we uncover the reasons behind this decision and explore the unique features of the GR-115F that caught the attention of the British military.
If you're a firearms enthusiast or interested in military history, this video is an absolute must-watch. Hit the like button if you want to see more content like this and feel free to share this video with fellow enthusiasts!
101
views
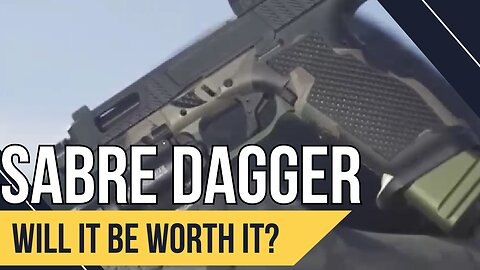
PSA Sabre Dagger Promo Initial Reaction : Will it be worth it?
To be clear i have no rights to the PSA Sabre Dagger and I have no relation to PSA. I am just a huge PSA fan boy. I've spent countless hours upgrading and tweaking the PSA dagger. This is my initial thoughts and reaction to the PSA saber dagger promo footage that was released earlier this week.
Official PSA Sabre Dagger Promo: https://www.youtube.com/watch?v=RwFrdqWveaA
The PSA Dagger is my favorite pistol. So when PSA announced the "Sabre Dagger" premium line, I was incredibly excited. Earlier this week, PSA released more promo footage of the sabre dagger. I was shocked how similar it was to the one that I custom upgraded, of course theirs is night and day better.
In this video, I'll analyze everything we know about the Sabre offering from that promo video, and compare it against the base PSA dagger that I upgraded, as well as share how much time and money it cost me to upgrade the base dagger, to help level set the value proposition of the Sabre Dagger itself.
tldr; In my opinion, PSA knocked it out of the park with this one, I'm really excited for the launch next week. You really need to pay attention as I think these will sell out instantly.
230
views
2
comments

History of the AK : From the AK-47 to the Modern AK-12
Want to learn more? Check out our full Firearms history series: https://crackshot.tv/category/history-of-guns/
Join us as we embark on an immersive journey into the captivating history of the AK series! From the iconic AK47 to the AK74 into the modern age of the AK100 and AK12 series, we delve into the origins, innovations, and enduring legacy of these legendary firearms.
Uncover the secrets behind their design, understand their impact on modern warfare, and discover the fascinating stories behind their development.
Whether you're a history buff, a firearm enthusiast, or just curious about the AK series, this video is a must-watch!
Don't forget to like and share this video with your friends who also appreciate the rich history and progressive development of these remarkable weapons.
239
views
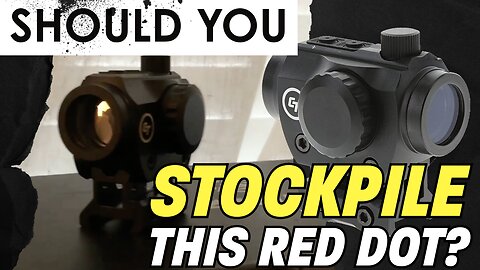
Should you stockpile this cheap red dot? (Crimson Trace CTS-25)
The crimson trace CTS-25 is an affordable red dot. With an MSRP of $79.99 it is competitively priced with other entry level red dot options. Routinely, it can be found on sale for around $55 or less. This makes it a tempting option for those of you collectors who need an affordable optic to throw on a bunch of AR builds. The question is, is this red dot any good or should you keep looking? This red dot actually has a lot of flashy features that we'll cover.
Before we dig in, I want to know, what is your go to red dot that you run on your rifles?
Let's start with what's good. This led emitter has both red and green options which is nice because everyone's eyes are different.
The CTS-25 features a 4MOA red dot with a 25mm objective lens. The field of view is slightly wider than most competitors for micro red dots. 20mm is the standard for the Sig Romeo-MSR, Romeo 5, Holosun 403/503, and equal in size to the Bushnell TRS-25, as well as coming in a hair smaller than the Bushnell TRS-26. So it has a good window size for its compact size.
The battery compartment itself is located on the side and it takes standard CR2032 batteries.
The Windage and elevation controls sit under the removable caps and can be turned with a flat blade screw driver or a bullet shell in a pinch.
The brightness controls are manual, but the push buttons are of good quality.
The body is made of durable 6061 Aluminum. So overall a pretty par for the course basic red dot. It does include a solid pic rail riser as well.
So far so good, but would I put this on my rifles? Well, I would say no. There are better options at the same price range. Its cool the amount of features Crimson Trace packed into this optic for such a cheap price, but it has some issues that I found were enough that I kept taking it off rifles to replace with other optics.
My biggest gripe is the placement of the internal emitter. It blocks part of your field of view. If you have it mounted very close to your eye, it doesn't matter, but as soon as you try to mount this far enough away for usage with a magnifier, it obscures a good portion of the window.
The optic also has a bit of glare in different lighting conditions. I found that I could see my own reflection in it frequently which was distracting.
The glass is also a bit hazier than other red dot optics I own. And 4MOA is a bit wide for my liking, especially with a magnifier. I would much rather run a 2MOA red dot optic.
So overall I would personally say no, this probably isn't the one to run on your backup rifles. Certainly, you should opt for the next tier up or better for your primary rifle. The optic has some cool and unique features, but I'd rather have a basic red dot that is designed well.
The market in 2024 is really saturated with high quality red dot optics, and for the same price you can get a Bushnell TRS-25 or better yet, the super rugged TRS-26 often on sale, for right around the same price. So overall I'd recommend holding out on a sale and picking up ideally, the Bushnell TRS-26, the Holosun 503C, or the Sig Romeo 5 if you're looking for an affordable optic to scale across a few builds.
I hope this video was helpful to you, thanks for watching.
266
views

Dryfire Bill Drill at Home - MARS Mobile
https://crackshot.tv/bill-drill-with-mars-mobile/
A bill drill is an incredibly powerful but simple shooting drill that is focused on stretching your shooting fundamentals with any firearm platform. Simply put, it consists in it’s most basic form of putting 6 rounds into a target as quickly as possible with acceptable accuracy at a short distance.
How to Perform a Bill Drill?
Performing a Bill Drill using Dryfire with Project MARS
Project MARS supports running bill drills at home. MARS Mobile is best used with standard “metric” USPSA targets or “classic” IPSC targets. Ideally, you’ll have a laser dry fire setup that will allow you to fire semi automatically. Check out our equipment guide for more details on the ideal dry fire setup.
Make sure that you are dryfiring in a safe environment. Make sure there is no ammunition located anywhere in the dryfire area.
To begin, setup any target (ideally a USPSA practice target) on your wall.
Setup your phone with MARS Mobile, with the rear facing camera pointed at the target.
Add at least one target area covering the target.
Select the “Bill Drill” mode. Begin.
The “Shooter ready?” range command will commence
Position yourself 7 yards or so from the target
When the shot timer rings, fire 6 shots into the target, attempting to keep all shots in the center of the target (A-Zone on a USPSA Target)
Interpreting the Results
If using USPSA style targets, your hit factor will be calculated based on the minor or major power factor (depending on your selected settings). Your goals for improvement with this drill will generally be as follows.
Goal 1: Improving Hit Factor
Hit factor is a concept used in USPSA to determine a shooter’s ability in a given stage as compared to other shooters. Achieving a higher hit factor is desirable. If you aren’t familiar with hit factor, read this article, as an understanding of the concept is critical to maximizing training benefits.
Just as some USPSA stages are more difficult than others, as you add more difficulty to the drill (e.g. shooting from further away, drawing from the holster, closing your eyes until the buzzer goes off), these factors will negatively impact hit factor score as they will add time to the drill. Keep this in mind as you challenge yourself more.
Goal 2: Shooting Speed
The main goal of the Bill Drill is to develop shooting speed while maintaining a combat proficient level of accuracy. You want to shoot a string of fire as quickly as you possibly can while maintaining that minimum accuracy standard. At say 7 yards, an acceptable group running this drill with a 9mm pistol would be all hits within the a zone on a 6 inches circle.
Goal 3: Shooting Cadence
The reason for establishing shooting cadence is that it keeps you from developing bad habits. It’s better to go slower at first, focusing on the fundamentals of marksmanship, picking up speed gradually as you get better with a given weapons platform.
Goal 4: Maintaining Accuracy while Shooting Fast
With this drill, we aren’t worried about bullseye shooting accuracy. Rather, we’re focused on practical accuracy. We want to get lots of hits in a reasonably accurate target area, in as little time as possible, rather than getting 6 well placed hits in a very short amount of time.
Applying the Bill Drill in a Live Fire Range
Finally, the whole point of dryfire is to make as many gains as possible before trying a particular skill on the live range.
A bill drill on the live range isn’t so different than the bill drill while dryfiring. Keep in mind that some ranges have limits on shooting speed (e.g. 1 shot per second), in which case you should ideally find a range that does not restrict rate of fire.
Traditionally, shooters will stand 7 yards from the target. Shooters can start by drawing from the holster or from a low ready position. Shooters will put 6 rounds into the target as quickly as they can while maintaining an acceptable level of accuracy (all A Zone hits on a USPSA target is acceptable, achieving about a hand sized grouping is ideal). The drill should be performed with a shot timer.
Practicing with MARS Mobile first will help you familiarize yourself with a bill drill maximizing the benefits of live fire training. All of the concepts of dry fire training with a bill drill carry over to a live fire context.
211
views
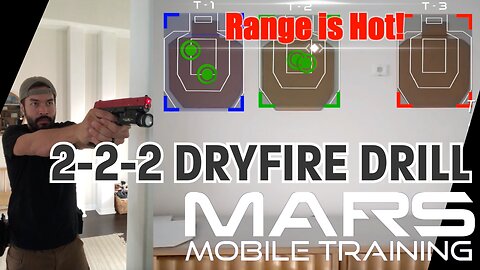
2-2-2 Dryfire Drill at Home - Project MARS
https://crackshot.tv/2-2-2-drill-with-mars-mobile/
A 2-2-2 drill is an incredibly powerful drill for testing your ability to transition between targets. Simply put, it consists in it’s most basic form of putting 6 rounds into three targets, 2 rounds each, as quickly as you can with acceptable accuracy.
Project MARS supports running 2-2-2 drills at home.
Ideally, you’ll run this drill with USPSA style targets.
You’ll need to add at least three target areas covering your three targets.
Select the “2-2-2” mode. Begin. The 2-2-2 drill includes shot timer capabilities for tracking hit times, but it also includes a fixed or random start timer depending on settings to simulate real competition.
While positioned about 7 yards from the target, when the buzzer rings, fire 2 rounds into each target. Your goal is speed with a rythmic shooting cadence. Ideally, you’ll want to maintain a zone level accuracy.
120
views
1
comment

Dryfire V-Tac / Accelerator Drill - MARS Mobile
https://crackshot.tv/v-tac-accelerator-drill-with-mars-mobile/
A V-Tac drill, also sometimes called an Accelerator Drill, is an incredibly powerful drill for testing your ability to transition between targets while combining your ability to put lots of rounds down range. Simply put, it consists in its most basic form of performing multiple target transitions while testing your ability to control and run the firearm. The drill gets its name because of the increasing volume of fire in the drill. You’ll increasingly put 1 more round into each target as you move between targets, effectively “accelerating” your rate of fire which is why this is sometimes called an accelerator drill.
This drill gets expensive fast, so doing it with dryfire is ideal. Project MARS supports running V-Tac drills at home. With at least 3 targets set up, select the V-Tac mode to begin.
When the shot timer rings, fire 1 shot into the first target, 2 shots into the second target, 3 shots into the third target, 4 shots again into the second target, and 5 shots into the first target, attempting to keep all shots in the center of the target (A-Zone on a USPSA Target)
77
views
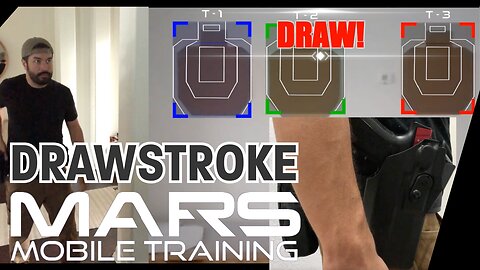
Dryfire Drawstroke Speed Drill - MARS Mobile
https://crackshot.tv/drawstroke-shooting-mode/
Getting fast on your draw stroke is one of the easiest ways to improve your competition shooting times. Beyond being fast from the draw, it is also important in self defense and concealed carry contexts. Getting out of the holster and on target accurately may actually be the most important skill that you can train regularly.
To facilitate this we’ve developed the MARS Mobile drawstroke mode. This mode incorporates a start timer, either fixed or random depending on your settings, that will train you to draw from the holster based on a trigger, in this case the shot timer, and time how quickly you can fire a round on target.
Your goal here again is speed with combat level accuracy. Try to get your draw time plus time to first shot on target to under 1.2 seconds consistently. It is very difficult to do, but if you can get there you’ll find that you’ll be one of the faster shooters in any given competition.
66
views

Dryfire Rotating Targets Mode - MARS Mobile
https://crackshot.tv/rotating-targets-shooting-mode/
The rotating targets mode is a unique dryfire mode that has you rotating between 2 and 6 targets. This mode will add a slight stress element to your dryfire practice, forcing you to engage your brain while dryfire practicing. It is harder than it looks.
in this mode, MARS Mobile will call out a random target between 1 and 6. You’ll have to shoot whatever target MARS calls out as quickly as you can. The goal of this mode is to hit the targets as quickly as you can. Doing so will train you to be flexible when transitioning between different targets at varying distances. You’ll also be able to track your split times, between target transitions, so try to improve your speed with this mode over time.
54
views
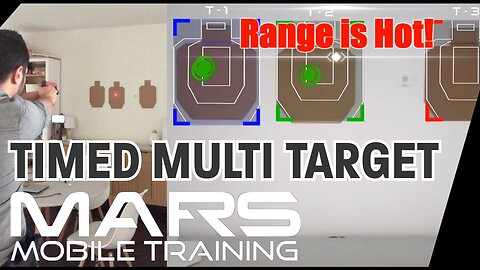
Timed Multi Target Dryfire Mode - MARS Mobile
https://crackshot.tv/timed-multi-target-mode-with-mars-mobile/
The timed multi target mode is similar to the multi target mode in that you can specify how many rounds are required per target in order to complete the set. However, it differs from the multi target mode in that you can set a max timer that must not be exceeded in order to complete the drill. The time for the drill does not include the random or fixed start timer before the drill.
This can be helpful if testing in preparing for very specific qualifications, such as those required for various law enforcement agencies. You can quite literally configure this mode to practice for any type of timed qualification, allowing you to do many dry runs preparing you for the real world qualifications.
Additionally, you can drop the timer down to challenge yourself when it comes to specific skills. Set a bar for yourself that you have to consistently beat, and then lower it some more. This is a great way to get faster at a particular skill.
45
views

Dryfire Target Transitions - Multi Target Mode - MARS Mobile
https://crackshot.tv/multi-target-mode-with-mars-mobile/
The multi target mode allows you to define, for any number of targets up to 6 targets, how many hits are required to complete the given dryfire set. The set will continue uncapped until the hit requirements are met. This differs from quick set up drills like the 2-2-2 drill in that you can set up any hit count criteria on any number of targets.
If using USPSA style targets, the mode will calculate a hit factor based on your time, and will also tell you where each of your zoned hits were on a given target. The multi target mode uses the shot timer features of MARS Mobile, meaning that you can specify from the configuration a random or fixed start time for the game mode and you can track your split times.
The flexibility of this general game mode, combined with the constraint of defining how many hits are required on each target allows you to train just about any skill you can imagine, while allowing you the flexibility of determining the exact hit requirements for a given drill.
The possibilities for this game mode are quite litterally endless. Whatever you can imagine, you can do.
36
views
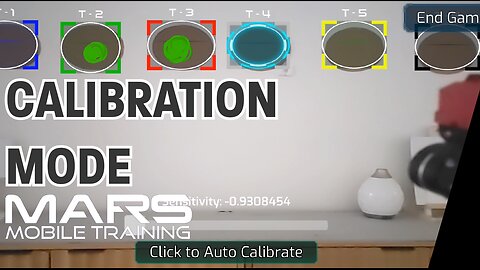
Dryfire Calibration Mode - MARS Mobile
https://crackshot.tv/calibration-mode-with-mars-mobile/
The calibration mode is primarily intended if you’re have issues with MARS Mobile picking up your laser dryfire device. MARS mobile should work fine out of box for most people. MARS mobile was developed using a Google Pixel 5 and a SIRT 110 training pistol. Because camera hardware, lighting conditions, and even the laser devices themselves have infinite variation, it isn’t possible for us to test compatibility with ever phone model. The calibrate laser mode may be necessary depending on what hardware you’re using. For this reason, the calibrate mode is also available in the free version of MARS Mobile so that you can ensure the app will work for your training needs before buying.
If MARS works well for you with base settings, we don’t recommend changing anything. Similarly, the ideal setup for MARS mobile is to not place targets near windows, where light from the outside will be covering the targets, or any bright light sources might be shining on the target. The reason for this is that phone cameras will attempt to compensate for bright lighting conditions be reducing the light, making the laser more difficult to see. So if you’re having trouble with MARS mobile not detecting your laser, try to close blinds or turn off ambient lighting as it may be drowning out the laser from the phone’s camera.
Still yet, the calibrate mode allows you to adjust sensitivity up or down. Sliding the slider to the right will increase sensitivity, sliding to the left will decrease sensitivity. If you’re getting false positive hits, you might try decreasing sensitivity. If your laser isn’t being picked up, you’ll need to increase sensitivity. We’ve also built in an auto adjust function that will attempt to calibrate the app specific to your lighting environment. Simply press the button to auto adjust.
In the calibration mode, you can shoot at any of the targets so that you can confirm your sensitivity setting is ideal for your training environment. If MARS is still is having trouble consistently picking up your shots, you may need to close blinds, turn off artificial lights, or move your training environment to an area of your home that is a little darker.
If you have issues, email me at keith@crackshot.tv or fill out our contact form on crackshot.tv. Ideally, if you can screen record the issue and send us the recording, that will help us with improving the app in future releases.
33
views
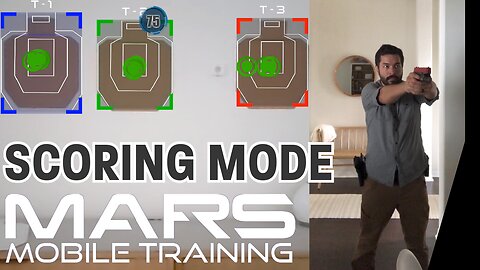
Dryfire Scoring Mode - MARS Mobile
The scoring mode is a dryfire training mode in MARS mobile that is similar to the free shooting mode in its flexibility but it adds more advanced hit tracking. The scoring mode does not contain any time or number of hits on target limitations. However, it does incorporate USPSA style score tracking if USPSA targets were set up, as well as shot timer capabilities, unlike the free shooting mode.
https://crackshot.tv/scoring-mode-with-mars-mobile/
The scoring mode can be set up with any number of targets in any configuration. The scoring mode also allows you to assign scores that you gain for hitting specific targets, which can be helpful for creating your own scoring system.
As such, it is most often used when wanting to learn specific concepts and tracking combat accuracy is desire able, but you aren’t necessarily trying to focus at all on doing that with speed. This can be helpful to instructors in classroom settings when having multiple people do a dry fire run through a particular concept, without having to restart the dryfire mode for every individual student, but while still being able to track split times on behalf of the student.
As a personal training aid, it can be a helpful mode for drilling a concept over and over again while you are just trying to get reps in without necessarily caring about tracking personal performance.
38
views

The Plate Rack Dryfire Drill - MARS Mobile
A plate rack drill is an incredibly powerful drill for testing your ability to transition between targets. Simply put, it consists in it’s most basic form of putting 1 round onto 6 plates each, as quickly as you can. Plate racks are pretty common in competitive shooting stages, so drilling this at home can be really beneficial for your competition times.
https://crackshot.tv/plate-rack-drill-with-mars-mobile/
Project MARS supports running plate rack drills at home and you can make the targets yourself. I like to outline a real 8 inch steel plate with cardboard, and then I cut out six circles. I then hang these on the wall to simulate a plate rack.
We set up circle style targets during target setup, in our case, we'll set up 6 targets. Selecting the plate rack drill from the drills area of the MARS Mobile app and hit continue.
This drill utilizes the shot timer features of MARS Mobile. It'll use either the random or fixed start time based on your settings. After the beep, draw and drill the targets as quickly as you can. The goal of this drill isn't pin point accuracy. Your goal is speed with acceptable accuracy.
Shoot this drill over and over again, focusing on speed and shooting cadence. Over time you'll see that this dryfire drill will improve your performance on the real plate rack at the live range.
28
views

Dryfire Free Shooting Mode - MARS Mobile
https://crackshot.tv/free-shooting-mode-with-mars-mobile/
The free shooting mode is made to be an extremely flexible training mode. The mode will track shots on target, but will not include any scoring or time keeping functionality. The mode will run infinitely long until you disable it, offering you max flexibility when trying out new concepts.
To setup the free shooting mode, simply set up between 1 and 6 targets, there is no minimum number required for this mode. Next, we’ll select the free shoot mode. The free shoot mode has no constraints or requirements, it ends whenever you decide. It’s an included mode with the free version of MARS mobile, making it an easy way to test out the capabilities of the app and to make sure that the app will work with your dryfire equipment and environment.
I use it most frequently for trying out new gear without running specific drills just to get used to certain pieces of equipment or to try new concepts without any pressure or specific goal in mind. It is really useful for training new shooters on safety and fundamentals as there’s 0 pressure, and zero scoring or shot timing.
52
views

Dryfire Equipment Guide - MARS Mobile
Project MARS (Marksmanship Augmented Reality Simulators) is a dryfire training tool that will allow competitive and tactical shooters run pretty much any shooting drill they can imagine. In this video, we're going to review the equipment requirements that are needed for setting up Project MARS.
Check out our equipment guide below for our latest product recommendations.
https://crackshot.tv/best-dryfire-equipment-guide/
The equipment requirements for MARS Mobile are simple. All you really need are targets, an fairly recently produced android or apple phone, a tripod, and an adapter for holding your phone to your tripod. As well, you'll need a laser dryfire device. We recommend a dedicated dryfire training replica with a red laser, here we have SIRT110 dryfire training pistol which mimics a Glock 17. There are pros and cons to other dryfire devices, we'll be adding more and more reviews of various dryfire products in the future on CRACKSHOT.tv and we will link those from our equipment guide on our blog as we review more products with our system.
For targets, MARS Mobile was built for USPSA style targets as our app is targeted towards competitive shooters. You can make targets out of cardboard quite easily, or you can download printable target templates from our website, crackshot.tv, the links for these are in the equipment guide blog post. MARS Mobile supports Metric and Classic USPSA or IPSC targets of any size. I often drill with full size or half size metric targets.
We have recommendations for the tripod and phone holders that we like on our blog, and we'll keep that list updated with new products as we find others that we like.
MARS Mobile was built using a Google Pixel 5 as a testing device. Most android or iphone devices should be compatible, but realize that hardware including processor speed, RAM, and camera vary considerably, so performance will most likely be best on newer devices. You may need to use our calibration mode if MARS Mobile isn't functioning optimally on your device. Please use the free app version before purchasing to guarantee MARS Mobile will work well for you. We're also working on adding support for laptop and desktop platforms to offer you maximum training capability.
For dryfire devices, we recommend a dryfire training replica laser. We really like the SIRT 110 training pistol. While you can dryfire train with real firearms using products like dryfire laser cartridges, or sound activated lasers, we don't formally recommend doing so for safety reasons. You need to be extremely careful in doing so. We will be adding more and more video reviews of various dryfire products to our blog to help you make a purchasing decision.
If you do choose to dryfire train with a real firearm, you must take extra care to make sure the chamber of the weapon is empty, that magazines are empty, and that there is no live ammunition in the area. Always follow the universal firearms safety rules, treat every weapon as if it is loaded, safety is ultimately your responsibility.
The app itself is free to try, in order for you to be able to make sure the app will work for your training needs. However, most of the features of the app and all new features added in the future will require you to purchase the app itself. At least at the time of editing this video, CRACKSHOT.tv and Project MARS do not sell physical dryfire training tools, we just build the training software. We want to ensure that responsible gun owners are equipped with the best possible tools for training safely and effectively.
This allows us to stay unbiased in terms of our product recommendations. While we do make a little bit from affiliate partnerships if you use our links for equipment sales, our bread and butter is software. So while we make the software as affordable as possible, it is how we keep the lights on. We ask that you would consider purchasing the full version of MARS Mobile. We purposely priced it to be as affordable as possible. MARS Mobile is a one time purchase, there is no subscription for this particular product.
I hope this equipment guide was helpful to you, email me at keith@crackshot.tv or fill out the contact from on crackshot.tv's website if you have any questions. Thanks you for your support.
129
views

Complete History of the Armalite Rifle / AR Platform
Want to learn more? Check out our full Firearms history series: https://crackshot.tv/category/history-of-guns/
Welcome to our channel! In today's video, we delve into the fascinating history of the Armalite rifle. From its humble beginnings to its current role in competitive shooting and home defense, join us as we explore the evolution and significance of this iconic firearm. Discover how the Armalite rifle revolutionized the firearms industry and learn about its various models and advancements over the years. Whether you're a history buff, a shooting enthusiast, or simply curious about the world of firearms, this video is a must-watch. Don't forget to like and share this video to support our channel and help us reach more viewers interested in the rich history and practical applications of the Armalite rifle. Let's dive in together!
113
views

Project MARS : Future of Dryfire Technology (Dev Log Ep. 1)
I've hinted on my channel that I'm working on a dryfire project that is going to revolutionize firearms training. Other similar dryfire simulators exist, but almost none of them implement features that allow for multi target drills, or have so much attention to detail in being stupid simple to use.
Other systems require proprietary targets. Project MARS is going to be ustable with hypothetically any target (but optimized for the open standard USPSA Metric target (future support for IPSC classic targets as well)).
Project MARS is a work in progress and I have it about 80% finished. The last 20% is primarily polishing the product to make sure that it is production ready and stupid simple to use on day 1.
In this video i'm going to demo the features and show you about how far along the project is.
Definitely leave suggestions for improvement down in the comments. I can't wait to get this thing released so you guys can start playing with it. In the meantime, subscribe to the channel to support us. Have a great day!
9
views

The Cyelee Wolf Pro Punches Above its Weight
The cyelee wolf pro is marketed as a higher tier offering from the Cyelee red dot lineup. At a $186 price point, it is competitively priced with other RMR pistol optics on the market. But how well does it stack up against the competition? Today we're going to give our honest and unbiased review of this pistol optic.
Now full disclosure, Cyelee provided this optic to us for free for testing. Manufacturers will sometimes send us free stuff to get our opinions on it, but we are in no way compensated by the manufacturer for reviewing their products. Our goal is to make sure we educate consumers on products well, and while we can't afford to review every product that comes on the market, it is helpful when a manufacturer sends us something for free. 95% of products featured on our channel or blog we purchase out of pocket. We don't have a relationship with Cyelee outside of agreeing to review this product. We do our absolute best to structure things in a way that we can remain unbiased.
That said, Cyelee gave us a coupon code to provide to our viewers that will include 15% off if purchased on Amazon. You can use code this code on either the Wolf Pro in this video, or the Wolf 2 used in last week's video. Use code CRACKW15 to get 15% off. We don't get anything from Cyelee if you purchase. We do have an affiliate partnership with Amazon for products purchased using our links, but this is completely separate from any agreement with Cyelee.
Okay with all that out of the way, lets get onto the review. So last week we reviewed the cyelee wolf 2, which I actually really, really liked, especially at the price point of $117. The Cyelee Wolf pro cost almost $70 more, so is it worth it?
It may or may not be for you, but lets dig in to what we like and don't like about the optic.
So lets talk about first impressions first. The cyelee wolf pro is an RMR footprint optic. Its marketed as a budget red dot option that punches above its weight. So it made sense to test this out on one of my favorite pistols that you've seen in tons of my videos, the PSA dagger, which is a budget pistol that also punches above its weight.
One of the nice things about the Cyelee Wolf pro is they include a ton of screws for a variety of different mounting situations. I was shocked. So many screws. One unique thing was this set of screws which is wider to fill the mounting holes in the optic, but threaded on bottom to fit tight to the slide. I've never seen mounting screws like this, but these make a ton of sense.
A little bit of blue loctite on the screws, and a sidebar, I started using the loctite stick blue loctite, and it is so much better than the liquid stuff. We were off to the races.
So I took the wolf pro to my indoor range, and I have to say, my first impressions were good. The optic performed well. I ran a variety of drills throughout the night. The optic never lost zero. It was actually near zeroed out of box, similar to the way Holosun ships their optics. I don't know if that was coincidence or if that's standard practice for cyelee, but it was nice to have a dot that wasn't miles off from the get go.
The optic performed well. Running bill drills I was able to pick up the dot fast enough and transitioning between A zone boxes was easy. Overall, it performs as well as any of my other red dots including higher end options in terms of usability. The optic is fairly low profile and minimalist. The body is pretty average in thickness, it doesn't sit low enough that you could cowitness standard height sights, like say the Holosun SCS or EPS models, but the overall profile is fairly sleek.
The optic does have some nice quality of life things that are upgrades over cyelee's other offerings. The battery pull out tray is a really nice conveinece thing. While the unscrew top battery system on the Wolf 2 is also convenient, battery tray implementations like those found on Holosun or the Sightron SRS-2 are ultra convenient.
The shape of the body is also a smart design. It has a slightly curved front. The curved design hypothetically prevents damage to the glass since the glass is recessed further back. It actually reminds me a bit of Vortex's defender line in that design choice.
The last thing to discuss here are the turrets. I'm not a fan of the turrets, and I wasn't a big fan on the wolf 2 either. The turrets are set up very similarly to Swampfox's Liberty and Justice models, or Primary Arms Classic series red dot. They do have flat blade adjustment which I like versus some obscure sized allen wrench. However, click adjustment is always preferable to no clicks. The marketing sells these as being infinite MOA.
Overall I plan to keep mine and I look forward to running it in a few local practice competition matches. I hope this video was helpful to you, if it was please consider subscribing. Check back next week for another great video. Have a great day!
164
views

Does the Cyelee Wolf 2 Red Dot Actually Work for an Astigmatism?
The cyelee wolf 2 is marketed as being a budget red dot that is supposed to be better for astigmatism than other competitor products on the market. But does it actually work? As someone with an astigmatism I'll give you my honest, unbiased feedback.
But I want to hear from you as answers to this question will vary for everyone's individual eyes and what works for you may actually work for someone else. Do you battle with an astigmatism? What is the best optic that works for your eyes?
In full disclosure, Cyelee provided this optic to me for free for this video, but I was not compensated in any way other than the optic being free. Whenever these opportunities come, I always make sure the manufacturer knows that I will not bend my review in any way.
If you do end up wanting to purchase the optic after the review, you can use one of my affiliate links in the description. Check out on Amazon with code CRACKW15 and you'll get 15% off of the optic. I'll also get a little kickback from Amazon for the purchase, and that helps support the channel and fund our future projects, so it is incredibly appreciated. We purposely don't monetize the channel with ads, so these affiliate links are what helps keep the lights on.
Okay, let's start with level setting the astigmatism problem. Those of us who deal with minor astigmatisms oftent have issues with red dot optics. Typically you'll either see a star burst effect or a long dash which is a series of dots. As you stare at the reticle for longer periods of time, the problem can get worse. My eyes always seem to transform the red dot from say a 2MOA dot to a maybe 5-10MOA diagnal line. It is so annoying.
I for one can testify that the problem varies a great deal from optic to optic. Some are definitely worse than others for my eyes, and it probably has something to do with the curvature of the glass. The problem is less of an issue so long as I target focus and have the brightness settings set appropriately.
For pistols this doesn't really matter much. Its so low of a concern that I don't mention it in most reviews unless its really bad on an optic. The distances that you're shooting at are so minimal and the red dot is just a guide post anyways, since you're for the most part point shooting inside 15 yards. If you aren't bullseye shooting, Acceptable accuracy is usually anything in the A-Zone, so I don't stress about it too much. A 5-10 MOA dot at say 10 yards really only covers around an half inch to an inch of the target, so any deviation from the astigmatism doesn't really effect accuracy.
Rifles are another story. With a rifle you're probably shooting at a longer distance. If your 2MOA dot becomes a 5-10 MOA line like it does for me, that can translate to a miss at over 100 yards.
It's for this reason, my preference is to run LPVOs on rifles, as the diopter can be adjusted for my eye sight, although friends trying out my rifles often complain of a hazy reticle. So if I end up being a loot drop, at least they'll be annoyed.
But hopefully I won't be a loot drop because ideally we'll solve this astigmatism problem. So this is the use case I had in mind when considering this optic. I was looking for something that could fill the roll of a backup for my higher magnification Vortex PST 5-25X Scope on an AR-10.
The Cyelee wolf 2 features two things that are supposed to help with astigmatism, a green emitter, as well as a 32 MOA circle with a 3 MOA dot in the middle. The reticle is essentially the same as the one we see on holosun multi reticle models like the 507 series or the EPS, although holosun typically features a 2MOA center dot.
The cyelee also comes in at less than one half, and in some cases, less than 1/3 of the price of Holosun, green emitter, multi reticle models.
The Wolf 2 does not have multiple reticle support, you're stuck with the circle center dot, but for my application on a rifle that doesn't matter and I actually like the 16 MOA reference point below the circle to estimate my holds.
So does this really work? Yes with some caveats. I still see a little bit of a line when using the optic. The 3MOA dot extends slightly to maybe 5MOA, but the problem is not nearly as bad as on other optics I've tried. The outer circle helps constrain the inner circle it seems like if that makes any sense. To compare, I shot it next to a typical rifle red dot on a 300 blackout pistol that I happened to have with me on that range trip, a Sig Romeo 7, and the Wolf 2 was night and day better for that astigmatism problem. So i'm going to say yes, for my eyes, this does work.
230
views

Upgrading Blackhawk Omnivore with Safariland QLS
The Blackhawk omnivore is a really cool universal holster system. We reviewed the ins and outs of that system in last week's video, so if you missed it feel free to check that out. In this week's video, we're going to do a short tutorial on how to make the holster cross compatible with Safariland's Quick Locking System, or QLS for short.
The Safariland QLS system is essentially a highly secure buckle system that features a male fork and a female receiver. By mounting the fork to a variety of holsters, you can quickly swap out holsters on your belt. Similarly, you can have many belts equipped with the QLS receiver, allowing you to swap holsters and belts at your leisure.
I personally run two belts. I have a competition focused belt that I like to use for USPSA production matches featuring polymer mag carriers, a dump pouch, and a QLS receiver for my holster. I also have a more general purpose range belt that is set up for more tactical style training courses and can be easily configured for 2 gun. It has a slimmer and more flexible profile, ESSTAC kywi mag pouches, for pistol and rifle, a dump pouch, IFAK, knife, QLS Fork, and Tourquet.
By using the QLS system, I can swap holsters depending on what style of class or competition im shooting in with minimal effort. So combining this versatility with the versatility of the Blackhawk Omnivore gives you nearly unlimited combinations of gear options as your gear closet grows.
Okay so with the case made for the QLS system, lets talk about the problem with mounting the Blackhawk omnivore. The blackhawk omnivore has a proprietary mounting pattern that honestly isn't compatible with a lot of the aftermarket. Its pattern is just off enough that it won't work with the QLS fork out of box which can be pretty frustrating. In order to get this to work with the QLS fork, you'll need an adapter, so that's where this $35 adapter plate from Cross Machine and Tool comes in.
Keep in mind that there's a chinese knockoff version of the adapter plate, but it has sub par reviews and only saves you $5. Just spend a little more and buy the American made version. As always, links to the real thing will be in the description of the video and pinned in the comments section.
so the first thing you'll notice is that the inner mounting holes on the adapter plate line up to the holes on the omnivore. As you can see the indentations on the inner holes need to be facing the holster, this is the correct orientation of the adapter plate.
Next, we'll want to take these locking nuts and insert them in the outtermost holes. These are the holes that we'll tap into from the QLS fork to attach the QLS fork to the plate. These must be inserted prior to screwing the adapter plate to the Omnivore holster.
Next, identify the 3 short screws. The short screws will interface with the holster. The long screws are for the QLS fork since the QLS fork has more thickness.
Lastly, we'll fix the QLS fork to the nuts that we inserted earlier utilizing the long screws.
Just like that, the Blackhawk Omnivore is now compatible with the Safariland's QLS system, giving you maximum customization capabilities across all of your belts.
If you liked this video, please consider subscribing to the channel. See you next week!
113
views