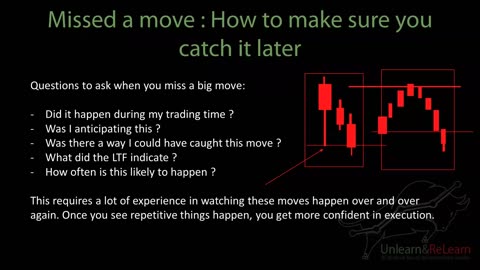
11 months ago5 How to Entries - Breakout Fakeouts - How Not to Miss Trades - (2.Psychology _ Trade Management)SMARTRAJACONCEPTS
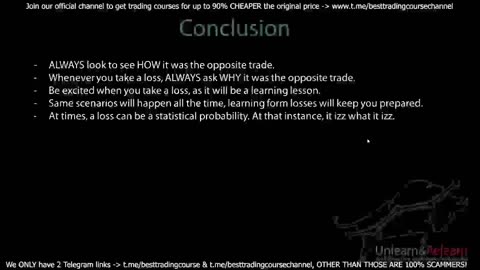
11 months ago3 Things to Do When You Take a Loss + Examples - (5.Learning From Losses)SMARTRAJACONCEPTS
11 months ago2 What Happens When You Take a Loss (Emotions) - (5.Learning From Losses)SMARTRAJACONCEPTS
11 months ago5 Breakout Impulse Trades vs Retests - (4.Adding Positions to Trades - Trends)SMARTRAJACONCEPTS
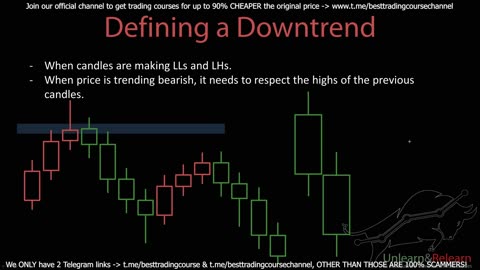
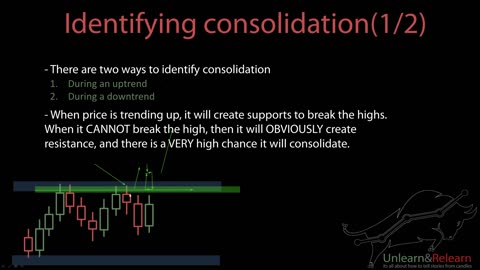
11 months ago4 Defining Consolidation _ How to Approach It - (4.Adding Positions to Trades - Trends)SMARTRAJACONCEPTS