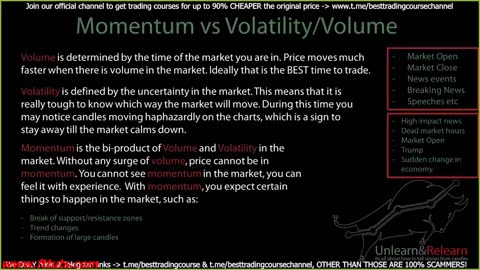
1. 9 Momentum vs VolatilityVolume - MARKETFLUIDITY ( 1. Unlearn _ Relearn)

    9 Momentum vs VolatilityVolume - MARKETFLUIDITY ( 1. Unlearn _ Relearn)

    9
    0
    585
  2. 2 How to Choose Currency Pairs - MARKETFLUIDITY ( Unlearn _ Relearn)

    2 How to Choose Currency Pairs - MARKETFLUIDITY ( Unlearn _ Relearn)

    7
    0
    643
  3. Impulse Entries 1.0 - (8.Impulse entries - A+ setups)

    Impulse Entries 1.0 - (8.Impulse entries - A+ setups)

    9
    0
    1.61K
  4. Breaking down HTF to LTF - (8.Impulse entries - A+ setups)

    Breaking down HTF to LTF - (8.Impulse entries - A+ setups)

    11
    0
    1.33K
  5. Impulse Entries Simulation - (8.Impulse entries - A+ setups)

    Impulse Entries Simulation - (8.Impulse entries - A+ setups)

    12
    0
    1.17K
    1
  6. Impulse Entries 3.0 - (8.Impulse entries - A+ setups)

    Impulse Entries 3.0 - (8.Impulse entries - A+ setups)

    10
    0
    1.27K
  7. Impulse Entries 2.0 - (8.Impulse entries - A+ setups)

    Impulse Entries 2.0 - (8.Impulse entries - A+ setups)

    7
    0
    1.14K
  8. 1 Intro to Forex - MARKETFLUIDITY ( Unlearn _ Relearn)

    1 Intro to Forex - MARKETFLUIDITY ( Unlearn _ Relearn)

    7
    0
    1.25K
  9. 6 Market Trends - MARKETFLUIDITY ( Unlearn _ Relearn)

    6 Market Trends - MARKETFLUIDITY ( Unlearn _ Relearn)

    8
    0
    733
  10. 5 Anatomy of Candlesticks - MARKETFLUIDITY ( Unlearn _ Relearn)

    5 Anatomy of Candlesticks - MARKETFLUIDITY ( Unlearn _ Relearn)

    11
    0
    710
    1
  11. 4 Risk Management 1.0 - MARKETFLUIDITY ( Unlearn _ Relearn)

    4 Risk Management 1.0 - MARKETFLUIDITY ( Unlearn _ Relearn)

    9
    0
    568
  12. 3 Lots and Leverage - MARKETFLUIDITY ( Unlearn _ Relearn)

    3 Lots and Leverage - MARKETFLUIDITY ( Unlearn _ Relearn)

    6
    0
    831
  13. 4 Breakouts and Candle Rejections - (3.Advanced Technical Concepts)

    4 Breakouts and Candle Rejections - (3.Advanced Technical Concepts)

    5
    0
    697
    1
  14. 11 Risk Management 3.0 - MARKETFLUIDITY ( 1. Unlearn _ Relearn)

    11 Risk Management 3.0 - MARKETFLUIDITY ( 1. Unlearn _ Relearn)

    4
    0
    707
  15. 10 Explaining a WickFill - MARKETFLUIDITY ( 1. Unlearn _ Relearn)

    10 Explaining a WickFill - MARKETFLUIDITY ( 1. Unlearn _ Relearn)

    5
    0
    647
  16. 6 Simulation - Back to The Basics - (6.Back to The Basics)

    6 Simulation - Back to The Basics - (6.Back to The Basics)

    3
    0
    555
  17. 16 Rejection in Zones - MARKETFLUIDITY ( 1. Unlearn _ Relearn)

    16 Rejection in Zones - MARKETFLUIDITY ( 1. Unlearn _ Relearn)

    5
    0
    690
  18. 5 Using Sellstops and Buystops - (3.Advanced Technical Concepts)

    5 Using Sellstops and Buystops - (3.Advanced Technical Concepts)

    401
  19. 3 Gaps and How to Handle Losses - (3.Advanced Technical Concepts)

    3 Gaps and How to Handle Losses - (3.Advanced Technical Concepts)

    4
    0
    526