-
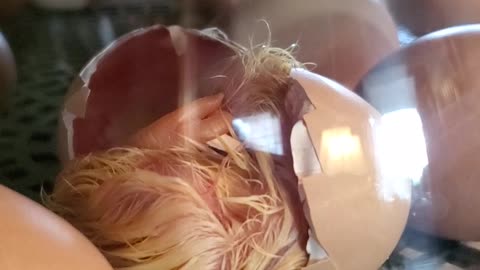
Basic Stuff - Processing Chicken Thighs for RS
Basic StuffHere's the video we talked about on processing thighs for meat, schmaltz and stock Sweetie. Let me know if you want a vid on making apple cider vinegar also. The nutrient content of bone broth depends on the ingredients and their quality: The bone itself yields minerals like calcium and phosphorus. Sodium, magnesium, and potassium may also be present. Bone marrow gives you vitamins A, B2, B12, and E, plus omega-3s, omega-6s, and minerals like calcium, iron, selenium, and zinc. Connective tissue (the gelatinous parts where muscle connects to bone) provides glucosamine and chondroitin, which are popular dietary supplements for arthritis and joint pain. Bones, marrow, and connective tissue are all largely made up of the protein collagen, which turns into gelatin when cooked. Gelatin has a unique profile of amino acids and is particularly high in the amino acid glycine.41 views 1 comment -
Basic Stuff - Apple Cider Vinegar
Basic StuffMaking Apple Cider Vinegar: Apple cider vinegar (ACV) is ridiculously easy to make. At the base is simply apples and a sugar water mixture left to sit for a few weeks. I have that dying Spire Apple tree on my property. It is still fruiting and we are nursing it along until we have another producing apple tree to replace it. I’m also in the process of several attempts to clone it. Even in it’s current condition it gives us over 500 apples a year. They are small and often blighted, as you've seen, however, good enough for critter feed and vinegar. INSTRUCTIONS: 1) Normally you would make a few apple based desserts reserving the peels and cores in the freezer till you have enough to fill up a jar. 2) Fill your container with apple peels, cores or pieces to about an inch from the top. If you have some “mother” put some of it in the middle of your container so apple bits are on top of it. “Mother” is the slimy, gelatinous, usually white-ish, goo that grows in top notch vinegar. It accelerates vinegar creation and is a source of threads of probiotic-dense and enzyme-rich bacteria that are great when you’re making a new batch. 3) Mix 1 Tablespoon sugar for each cup of water that you use. 4) Pour the sugar water over the apple pieces until they are covered. Make more sugar water if you need to get the water level up to about an inch above the apple pieces. If you have fermentation weights, now is a good time to use them (I don’t have any and my vinegar turns out great every time) 5) Cover with a cloth and rubber band, or similarly, such that the gasses can escape and bugs can not get in. Store in a cool dark place like the back of your cupboard for two weeks. Mark it on your calendar. 6) After two weeks strain the vinegar (if there is a “mother” present, store it in the fridge in a separate jar filled with enough vinegar to cover it). It should smell like vinegar and taste like weak vinegar. Re-bottle the strained vinegar and put it back where it was for another two weeks. Mark it on your calendar. 7) After the second two weeks you should have a wonderful tasting vinegar. If it isn’t as tart as you want you can set it back for another week, otherwise store in the refrigerator or cellar. I will use pear peal and cores mixed in with my apples whenever I have them. You can make vinegar from a WIDE variety of fruits and veggies. Go ahead and experiment, if you don’t care for the taste of your new vinegar it can always be used in critter water and for cleaning.151 views 5 comments -
Basic Stuff - Yogurt
Basic StuffYogurt Ingredients: Milk – Farm fresh is best, store bought pasteurized is OK, definitely Not ULTRA pasteurized, can be made with skim, but why would you do that? Culture – can use yogurt from store with ACTIVE cultures in it, can use cultures from cheese outlets, can use your own yogurt cultures as long as they are still active. I make mine with pasteurized store bought milk and (the first time only) I bought Fage yogurt for my starter culture. When I can, I will be using fresh local farm milk. 1) Heat milk to 185-190 degrees stirring to prevent scalding (kills the nasties) 2) Let cool (on counter or in a cool water bath) to 95-105 degrees (temp cultures grow at) 3) Temper the yogurt culture (your starter) with a little of your warm milk 4) Add your culture starter to your warm milk and briefly and gently mix (don’t overdo it) 5) Cover your mixture, wrap it in a towel and set it where it can retain it’s heat and will NOT be bumped or moved for 8-9 hours 6) After 8-9 hours you have typical store bought, thin-yogurt-style plain yogurt. You can now refrigerate, flavor if you like, and enjoy. FOR GREEK STYLE YOGURT: 7) Strain yogurt using a catch vessel holding a colander with a cheesecloth. Cover with pot lid or whatever and set in fridge to strain for another 8 hours or so. 8) Viola! You now have yummy, very thick and creamy Greek Style Yogurt What to do with the whey: It’s the BEST meat marinade / tenderizer we’ve ever used Ferment your chicken feed with it Bake with it Water plants with it It can be frozen This particular whey is SWEET, meaning no acids were used in the process. What to do with the milk jug: Extend growing season by filling jug with water and setting outside by your plants. It absorbs sunlight during the day and gives it’s heat off during the evening. I use this method to warm my greenhouse. When you cut it the correct way, they make great scoops.102 views 2 comments -
Basic Stuff - Sour Cream
Basic StuffOne Cup Cream One Tablespoon Vinegar Salt to taste Shake shake shake Let sit on counter for 24 hours Then refrigerate Bada Bing, Bada Boom you got sour cream Good for about 2 weeks in fridge.115 views 2 comments -
Basic Stuff - Coping Mechanism
Basic StuffWhen I'm stressed, finances, relationship, politics etc. I pull my head out of my keister by forcing myself to acknowledge what I am grateful for. When I'm down in it, it's easy to lose sight of those things that bring an instant smile to my face, those things in my everyday life that elevate me. This whole video would be clips of my husband, but he hates being in videos. :)65 views 1 comment -
Basic Stuff - Tracking Family Data Points
Basic StuffAll of these charts and dashboards can be done with Excel or a free MS knockoff like LibreOffice (which is what I use). Link to my full Substack writeup on this https://kellycarijen.substack.com/p/things-ive-learned-living-on-my-tiny40 views 1 comment -
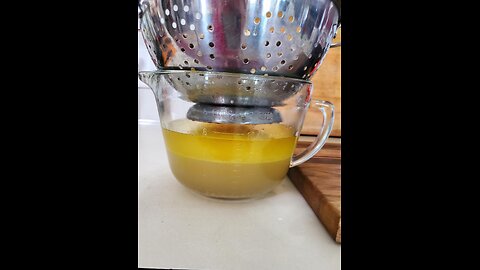
Basic Stuff - Rendering Animal Fats
Basic StuffRendered Animal Fats I use schmaltz (chicken fat) as my primary cooking fat as I get it at Aldi for about $1.89/pound. Lard (pork fat) also comes in around $1.89/pound so I use that when I want that taste in my cooking. Butter is around $4/pound and everything else is more expensive than that. Schmaltz – Chicken Fat I use bones, skin and fat from processing chickens. I place the frozen bones/skin/fat in my big pot and add a gallon or two of water to cover everything with at least a few inches of water. I simmer for at least 2 hours replenishing water when it gets too low, I simmer longer if I want the stock to gel. Then I strain the bone and skin from the stock and schmaltz. Refrigerate the stock and schmaltz until the schmaltz is solid (overnight). Skim off the solid schmaltz into a jar. It will last at least 3 weeks in fridge. I’ve always used it up before that, so it may last longer. Lard – Pork Fat When I get a pork loin I trim the fat from the back. I then cut that into one inch pieces for uniform rendering. When I am lucky enough to get a spiral sliced ham during the holidays, I also trim the fat off of it and reserve it for rendering and of course that wonderful bone for stock. Once I have my bag full of enough fat to begin rendering I use the simmering water method. I place the cubes in a pot with water to cover them and simmer for 1 to 2 hours replenishing the water as it gets low. At the end of that I have liquid lard and stock. I strain and refrigerate until the lard is solid (overnight). I skim the solid lard off and place it in a jar for refrigeration. If I am not going to use the stock within a few days, I freeze it. The cubes of fat can be fried up into cracklins or fed to your cirtters. Bacon Fat Bacon fat rendering is done most mornings with breakfast. I do it with a whole package of ends & pieces, which is usually more fat than meat. The meat is usually in chunks, not slices. I dump the whole package on an extra large baking tray and spread out evenly. I cut huge chunks into smaller chunks for more even cooking. I bake it at 350 degree oven for around 10-30 minutes watching constantly to drain the fat as it gathers. Pour fat off into a jar whenever it builds up, I usually do this at least twice, but most often three or four times during baking. You’ll be left with a bunch of crispy bacon. My favorite. Link to Chicken Thigh Processing https://rumble.com/v5acpfx-processing-chicken-theigh-for-rs.html Link to Yogurt Making https://rumble.com/v5igk7x-basic-stuff-yogurt.html https://open.substack.com/pub/kellycarijen/p/stopping-seed-oils?r=z9mgc&utm_campaign=post&utm_medium=web&showWelcomeOnShare=true99 views 1 comment -
Basic Stuff - Climbing out of Debt
Basic StuffNothing new, basic life skills. Basic Budgeting. We have used this basic budgeting to climb out of debt before and we will use it again. https://open.substack.com/pub/kellycarijen/p/things-ive-learned-budgeting-lifestyle?r=z9mgc&utm_campaign=post&utm_medium=web&showWelcomeOnShare=true31 views 1 comment -
Basic Stuff - Lemon Vinegar
Basic StuffLemon Vinegar full Substack writeup https://open.substack.com/pub/kellycarijen/p/things-ive-learned-lemon-vinegar?r=z9mgc&utm_campaign=post&utm_medium=web&showWelcomeOnShare=true13 views 3 comments -