-
Fixing My 3-Year-Old’s iPad Air (1st Gen) – Full DIY Repair Guide!
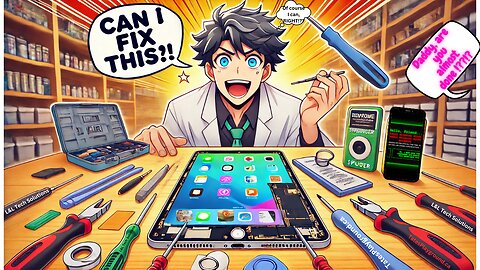
LLTechSolutionsWelcome to L&L Tech Solutions – your ultimate destination for innovative tech repairs, OS Videos, Networking,Ethical Hacking and DIY tutorials! In this captivating video, I take you on an exhilarating journey as I repair my 3-year-old daughter’s beloved iPad Air 1st Gen. SEO Keywords: iPad repair DIY, iPad Air 1st Gen fix, tech repair tutorial, gadget restoration, home repair guide, DIY electronics, affordable tech repair, tech hacks, step-by-step iPad repair, innovative tech solutions, L&L Tech Solutions, family tech projects, DIY repair tools, restoration guide, hands-on tech repair. -----list of the specific tools and materials you’ll need for fixing your iPad Air 1st Gen, with a focus on the exact items that make the process smoother and safer: Pentalobe Screwdriver Set • Use a high-quality Pentalobe screwdriver (often labeled as P2 or 5-point) to remove the screws securing the device’s casing without stripping them. Phillips Screwdriver • A precision Phillips screwdriver, such as the PH00 or PH000, is ideal for tackling the smaller internal screws. Ensure you have the right tip size to avoid damaging screw heads. Plastic Prying Tools (Spudgers) • A set of variously shaped plastic spudgers is essential. One with a flat edge works best for separating the display, while a forked version can help with disconnecting delicate ribbon cables. • Consider tools made from anti-static materials to protect sensitive components. Suction Cup • A medium-sized suction cup with a secure grip is necessary to gently lift the screen without applying too much pressure. Look for one designed for mobile devices that provides a stable hold. Precision Tweezers • Fine-tip tweezers will help you pick up tiny screws and handle small connectors carefully. A pair with a non-slip grip is recommended for better control. Replacement Parts • Battery: Ensure you have an iPad Air 1st Gen replacement battery that meets OEM specifications. • Connectors: Stock up on any known weak ribbon cables or connectors that are prone to wear in older models. • Display Elements: Depending on the repair, you might need a new digitizer or front glass assembly. Confirm compatibility with the iPad Air 1st Gen. Cleaning Cloth • Use a high-quality microfiber cloth, preferably anti-static, to clean surfaces and remove any dust or fingerprints during the repair process. Adhesive Strips • Acquire replacement adhesive strips designed for iPad repairs. These are typically strong, double-sided, and come in pre-cut sizes to ensure a secure reassembly of the screen and internal components. Additional Optional Tools • Heating Pad or Hair Dryer: A low-temperature heating pad or hair dryer can help soften adhesive around the edges of the screen or internal components for easier removal. • ESD Wrist Strap: To protect sensitive electronic components from static electricity, wear an anti-static wrist strap during the repair process. • Small Containers or Magnetic Mats: Keep screws and small parts organized by using a magnetic mat or small containers labeled for different components. Throughout this tutorial, every tool is showcased and explained in detail to ensure you understand their roles in the repair process. I break down each step, from initial disassembly to the final reassembly, ensuring that you can replicate the process with ease. Safety, precision, and patience are key elements that I emphasize, guaranteeing that your repair journey is not only educational but also highly enjoyable. I invite you to take notes, ask questions in the comments, and share your own experiences with similar projects. Check ME OUT!! LinkedIn: / tatebyers GitHub: https://github.com/300LBHACK3R Personal Website: https://tatesplayground.ca These links are your gateway to a wealth of tech insights, projects, and future tutorials that I regularly update to inspire and educate tech enthusiasts around the globe. At L&L Tech Solutions, we believe that every tech challenge is an opportunity to learn, grow, and innovate. This video not only demonstrates a successful repair but also serves as a tribute to the spirit of creativity and hands-on problem solving. I invite you to like, subscribe, and hit the notification bell so you never miss out on our latest tech adventures. Share this video with fellow tech lovers and DIY enthusiasts, and join our vibrant community where every repair is a new opportunity to master the art of technology. Remember, each step you take in repairing your devices builds your confidence and skill. Embrace the challenge, enjoy the process, and let your passion for technology shine through. Thank you for watching, and welcome to the ever-evolving world of L&L Tech Solutions – where innovation meets hands-on expertise in every repair! Your journey into tech mastery starts now. Let’s get those tools out, roll up our sleeves, and transform challenges into triumphs together. Happy repairing and see you in the next video!41 views 1 comment